In this guide, we will show how to add an Axis IP camera to a Hikvision NVR using the ONVIF protocol. The method has been tested and works correctly and you can basically use any Axis camera and Hikvision NVRs. Before starting, ensure both devices are updated to the latest firmware version.
In a few words, the procedure includes creating an ONVIF profile (account) on the Axis camera and then adding the camera’s IP address and username/password on Hikvision’s NVR.
The adding has to be done manually since the camera is not detected automatically. For more, keep reading further. (Moreover, the same instructions are valid for any type of NVR, as long as it supports the ONVIF protocol).

How to add Axis camera to Hikvision NVR
Hikvision NVRs work smoothly with third-party cameras that can be added using the ONVIF protocol. You basically need three components:
- A camera that supports the ONVIF protocol (Axis, in our case)
- An NVR that supports the ONVIF protocol (Hikvision in this example)
- Both the NVR and the camera need to be on the same local network.
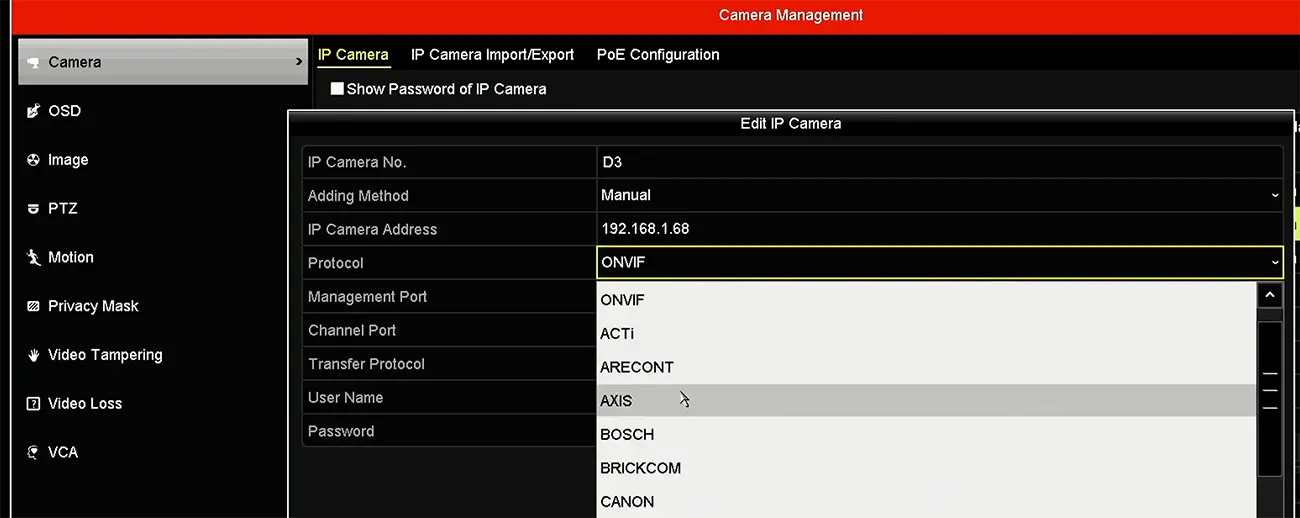
If you go to the camera management section of the Hikvision NVR, you should see a list of manufacturers listed there, Axis included (as shown in the picture below).
Depending on the firmware on both the camera and the NVR, it may happen that the direct integration via the native protocol doesn’t work.
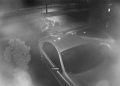
For example, this Axis camera cannot be linked using the Axis protocol on Hikvision NVR, but it works when using the ONVIF.
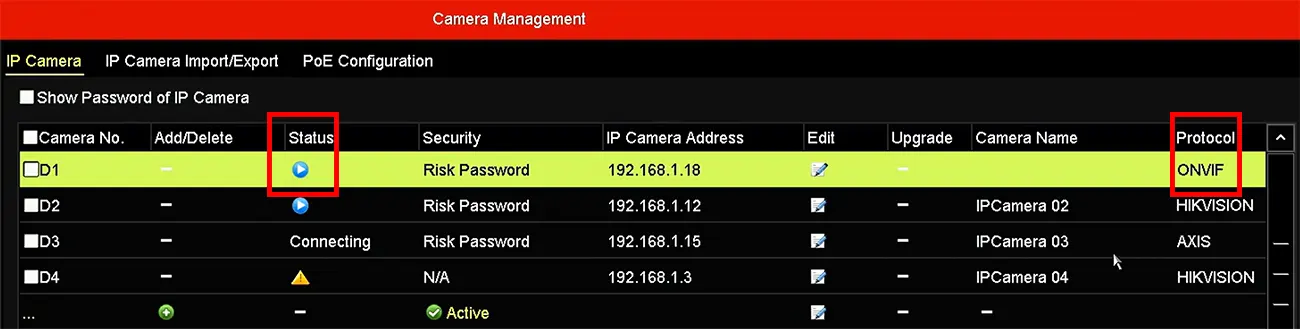
If your scenario is the same, you can add the Axis camera using the ONVIF method. As you can see below, the Axis camera is added correctly using ONVIF. The blue play button indicates that the camera indeed shows pictures and communicates properly with the recorder.
The steps to add an Axis camera to a Hikvision NVR
The first thing you should do is to create an ONVIF profile/account on the camera which will communicate with the Hikvision NVR. However, you need to create the correct profile.
Create an ONVIF account on the Axis camera
Here’s the procedure step by step:
- Log into your Axis camera via the browser.
- Navigate to Settings/Setup and locate the ONVIF section.
- Click the “Add…” button and create a new ONVIF account.
- Create a username and password.
- Add the new user to a group (for example, user Media user or operator).
- Click OK to apply and save the settings.

You can pick any username, but we’d recommend avoiding admin. The user group should be either Media user (which is enough), or Operator. Don’t use the Administrator. This article has more info about the ONVIF protocol on Axis cameras.
Adjust the newly created ONVIF profile
Before adding the camera to the NVR, it’s necessary to make some adjustments to the new ONVIF profile.
This is an important part, otherwise, you may have bandwidth problems with the camera (error message “No enough bandwidth) when adding the camera to the Hikvision NVR.
Go to the ONVIF profile screen of the Axis camera and select the “default_1 h264” from the profile list. On the next window, change the bitrate to a lower value. For example, from 4Mbps or 8Mbps lower it to 2Mbps. The values are shown on Kbps, 2048Kbps (which is 2Mbps).

Technically speaking, this value depends on the camera model and the resolution. The bitrate should be reasonable and the lower end for the NVR to be able to process the image without struggling.
A regular HD camera usually uses 2Mbps, a 4MP camera is good at 4Mbps, and so on. If you add the camera and the image is choppy or lags, then you need to come back to this section and lower the bitrate further.
Overall, the bitrate depends on the resolution, the incoming bandwidth on the NVR, your network configuration, and other installation factors.
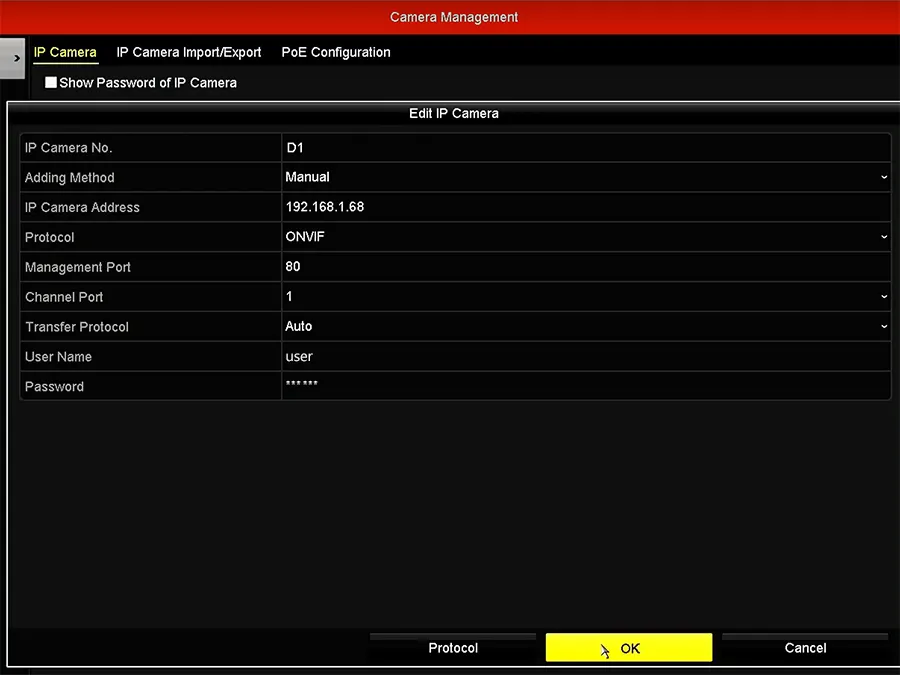
Add the Axis camera to the Hikvision NVR
Follow these steps:
- Access your NVR and go to the Main Menu.
- Click on the Camera section.
- Select one of the channels that are empty. For example the first one and hit Edit.
- The Adding Method should be Manual.
- Type in the IP address of your camera.
- On the Protocol line, select ONVIF from the drop list.
- Enter the username and the password of the ONVIF user (of the Axis camera)
- Click OK to save the settings.
If all the settings are entered correctly, you should see the camera online after 1-2 minutes. If it fails, re-do the steps again and ensure the credentials are entered correctly. One more time, the added account should be the newly created ONVIF users (not the root or admin user).

Basically, that’s all. The camera will show up and the NVR will record the footage. You can adjust the motion settings via the NVR’s menu, or even directly on the camera.
These instructions are valid for any NVR (that supports ONVIF), just create an ONVIF user on the Axis camera and add it manually on the NVR.