Guarding Vision is a phone and tablet app used by Hikvision OEM devices that provides live view and playback for the cameras. So, using this app you can view the cameras on your iPhone or Android phone.
Guarding Vision works for Hikvision logo devices as well, but originally it’s meant to be used by non-branded Hikvision devices or other equipment sold under third party sellers.
The procedure is identical with the iVMS-4500 app. This guide shows all the steps you need to follow in order to add your IP camera, NVR/DVR to the Guarding vision app via the web interface.
Add devices on Guarding Vision via the web interface
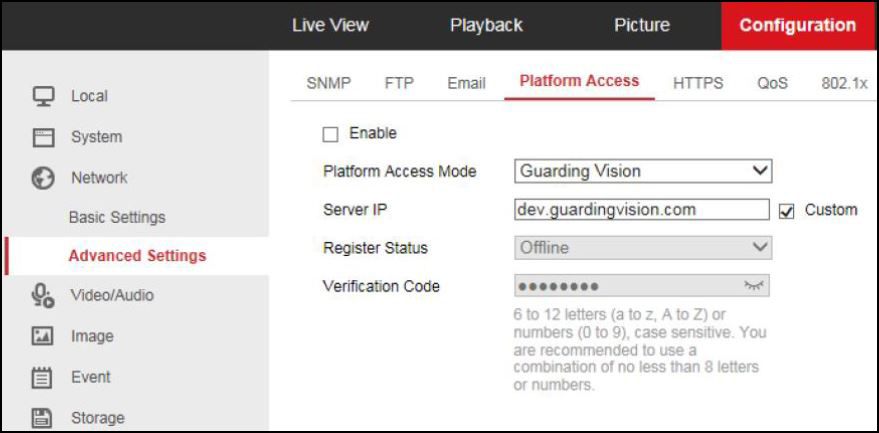
Step 1. Go to the device to see the register status. Navigate to Configuration > Network > Advanced Settings. The status can be viewed via web browser, directly on the DVR or NVR or even through the SADP tool.
Step 2. If the Enable box hasn’t been checked, enable it and see the register status. Make sure Status shows Online.
 Step 3. Type www.GuardingVision.com into the browser url bar.
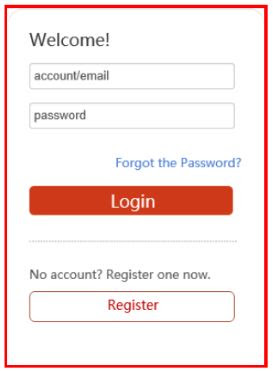
 Step 4. Login with your account username and password. If you don’t have one, you can click Register and create an account. Make sure to add the correct information.
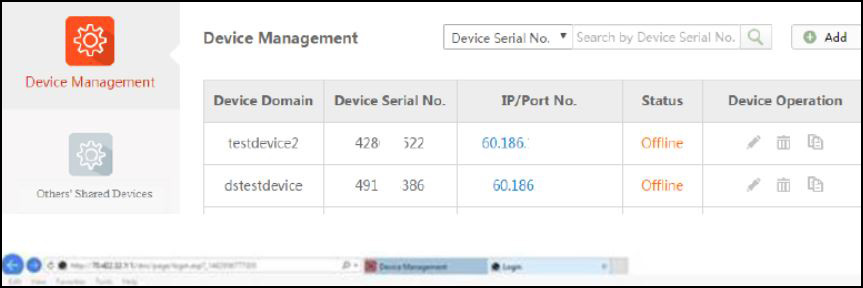
 Step 5. Go to Device Management. If you have other devices under the account, you’ll see them listed.
 Step 6. Click the Add button. Type your device Serial no. then click Search. Note: you can get the serial number from the sticker on the device or on the settings page (of the NVR, DVR, IP camera).
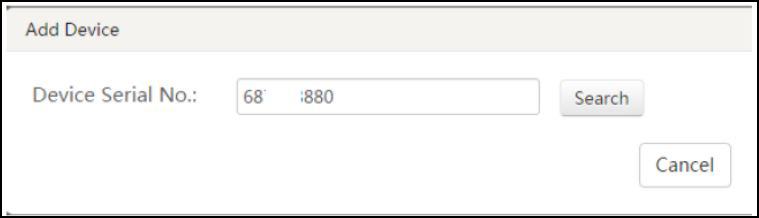 Step 7. When a connection is made to the device (it must be powered on and connected to the Internet) a pop-up shows the model and confirms the S/N. If this is the desired device, Click ‘+’ to continue.
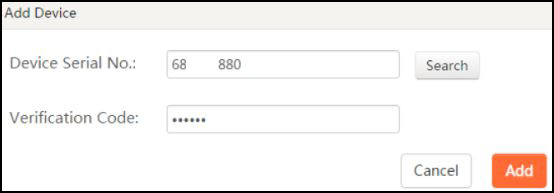
 Step 8. Input your device verification code, then click Add to finish.
 Step 9. A pop-up confirms success. And the device now is editable on the Device Management page.
 Step 10. Click on the IP address and Port No. of a connected device, a new window pops up to login the device. Enter the username and password to login (in this case, that’s the credentials of your NVR, DVR or IP camera. So enter the username/password of your device).
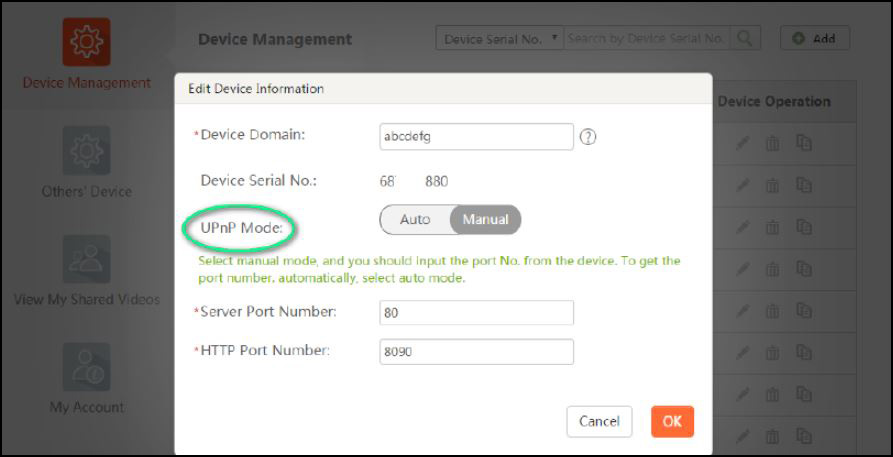
 Note: If it can’t redirect to your device after clicking the IP/Port number link in www.Guarding Vision.com while the device status is online, it means ports may not be properly configured for your device.
In this case, you should open the ports manually in the router instead of using UPnP to configure port forwarding. Then input the correct ports number here.
 Try http:// WAN IP: Port No. to test whether port forwarding is successful after port forwarding manually. Usually, if the router is new, the UPnP is enough to open the ports, so there’s no need to open them manually.
Once done, try to see the cameras on the Guarding Vision app. If all the settings are correct, you’ll see all the cameras showing up on the phone. Additionally, make sure that the apps are updated to the latest version.
