Here we will show how to add a third-party IP camera to a Uniview NVR. A third-party camera is any other branded camera, basically any non-Uniview IP camera.
This method is useful and very convenient if you like the Uniview NVR but you still need to use other non-Uniview IP cameras. This tutorial will show step-by-step how to add such a camera to a Uniview CCTV system.
Uniview offers software named EZTools which can be downloaded from Uniview’s website or from our download section. This tool can scan your network and find Uniview devices and third-party devices as well.
How to add an ONVIF camera to Uniview recorder
Step 1. Install and run the tool. The software will scan your local network and list all the cameras located on your network. It also provides an option to load up any camera in a web browser.
However, sometimes you need to install the scanning tool provided by the manufacturer of your third-party cameras. Read the next step.

Step 2. Most camera manufacturers will make their own tool for finding cameras of theirs on the network.
In this tutorial, we will be adding a Dahua IP camera to the recorder so we used the Dahua “Config tool” to find their cameras.

Step 3. After finding all of your cameras on the network you will need to change their IP address to match your network’s default gateway.
For example, the NVR’s IP is 192.168.1.XXX, the camera’s IP should be in the same format. Once this is done for all of your cameras, you can then move on to adding your cameras to the recorder.
Step 4. Adding your cameras can be done from the Uniview recorder directly and or from the recorder’s web service. In our case, we will add the cameras through the web browser.
Type the IP of your NVR on the URL bar of your web browser and log in using your username and password. Open the Setup page and navigate to the Camera > IP Camera menu.
This menu is where you can add your cameras to the recorder, change the channel spots from built-in PoE “plug and play” to manual add, and add your camera’s IP address.
Check off one of the channels checkboxes and then click the “Modify” button at the top of the menu. In the opening menu, you can change the “Add mode” from Plug-and-play to manual mode.
Type in your camera’s current IP address, user name, password, and HTTP port. When adding a camera make sure to always select “ONVIF” as the protocol. Consult this article to learn more about the ONVIF protocol.
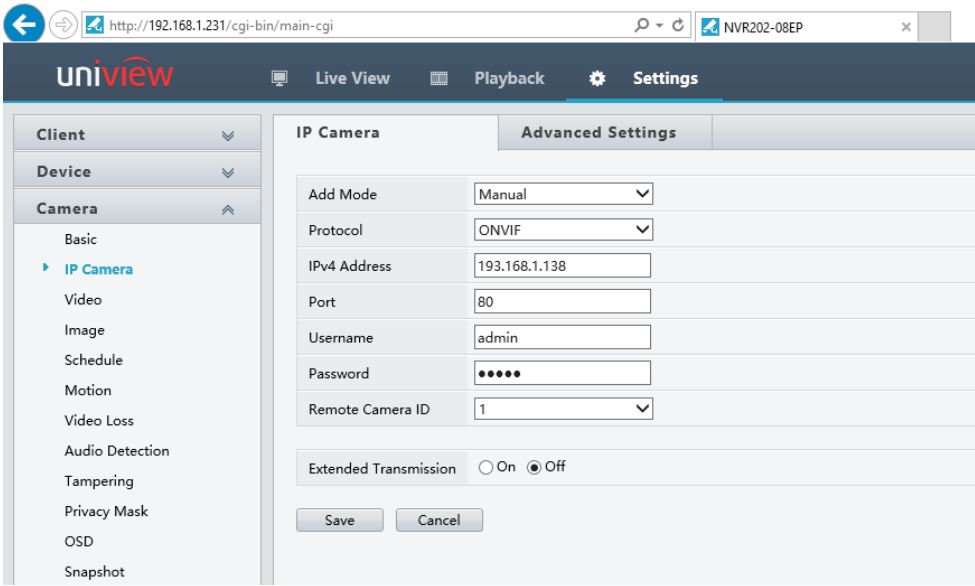 Note: Extended Transmission is for Uniview cameras only and should not be turned on for third-party cameras.
Step 5. Once the camera information has been entered correctly click the save button to return to the added IP camera list menu.
Once returned to the menu click “Refresh” at the top of the menu in order to check the camera’s connection status.
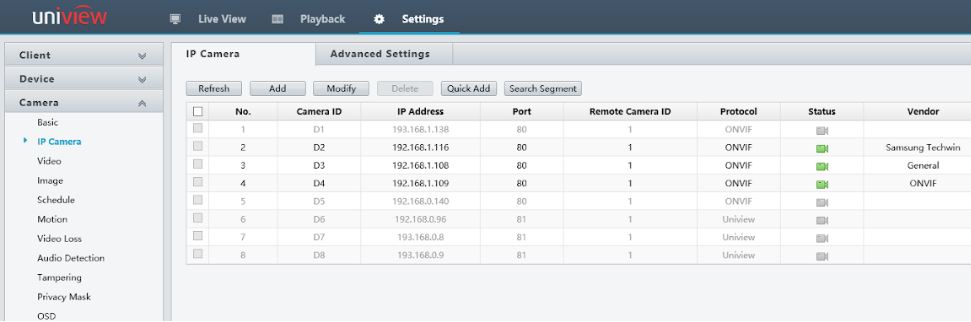 The image above depicts three third-party cameras that we have added to our Uniview recorder. The cameras we used in this tutorial were a Samsung box camera, a Dahua bullet camera, and a Hikvision turret dome camera. Remember that all these cameras use the ONVIF protocol.
Reasons why a camera may not connect to a Uniview recorder
Sometimes the camera won’t connect and there will be no live feed. We created a list of possible issues that may cause a camera not to show up online.
- The protocol was not set to “ONVIF”.
- The camera is not ONVIF compliant. This method works if the third-party camera supports the ONVIF protocol.
- The IP address was entered incorrectly. Once again, make sure the camera’s IP address and the NVR’s IP address match, meaning they should be on the same network.
- The HTTP port was entered incorrectly. ONVIF uses the HTTP port to send the video feed to the recorder.
- The camera is not compatible with the recorder. This can sometimes be resolved by updating the recorder and camera firmware to the latest version.
- The network is not properly set up at the local level. This means that the IP address of any device could be on the incorrect subnet, the IP is conflicting with another device, or the network is not properly wired/connected.
Extra Information
When in the Camera > IP Camera menu the “Quick Add” button will automatically scan the network and find IP Cameras on it.
Most of the time, the third-party IP cameras can be added to the recorder in bulk instead of manually typing in each camera’s IP address.
This menu will also let you check if the recorder can change a camera’s IP address. If a camera does support this feature there will be a “Config pencil” under the “Edit” column.

Conclusion
Below is the live view after adding the third-party cameras. Make sure that their status is green (connected) and that the recorder has pulled all of the camera’s information.
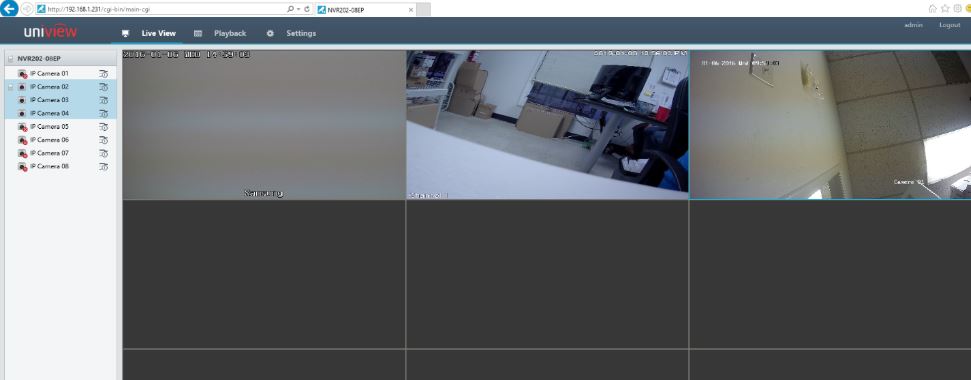
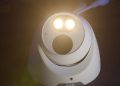
The first channel is the Samsung IP box camera, the second camera is the Dahua bullet IP camera, and the last camera is the Hikvision turret IP camera.