Most of the new recorders are able to detect the resolution of the TV/monitor and adjust the display settings automatically. However, in some cases, especially on the non-supported monitors, the resolution needs to be set manually.
In this guide, we will show how to change the resolution of your recorder (Dahua) and how to reset the resolution if necessary. By resetting it, you’re letting the machine detect the display automatically.
Additionally, this is the solution if you’re getting an error on your TV or monitor that shows the message “Mode Not Supported”, “Format Not Supported” or “Out of Range”
Before you change the resolution of your recorder, determine what resolutions the display (TV, a monitor) you are using see the cameras.
Be cautious when changing the resolution as selecting the wrong resolution for your display can cause your recorder to display a black screen or an error on the display stating “Out of Range”. If that happens, you can correct it if you have buttons on the front panel of the recorder or access to a computer.
Change Recorder Display Resolution on Dahua Recorders
Change the Resolution via the front button
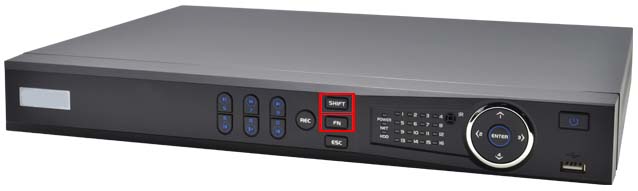
Using the front SHIFT button, you can reset the resolution. First, turn OFF the recorded. Then hold the SHIFT button on the front panel. If your recorder has the FN button you can try that if SHIFT does not work.
 If your recorder does not have a shift button or this method does not resolve the problem, you will need to login to the web interface, see below.
Change the Resolution via Web Interface
Another way to change the resolutions is by configuring the recorder through its web interface. The recorder needs to be on the same network as the laptop/computer.
You can access the web interface by entering the recorder’s IP address into the address bar of Internet Explorer if you know what the IP address is. Once you see the interface, enter the username and password.
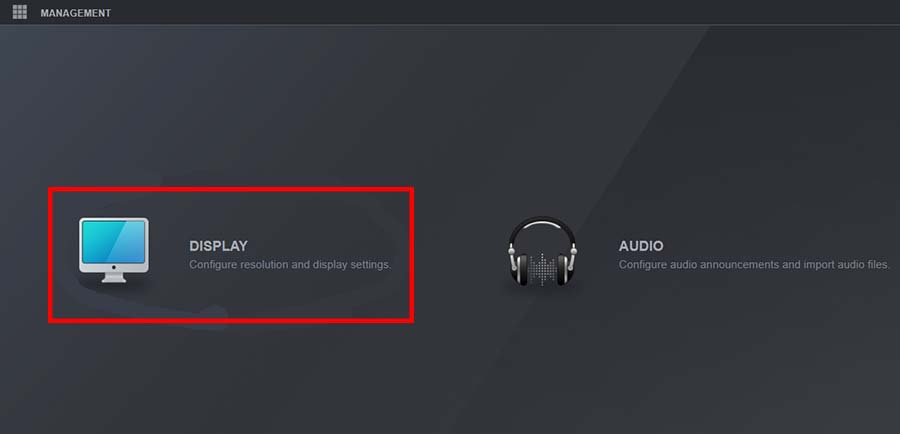
Then go to the Main Menu, then use the scroll wheel or click the second-page indicator as below. Select Display.
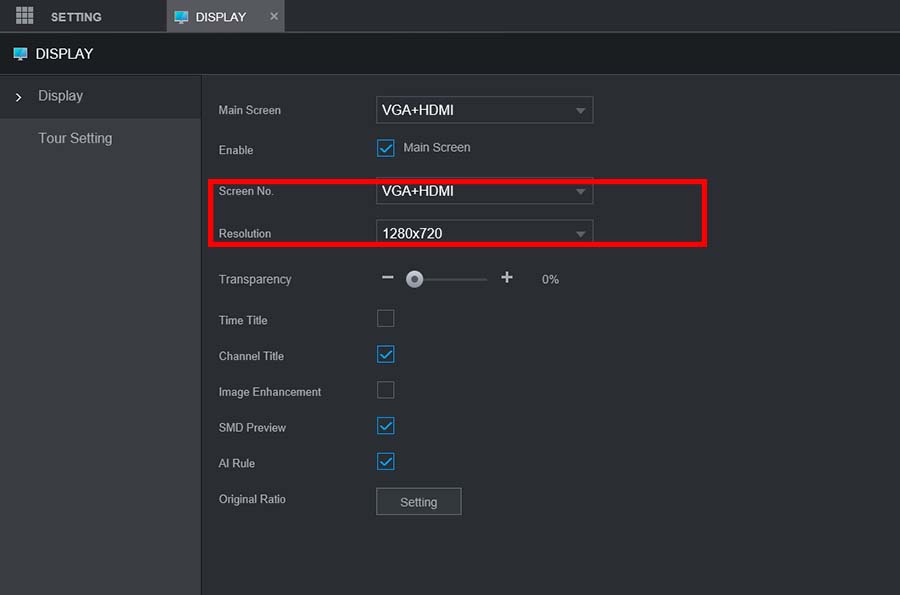
 Change the Resolution to suit the display the recorder is connected to. Select OK.
 Then you should be able to see the recorder’s interface on the monitor or the TV where it’s hooked up.
Another option is to connect the recorder to a TV with a higher resolution than the current monitor, then lower the resolution via the local recorder’s interface. Once done, re-connect it to the monitor that wasn’t displaying the picture.


