One of the intelligent features of Hikvision CCTV system is the so-called Distance Detection function (technical term: Distance Exception function). Using this function you can track the distance that people maintain from each other in the monitored area.
It can be a useful feature when enforcing social distance policies. The function notifies the monitoring team when the subject breaks the distance rule.
This guide shows step by step how to configure the Distance Exception function on Hikvision security systems. At the same time, each technical term and function is explained.
How to configure Hikvision Distance Exception function
There are a few things you need to keep in mind when installing a security camera for the purpose of the Distance Detection function.
- The height of the camera needs to be in the range of 2.5 m to 6 m (9-20 feet).
- The tilt angle of the camera is recommended to be in the range of 25° to 60°.
- The best detection area is within 6 meters (20 feet) of the horizontal distance from the camera.
Hikvision Camera Configuration for Distance Detection (Distance Exception rule)
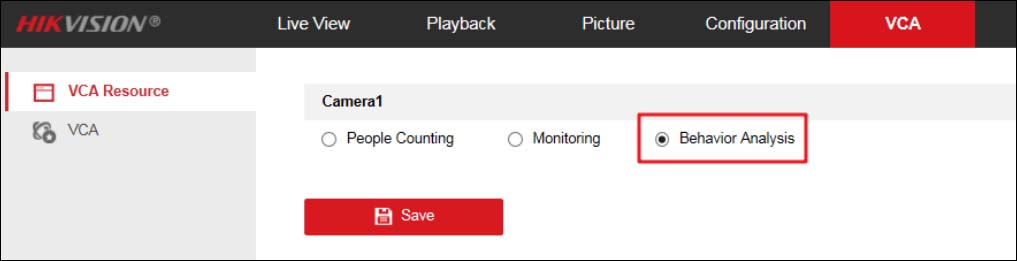
1. Select VCA Resource
It is necessary to select the VCA resource as Behavior Analysis. Click Save to apply the settings.
2. Camera Calibration Configuration
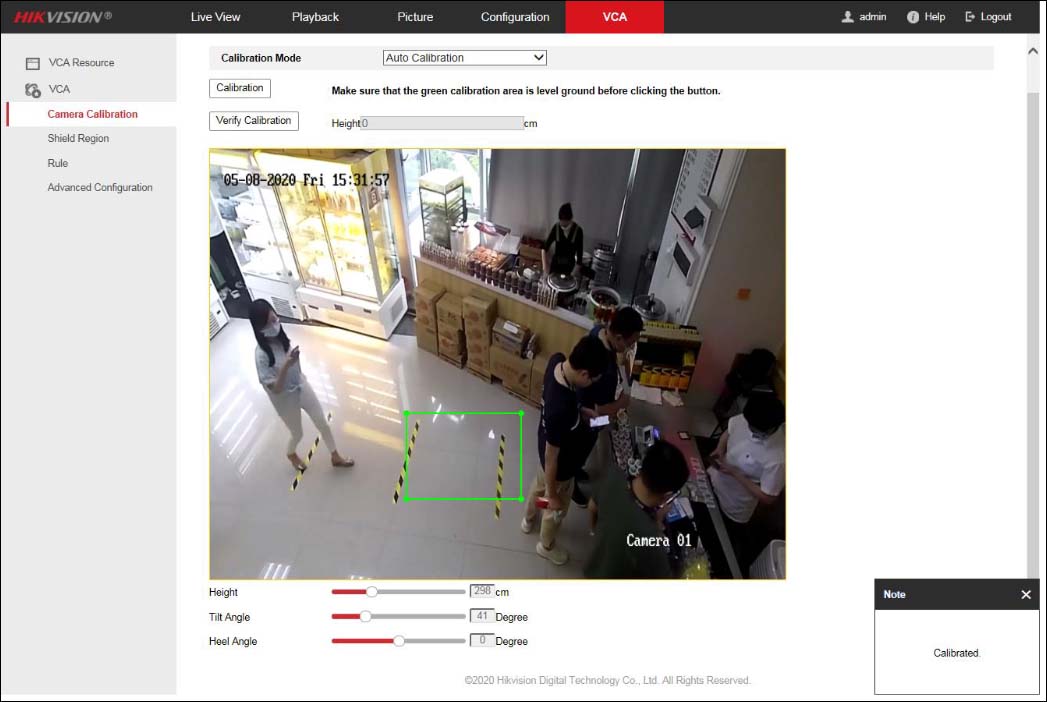
Step 1. Navigate to VCA > Camera Calibration and select the calibration mode. Manual Calibration and Auto Calibration are selectable.
Auto Calibration Mode: It will generate the lens height and a green calibration area automatically. The calibration area is used for calibrating the height from the ground to the lens. So, we strongly recommend selecting the totally ground part as a calibration area.
 Note:
Note:
- The Auto Calibration Mode is recommended.
- The ground area where the green frame is calibrated should be free of reflections and backlighting. If there is a case of reflective backlighting or less texture, it is recommended to lay a rich texture such as a newspaper for calibration to improve the accuracy of the calibration.
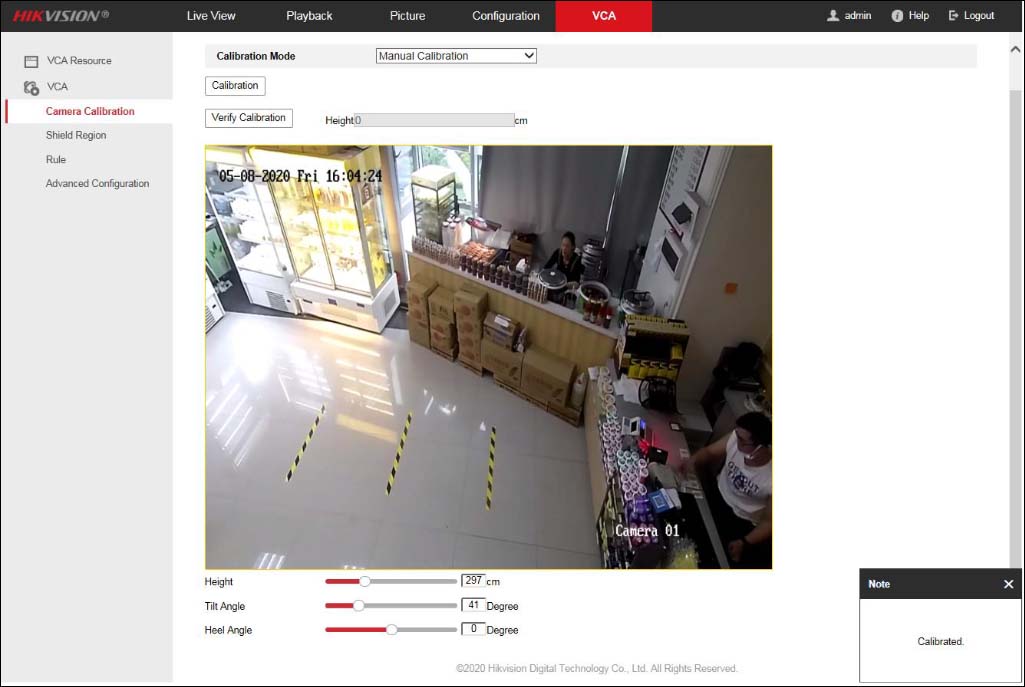
Manual Calibration Mode: Enter the camera’s lens height (the height from the Entry/Exit area to the camera), Tilt Angle, and Heel Angle manually. To increase the success rate of the manual calibration, make sure the lens height is the true value in the vertical direction between the lens (camera) and the ground (floor).
 Step 2. Click “Calibration”. The blue area is for detection. A prompt “Calibrated” will automatically appear in the lower right corner.
 Note:
Note:
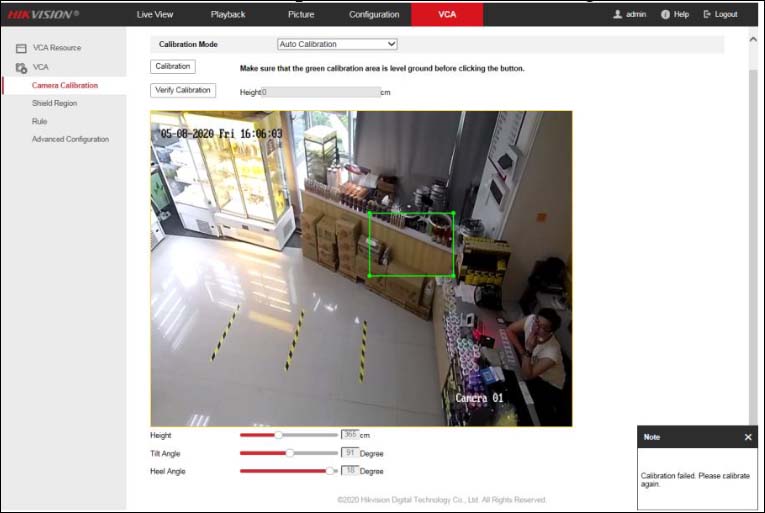
- If auto-calibration fails, please check whether the ground is selected as the calibration area.
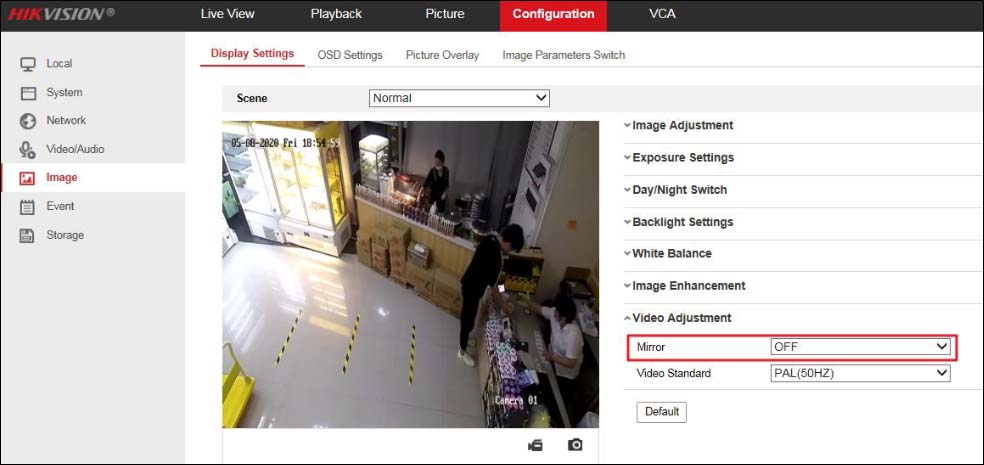
- It is recommended to keep the Mirror off, otherwise, it will cause a calibration error.
 Step 3. After the calibration is finished, you can click “Verify Calibration” to obtain the height of the clicked position by clicking the image on the screen, which can verify the accuracy of the calibration.

3. Rule Configuration
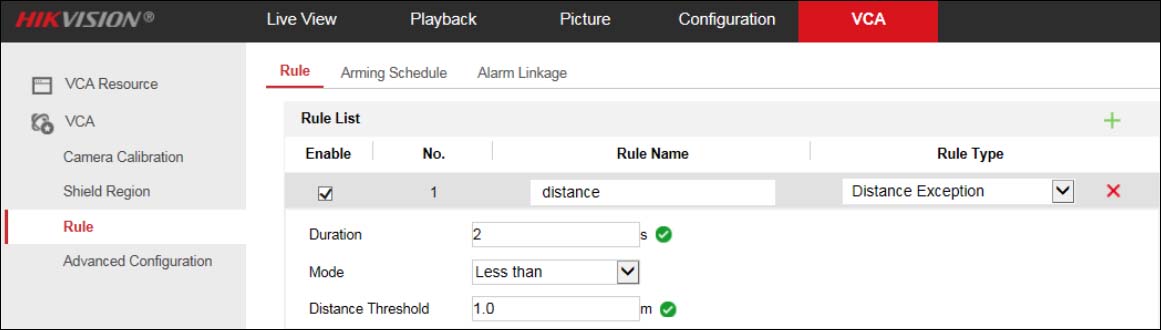
Step 1. Go to VCA > Rule and click the plus sign in the upper right corner of the interface to add a rule. Enable the rule, set the rule name, and choose the rule type as Distance Exception.
Step 2. Set “Duration”, “Mode” and “Distance Threshold”. The device can trigger the alarm of the corresponding rule by judging the distance between any two people in the rule area.
For example: You need to receive the alarm in 2s when the distance between the two subjects is less than 1 meter (3 feet). You can set the “Duration” to 2s, the “Distance Threshold” to 1 meter, and select “Less than” for the “Mode”.
Step 3. Click to draw the rule area, click the left mouse button on the preview image to draw the endpoints of the rule area, and click the right mouse button to complete the drawing. If you need to redraw the rule area, click the octoshape icon again.
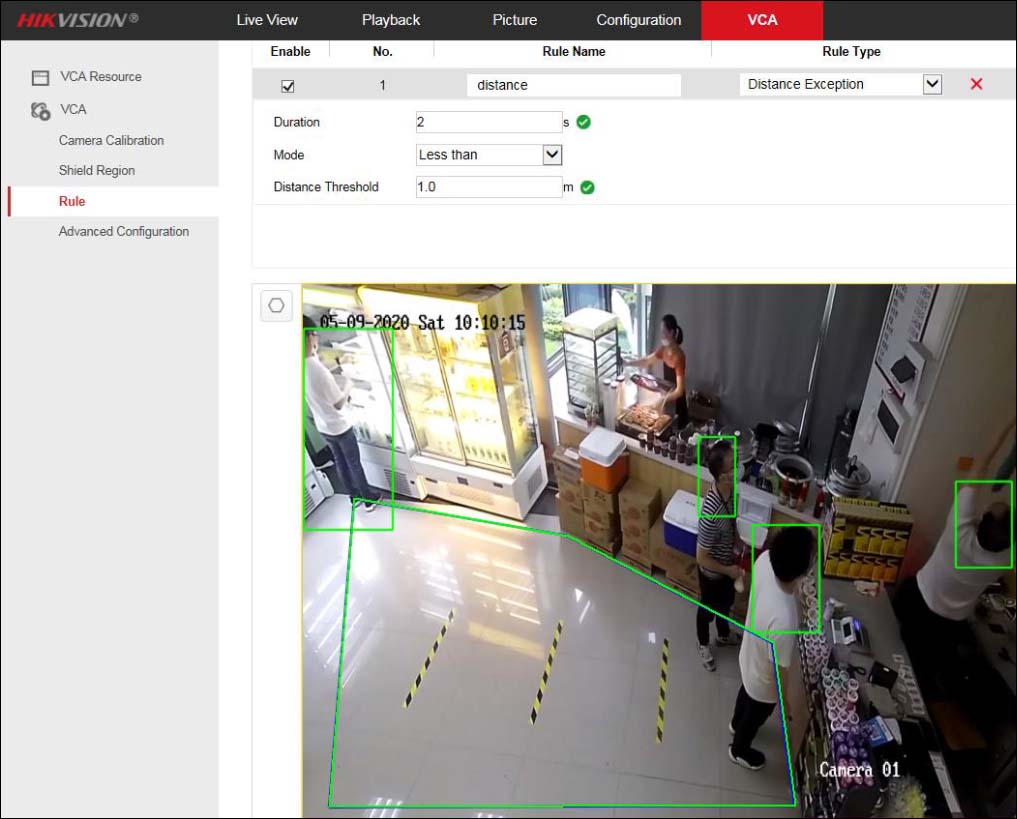
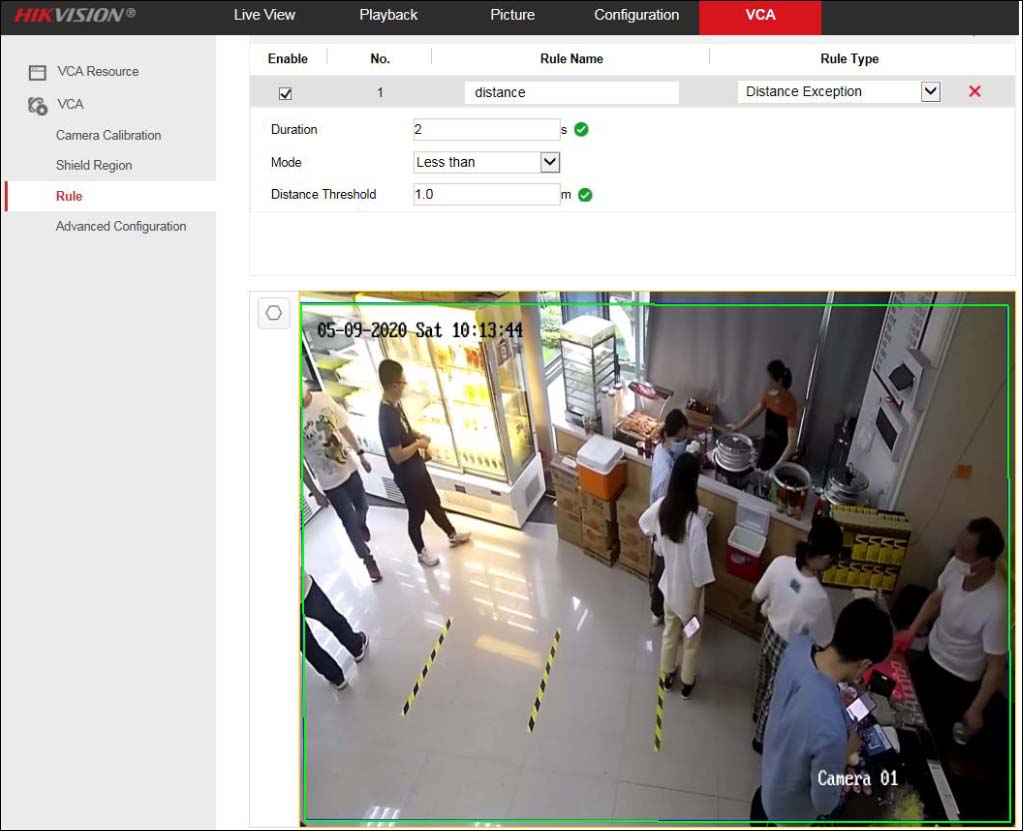 Important Note: The “rule area” needs not to only include the ground area, but also to include the area covered by the standing state of the person. If the rule area is drawn like the picture below, the alarm will not be triggered.
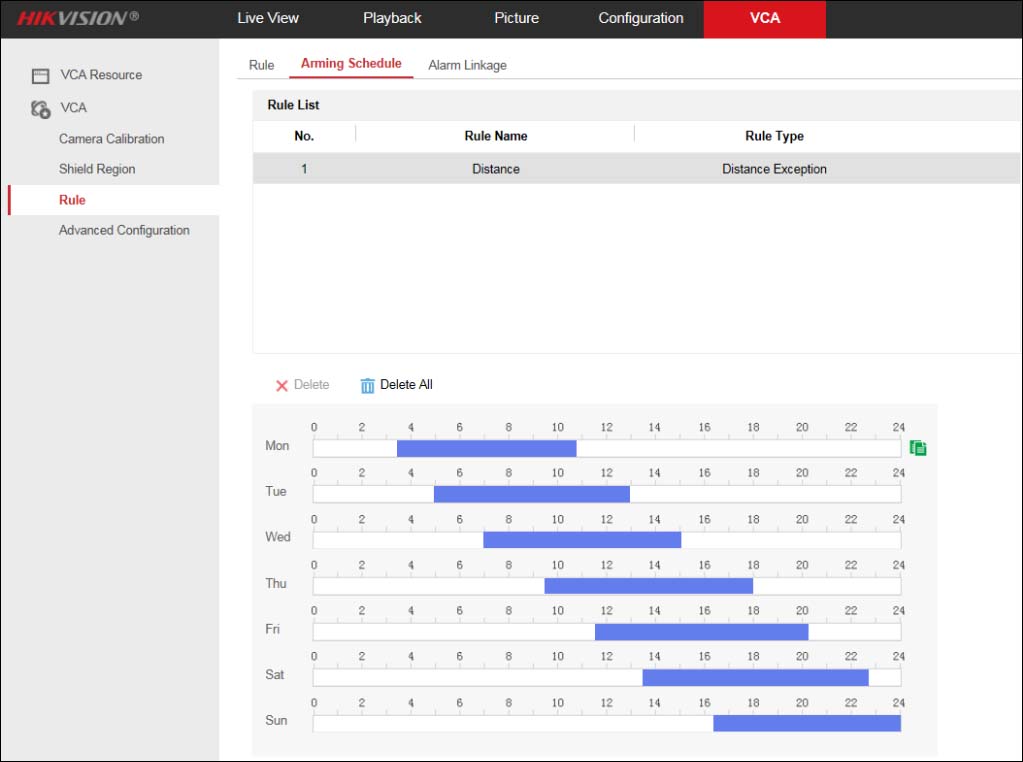
 Step 4. Click the Arming Schedule and select the rule that needs to set arming time, click the arming time period, you can adjust the arming time of the rule.
If you need to set the same arming time at other times, click the green copy button on the right side of the timeline. Multiple arming time periods can be set in one day.
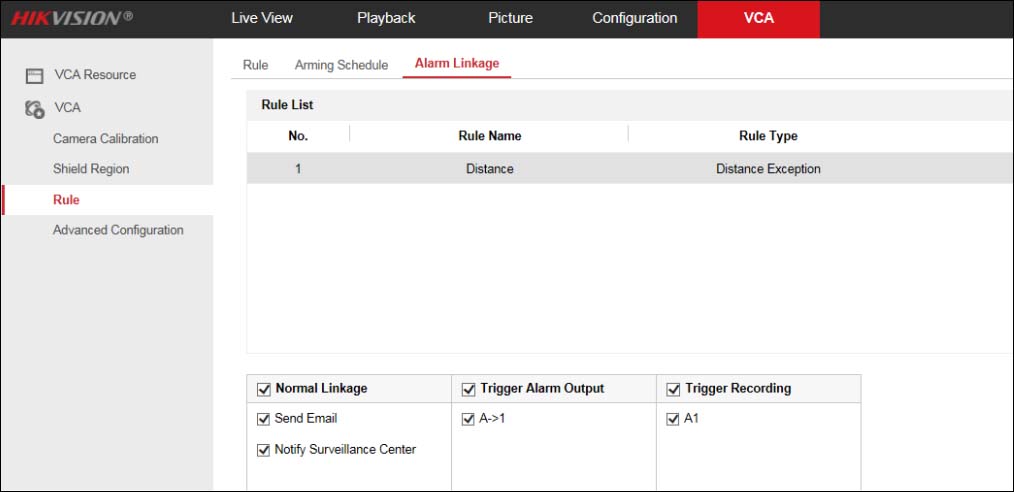
Step 5. Click Alarm Linkage and set the linkage mode according to the requirements of smart rules. The linkage modes include “Normal Linkage”, “Trigger Alarm Output”, “Trigger Recording”.
Shield Region Configuration
Step 1. Navigate to > VCA > Shield Region and click the octoshape icon again to draw the mask area of the polygon frame (3-10 sides), the smart rules set on the device are invalid for the mask area (as shown in the picture below).
 Step 2. Click to clear the currently drawn mask area. Whatever chance you make, don’t forget to click Save.
Conclusion
This technical guide demonstrates how to set up the Distance Detection rule and whenever a subject breaks such rules, the system will send out a notification (beep, email, alert, etc) and the security team can take action. It’s not a difficult procedure, but it requires some tryouts until you configure the parameters correctly for your monitoring area.
