Hikvision Licence Plate Recognition (LPR) function is able to scan the live footage coming from the LPR camera and pull out the license plates of the cars that drive in front of it. In Vehicle Detection mode, the passed vehicle can be detected and the picture of its license plate can be captured. You can send an alarm signal to notify the surveillance center and upload the captured picture to the FTP server.
The road traffic functions on Hikvision cameras vary according to different camera models. And, Mixed-traffic Detection (detecting pedestrian, non-motor vehicle and motor vehicle) is also available for some certain cameras. In this article we will demonstrate how to do the settings for the LPR function on Hikvision equipment.
Web configuration of the LPR function
Connect your camera to the local network and access it through the web browser. We recommend using Internet Explorer (not Edge) and you have to install the plugin when prompted. Type the IP address of the camera and login using your username and password. The account should possess admin permissions.
Detection configuration directly on the camera
In this section we will show how to do the LPR settings on the camera directly. In this scenario there’s no NVR and the camera is storing the footage on the built-in microSD card. If you do have a NVR, the procedure is still the same.
Step 1. Make sure the camera is updated to the latest firmware. The camera has to be connected to your local network.
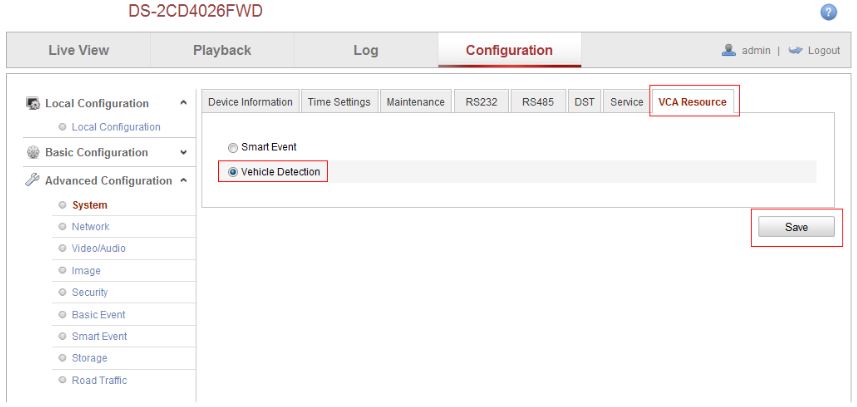
Step 2. VCA resources can be efficiently allocated to get a better performance. Two modes of VCA resource allocation are supported: Smart Event and Vehicle Detection.
Go to Configuration > Advanced Configuration > System > VCA Resource. Tick Vehicle Detection for the VCA resource allocation. Reboot the device to activate the new settings. Note: When Smart Event is enabled, the Vehicle Detection function is disabled; When the Vehicle Detection is enabled, high frame rate, recording on SD card or NAS / CIFS, some certain smart events (for the details, see the actual operation interface) and people counting (non-iDS) are disabled.
Step 3. Then go to Advanced Configuration > Road Traffic option. Select the detection type from the list. Vehicle Detection will be selectable.
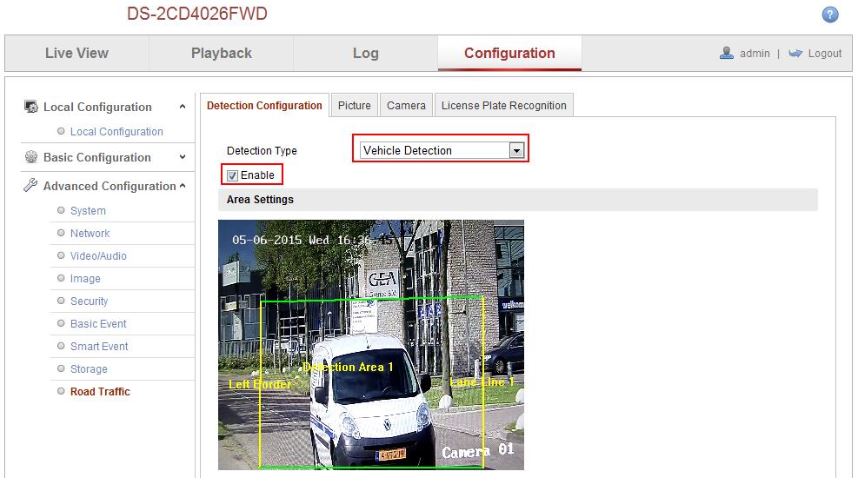
Step 4. Enable the selected detection function. Then select the lane number in the corresponding dropdown list. Up to 4 lanes are selectable.
Step 5. Click and drag the lane line to set its proper position, or click and drag the line end to adjust the length and angle of the line. Only 1 license plate can be captured at one time for each lane. To make things simpler, you can park your car in front of the camera and then draw the guidelines correctly.
Step 6. Select a State Abbreviation in the dropdown list.
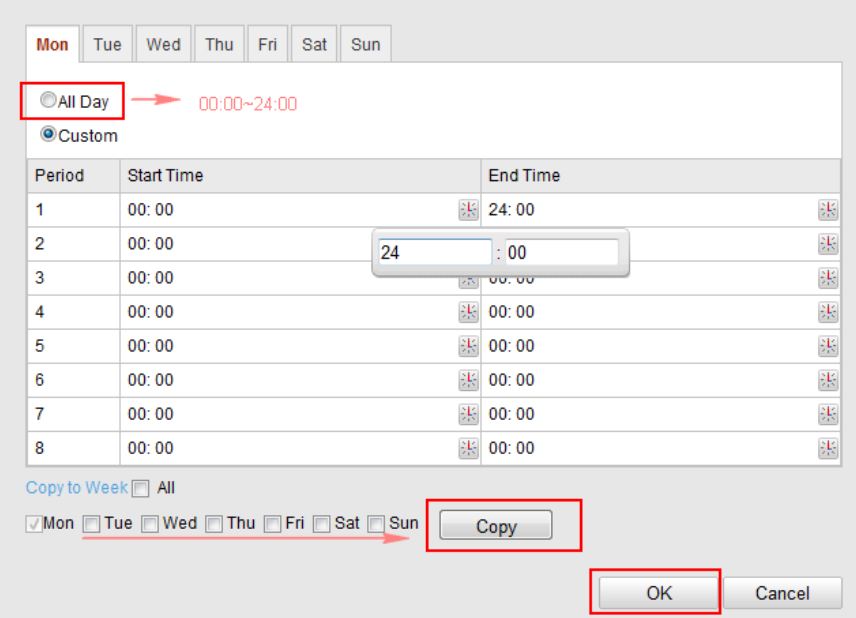
 Step 7. Set the Arming Schedule for Vehicle Detection.To edit the arming schedule, click Edit button.
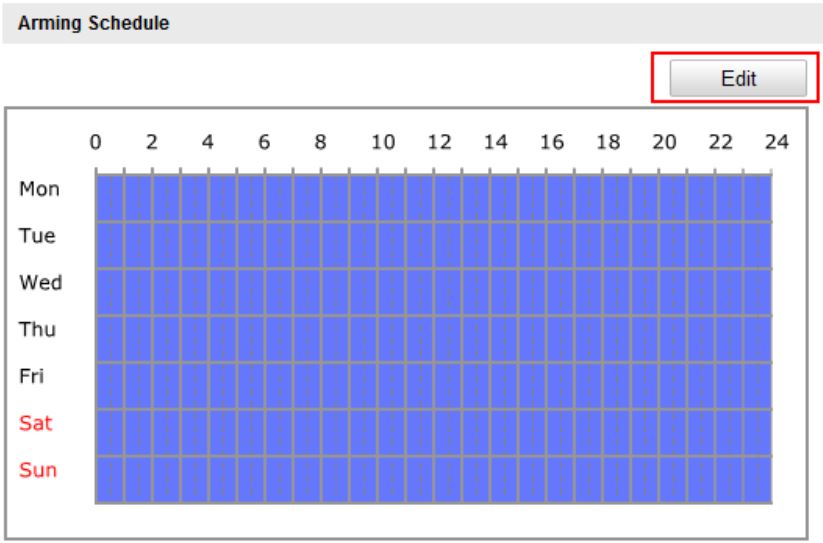 After setting the arming schedule, click the Copy button to copy the schedule to other days. Click the OK button to save the settings. The time of each period cannot be overlapped.
Step 8. For the correct recognition is necessary to set the parameter of the maximum and minimum size of the license plate.
• Define the area of interest on the frame and set it up.
• Measure the size of the license plate area of interest. The minimum size of the license plate in ROI (LPminW).The maximum size of the license plate in ROI (LPmaxW).
• Set the parameters.
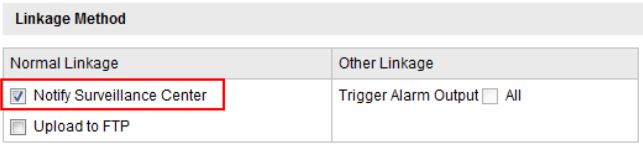
 Step 9. Check the checkbox to select the linkage method. Click on Notify Surveillance Center (will send an exception or alarm signal to remote management software when an event occurs). Save the settings.
Upload picture configuration
Step 1. Set the picture quality. Either Picture Quality or Picture Size can be set to specify the picture quality.
Step 2. Enable and edit the text overlay on the uploaded picture. You can set the font color and background color, and click the desired color in the popup palette.
Step 3. Select the information for the text overlay, including camera number, camera info, device number, capture time, plate number, vehicle color, etc. You can also click the up and down direction buttons to adjust the sequence of the text.
Step 4. Click Save to save the settings.

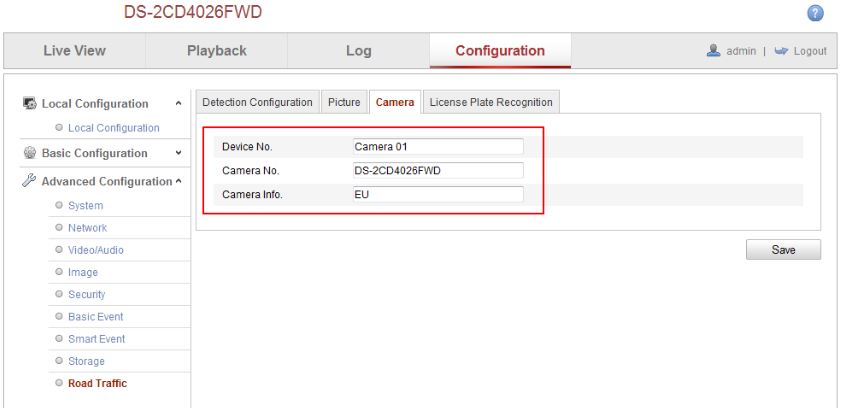
Overlay Content Configuration
Step 1. Edit the content of the camera No., camera information and device information in the corresponding text fields. Enable and edit the text overlay on the picture to upload.
Step 2. Click the Save button to activate the settings.
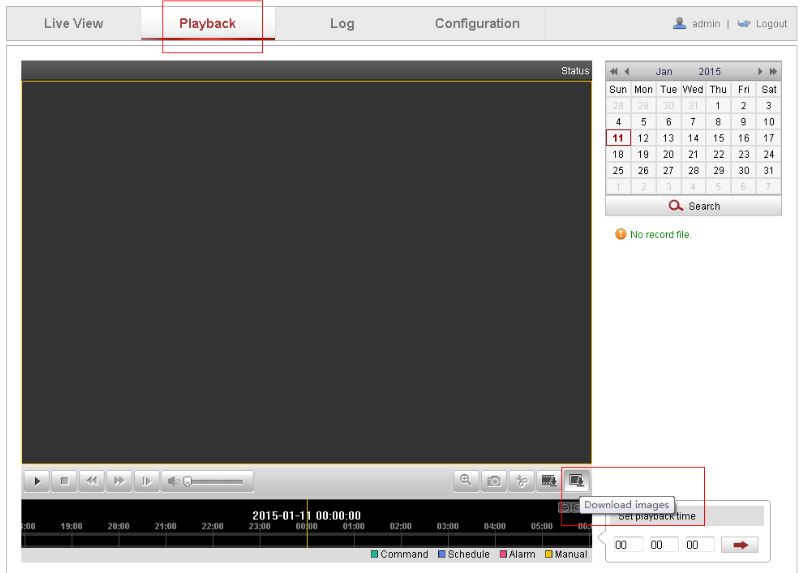
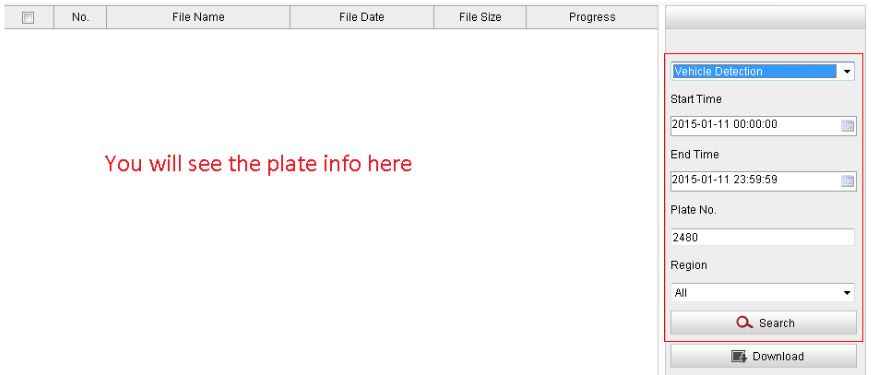
Searching the plates on the database
To search the stored images go to Playback >Download pictures, select Vehicle Detection option. Here you can search the plate pictures and other information stored in the microSD card (or on the hard drive).
Recommended LPR parameters
To obtain the maximum license plate recognition accuracy, you need to set the right parameters. In this section we will list the recommended settings. However, you need to tweak your settings given your location and lighting conditions.
Exposure Settings
Iris Mode: Auto
Auto Iris Level: 50
Exposure Time: 1/1000
Gain: 20

Day/Night Switch
Day/Night Switch: Auto
Sensitivity: 4
Filtering Time: 5
Smart IR: ON
Mode: Auto

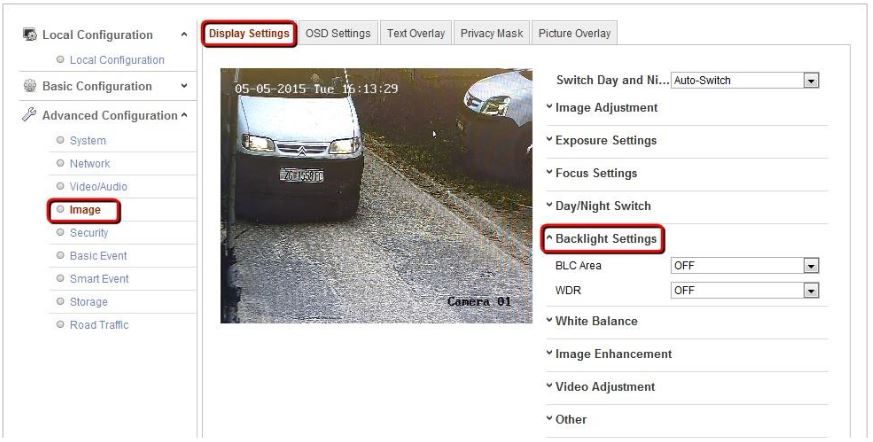
Backlight Settings
BLC Area: OFF
WDR: OFF