Here we will explain how to connect a Hikvision IP camera to a Dahua NVR. These two brands are very popular and cost-effective so in certain cases you may need to add a Hikvision IP camera to a Dahua recorder (or to a Dahua re-branded recorder).
Dahua has a strong reputation for manufacturing standalone Digital Video Recorders (DVR) and Network Video Recorders (NVR) that live up to people’s expectations.
Not only do they possess all of the features people have come to expect, but they also stand the test of time where others fail.
How to connect a Hikvision IP camera to a Dahua NVR
Step 1: Configure your Hikvision (or Onvif) IP Camera
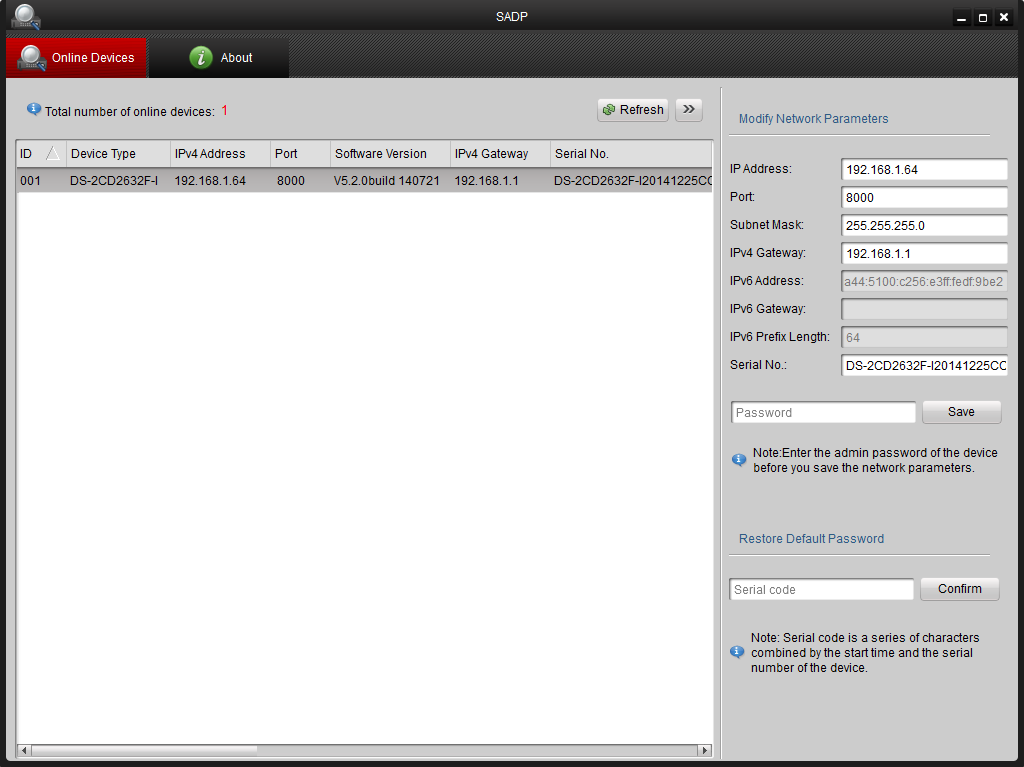
For a Hikvision IP Camera, you’re going to be configuring your camera using the SADP tool (which comes with the camera or you can download it here). Connect your IP camera to your network (router/switch) and ensure that it’s getting powered (PoE switch, power supply, etc).
Once you have the SADP tool installed and open, use it to modify the network credentials of your IP camera to comply (match) with your own network (including your Dahua NVR). The tool will automatically detect your Hikvision IP camera.
You’ll only need to select it from the list and then, if necessary, modify the camera’s network parameters using the options located on the right side of the screen.
All other Onvif IP cameras will have a similar IP configuration tool or software that you’ll use to accomplish the same task.
The software will ask you to activate the camera first, meaning it will ask to create a password. This is the password for the camera and we will need it later.
For Tribrid or Hybrid DVRs
Those of you who own a Tribrid (or hybrid) DVR will have an added step immediately following step one. If you haven’t already discovered the Channel Type page in the menu, you’ll need to now. It can be found located under the Setting section of the Main Menu, and then under Camera.
From the next page, select the Channel Type option from the left side of the screen. Tribrids, as you probably already know if you own one, are compatible with standard definition analog, high definition (HD) analog, and IP cameras.
The way this is made possible is by allowing the end-user (you) to configure those cameras for any of those three signal types.
On a Tribrid, you need to add IP cameras in reverse order. For example, using an 8 channel Tribrid DVR, we select the check box under the IP column for channel 8.
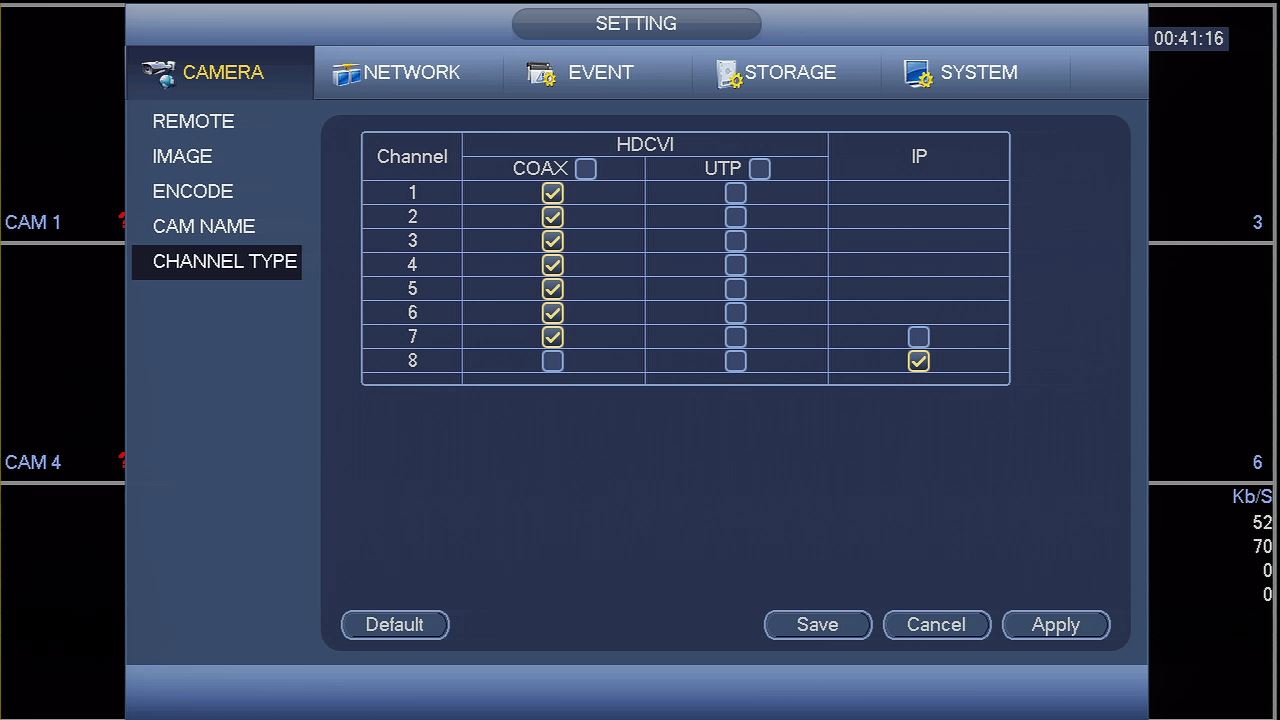 If we decide later to add an additional IP camera, we just need to go back and change channel 7 to IP (and so on). Once you’ve changed the appropriate channel(s) to IP, click the Save button and then the Apply button.
Your DVR will inform you that it needs to restart at this time. After it has finished rebooting, the changes you’ve made to the channel type will now be set, and you may move on to step two.
Step 2: Connect your Hikvision (or Onvif) IP Camera
For this step, you’ll be using the Remote Device feature on the Dahua NVR. After selecting this option from the main menu, you may see your IP cameras IP addresses being displayed on the device list. Select the camera by clicking on the check box, and then click the add button.
You will likely need to utilize the Edit feature at this time to input the proper credentials for your camera. If you do not see your camera being displayed, you will need to add the camera manually by clicking the Manual Add button located on the same page.
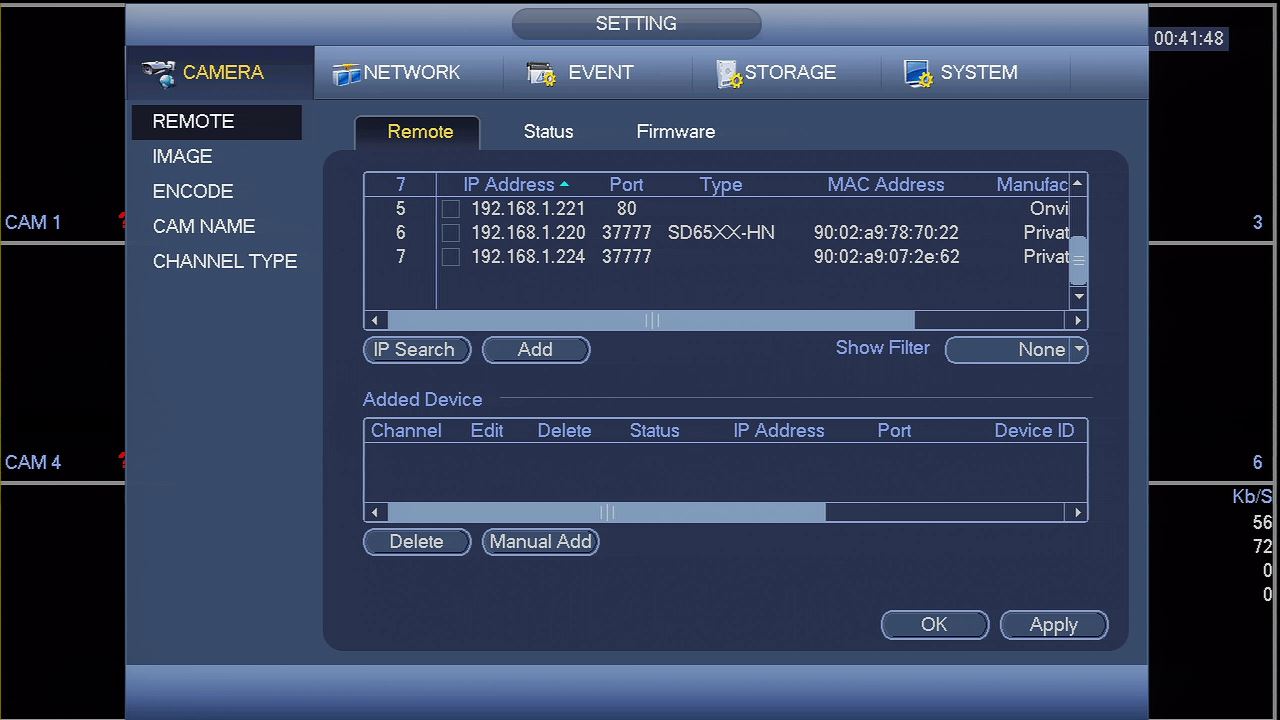 To add a Hikvision IP camera, you will definitely have to use the Manual Add feature. After clicking the button, you will be brought to a pop up window (picture below).
The screen you see below is the same screen that will open when using the Edit option.
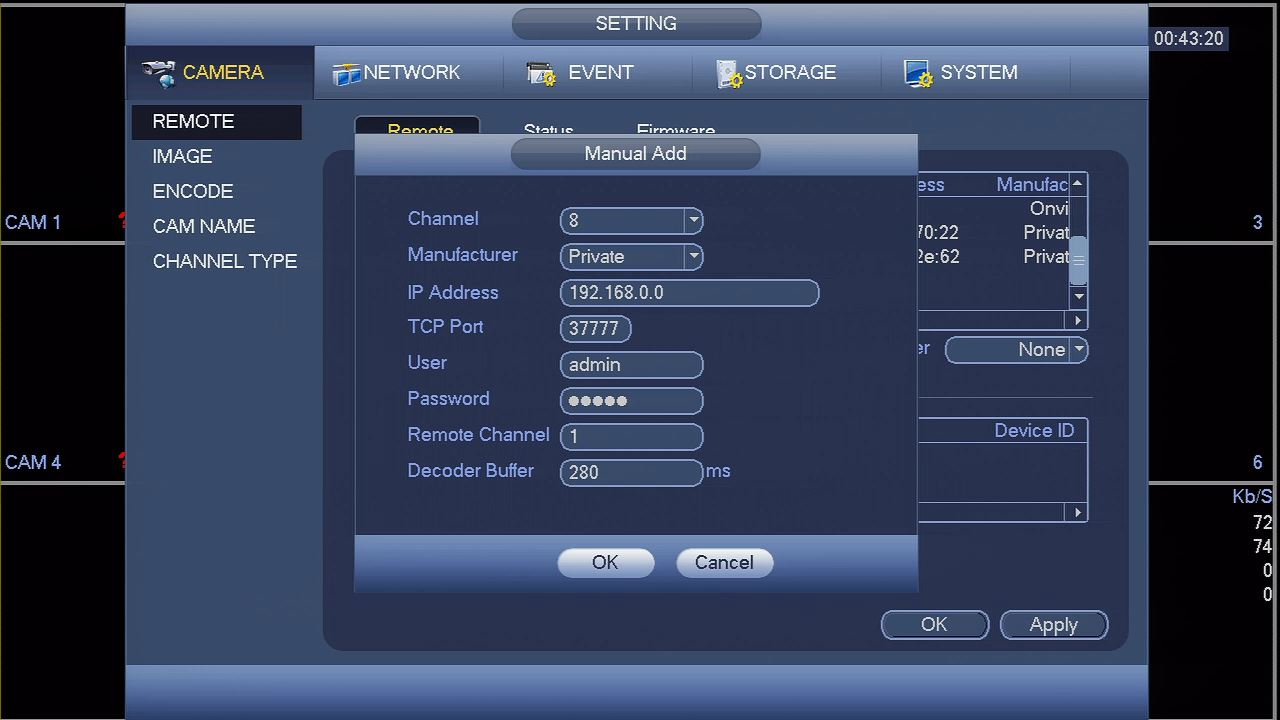 Immediately after selecting which channel you’d like the IP camera to be associated with, change the Manufacturer option to Onvif.
After changing that from the drop down menu, you will notice a slight change in the layout of the screen.
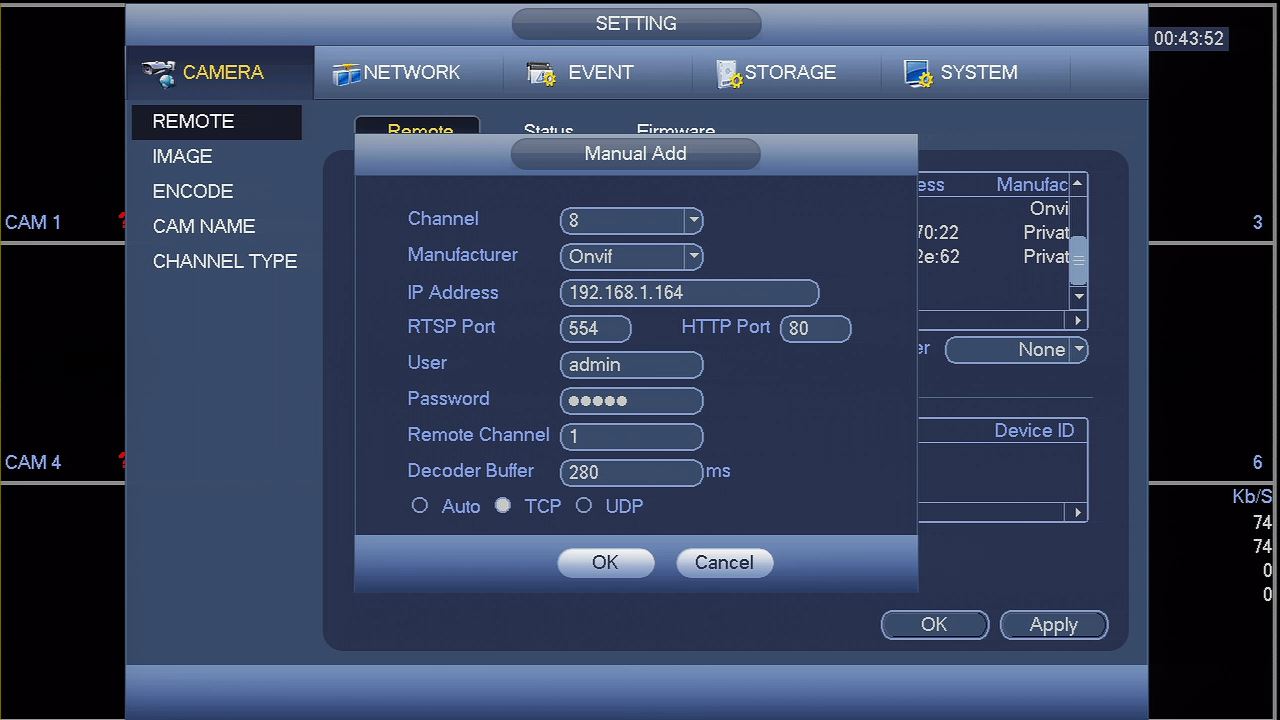 Once this change has occurred, continue through the remainder of the window and alter the settings as you need to. Your IP address will need to be changed the one you designated (the one we set on step 1).
After that, you’ll need to change the username and password to match that of the camera. The last thing you’ll be required to change is the tabbed option at the bottom of the screen. You simply need to change it so that TCP is checked instead of Auto.
You’re now ready to click OK and be brought back to the previous page. Once back on this page, you’ll see that your IP camera has now been added to the NVR. Verify that the Status column displays a green-colored dot and not a red one.
Green indicates your camera is properly configured and connected to the NVR while red will indicate that something is incorrect with the way you setup the IP camera.
If you find a red dot, the mistake is either in the configured network parameters within the camera or with the way in which you attempted to add the camera.
Once it’s been moved to the Added Device list and the Status shows as green, click OK to save your work. After navigating back to the home screen, you should now see your IP cameras video feed being displayed on the channel you designated.
Note: this guide works for Dahua and their OEMs sold under these brands: Activecam, Advidia, Amcrest, Ameta, Ascendent, Backstreet Surveillance, BV Security, CCTV Security Pros, CCTV Star, CP Plus (Orange Line), Dax Networks, eLine, ENS (formerly Eastern CCTV and SavvyTech), Expose, Lorex, GSS, Honeywell, IC Realtime, Ikegami, Impath Networks, Inaxsys, IndigoVision, Infinity CCTV, Innekt, Intelbras, KBVision, Lumixen, Maxron, Montavue, Oco, Optiview, Rhodium, RVI, Saxco, Security Camera King (Elite), Space Technology, Speco, ToughDog, Tyco Holis, Tyco Illustra Essentials, Unisight, VIP Vision, Watchnet, Winic, Zuum.


wonderful. now if my software only had the ‘remote’ button
If no remote button, that means your recorder doesn’t support IP cameras (most likely it’s a regular DVR).