If you’re wondering how to enable the FT server on Axis cameras, this is the right place. Here we will show via screenshots and clear instructions on how to enable the FTP server regardless if your Axis camera uses the old or the new interface.
The FTP server is useful when you need to upgrade a camera’s firmware or if you want to make the camera communicate with a server. By using this protocol, you can store the footage and snapshots on an external server which increases the level of redundancy of your camera system.
Enable the FTP server on Axis cameras
As we mentioned, there are two types of Axis cameras out there, the one that uses the old firmware (the legacy) and the newer camera that uses a new interface. Below we will show the steps for both cases.
FTP on Axis old cameras or old web interface
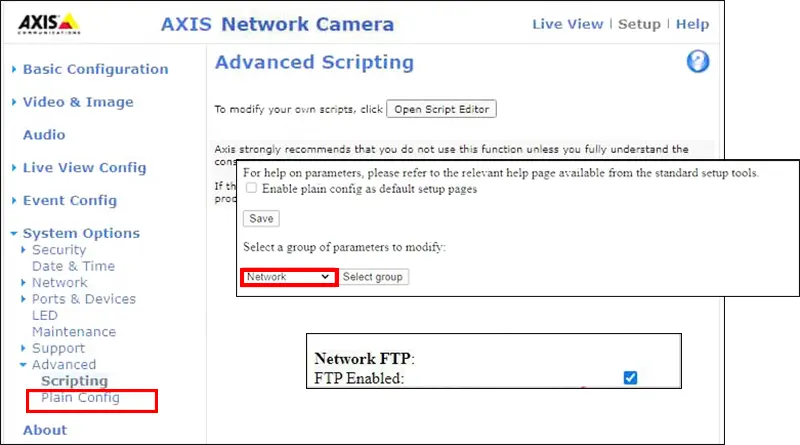
You’ll know that your camera’s using the old interface (and firmware version) if it’s similar to the one on the screenshot.
Once you access the camera via the web browser, you should see the menu on the left side of the screen. Follow these steps:
- Login to the via by entering the IP address and credentials via the web browser.
- On the Menu, navigate to System Option > Advanced > Plain Config.
- In the following screen, click the drop-down menu and select Network.
- Open up the options and check the Network FTP box
- Click the Save button to apply the settings.
Basically, that’s all you have to do, the FTP server is enabled and you go ahead to use it.
FTP on Axis new cameras or new web interface
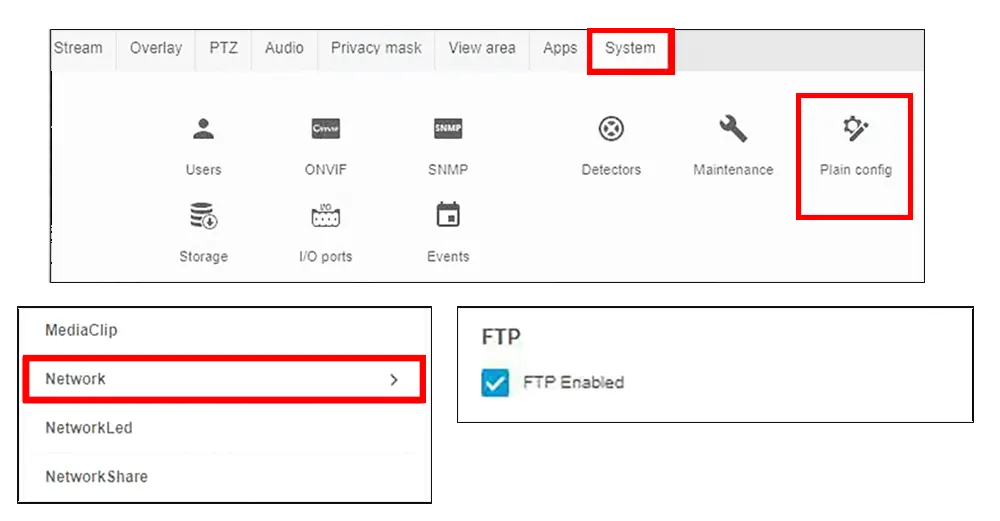
If your camera runs the latest version of Axis firmware, then the interface will look different. Below are the steps to enable the FTP server on the Axis new web interface.
- Access the camera via the web browser
- On the menu, navigate to Settings > System > Plain Config.
- Select the Network menu and check the FTP box.
- Save the new settings.
That’s all, now the FTP server is enabled and ready to be used.
To confirm it, you can test it out by using the command prompt on your computer. Open up the command prompt (just type “cmd” on the Windows search box), and then type this command: ftp followed by the camera’s IP address (for example, ftp 192.168.1.101).

Hit enter and you should see a response from the camera, indicating that the FTP is enabled and good to go.

You can update the camera, use standard FTP commands to communicate with the unit, or even set up a server to backup the footage, snapshot, and other data. Plenty of options.