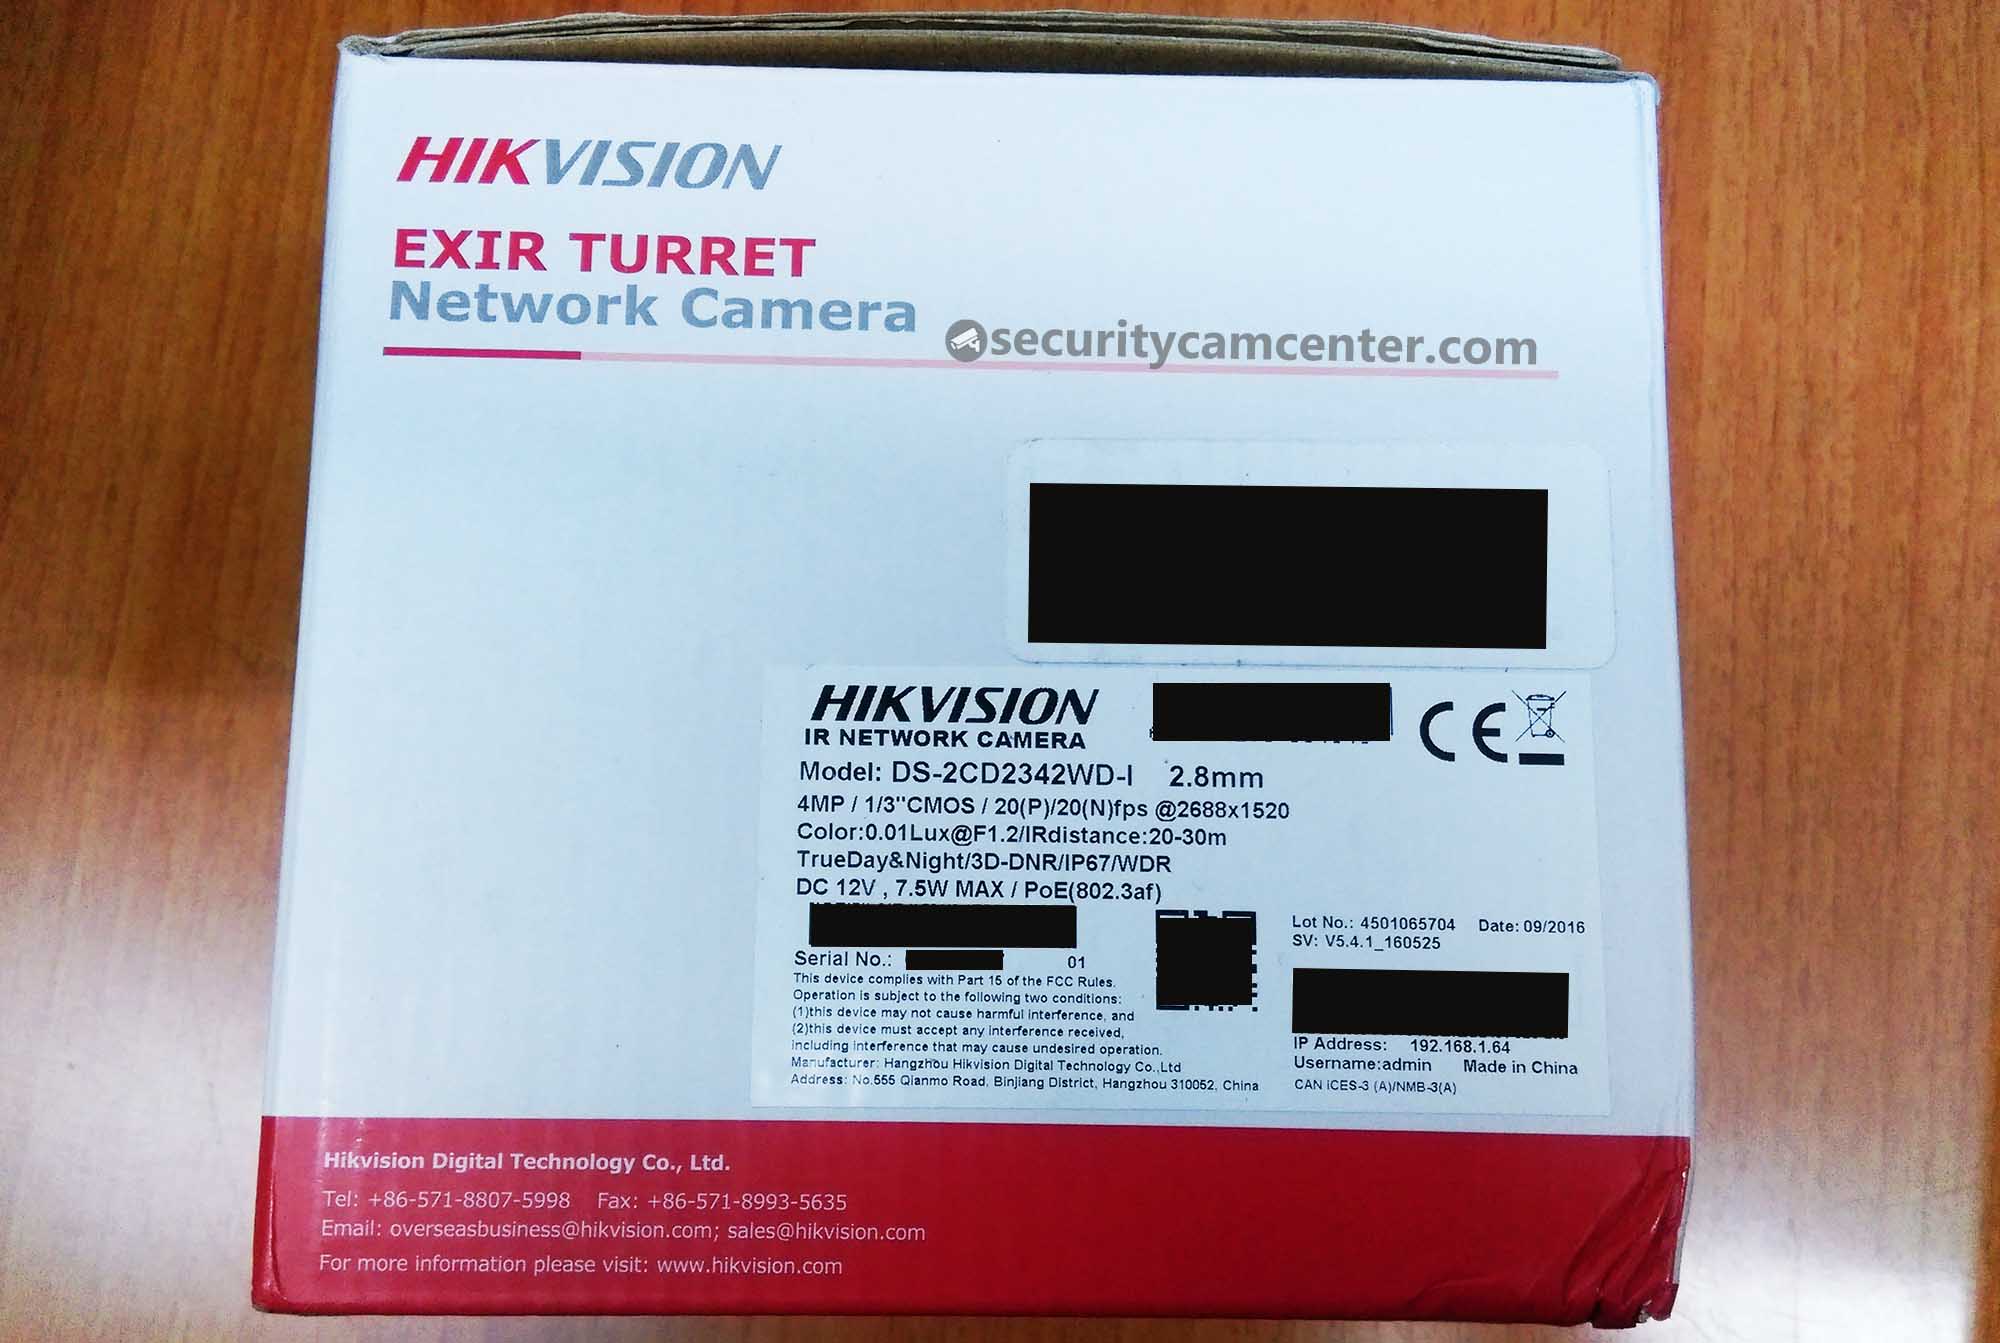
This Hikvision DS-2CD2342WD-I is a turret style (eyeball), Power-over-Ethernet network camera featuring a 1/2.8″ progressive scan CMOS image sensor and comes in 2.8mm, 4mm, or 6mm lens size. The shape makes it easy to install and provides a good blending of the camera with the environment.
The camera has a weather-resistant housing and EXIR infrared array technology near the lens that provides up to 98 ft (30 meters) of night vision in complete darkness.
Review: Hikvision Turret IP Camera


The main features:
- Up to 4-megapixel high resolution
- Dual video streams
- 2.8mm/4mm/6mm fixed lens
- 120dB Wide Dynamic Range
- 3D Digital Noise Reduction
- WDR, Backlight Compensation
- DC12V & PoE
- Support H.264+
- High-performance EXIR LED
- Up to 30m IR range
- IP67 Protection
Installation
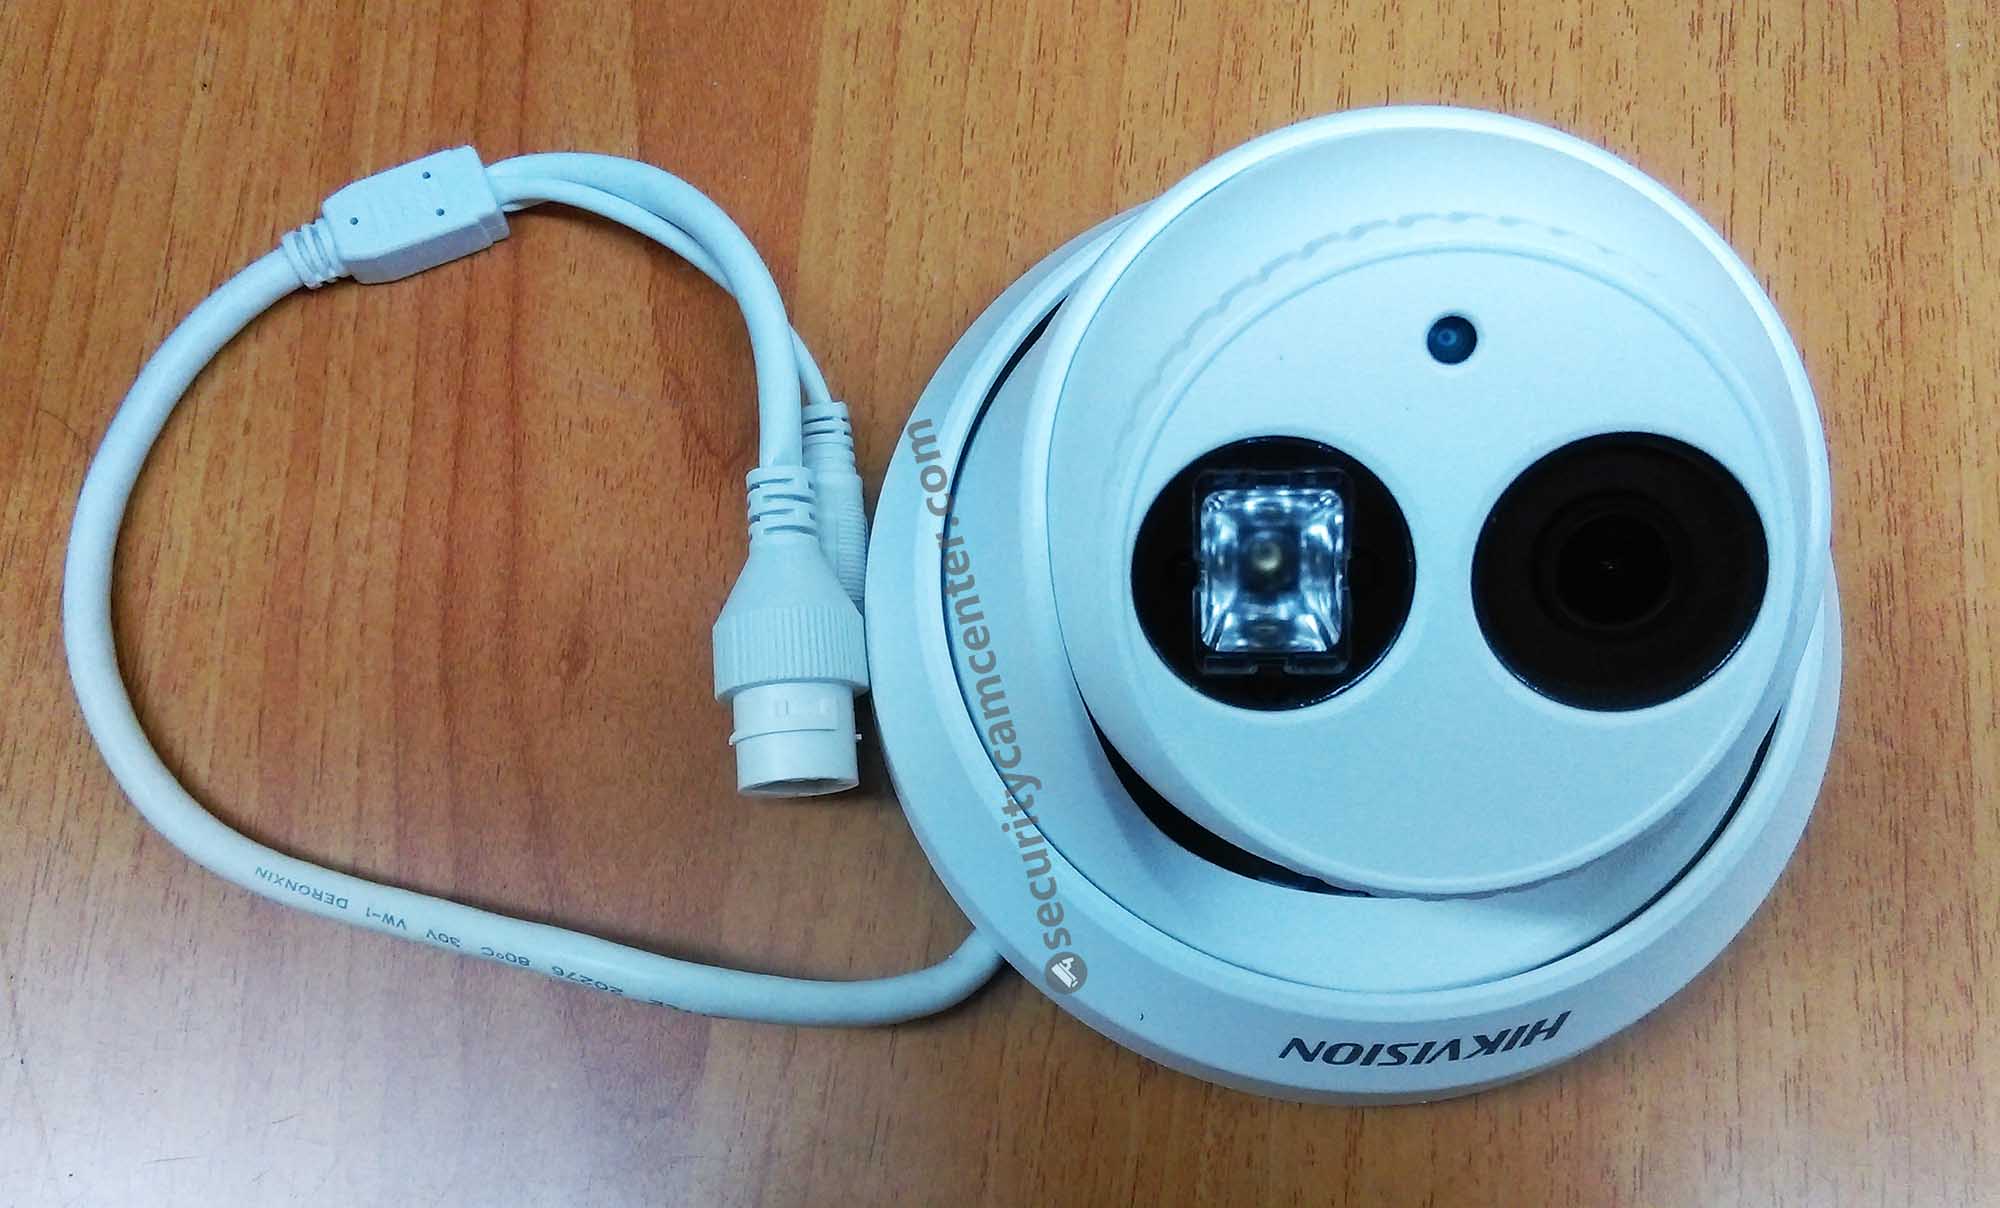
This Hikvision 4 megapixel turret camera has a metal base, except the ring at the base which is plastic. The camera can be adjusted in 3-axis, meaning it can be mounted in any orientation and be aimed as you wish.
Also, not sharing the lens with an IR illuminator behind the same piece of glass or dome means zero chance of IR light bleed that may occur in IR mini domes.
So the eyeball shape and the placement of the IR means the IR light will not bleed on the image, hence no reflection and a clearer picture. And lastly, you don’t have to remove the dome cover to install the camera or aim the lens, making it much easier to install.

Like the Hikvision mini bullet and mini dome, this is a no-frills camera with a fixed lens, no SD card slot, alarm I/O or audio capabilities. But it does really well at being a camera.
You can power this camera via a Power-over-Ethernet connection to your NVR or PoE switch, or alternatively using any 12V DC 1A power supply, sold separately. Hardware is included for surface-mounting the camera (such as directly to the ceiling) but you can also incorporate an optional Hikvision wall-mount bracket or ceiling-mount pendant cap and mount.

Configuration
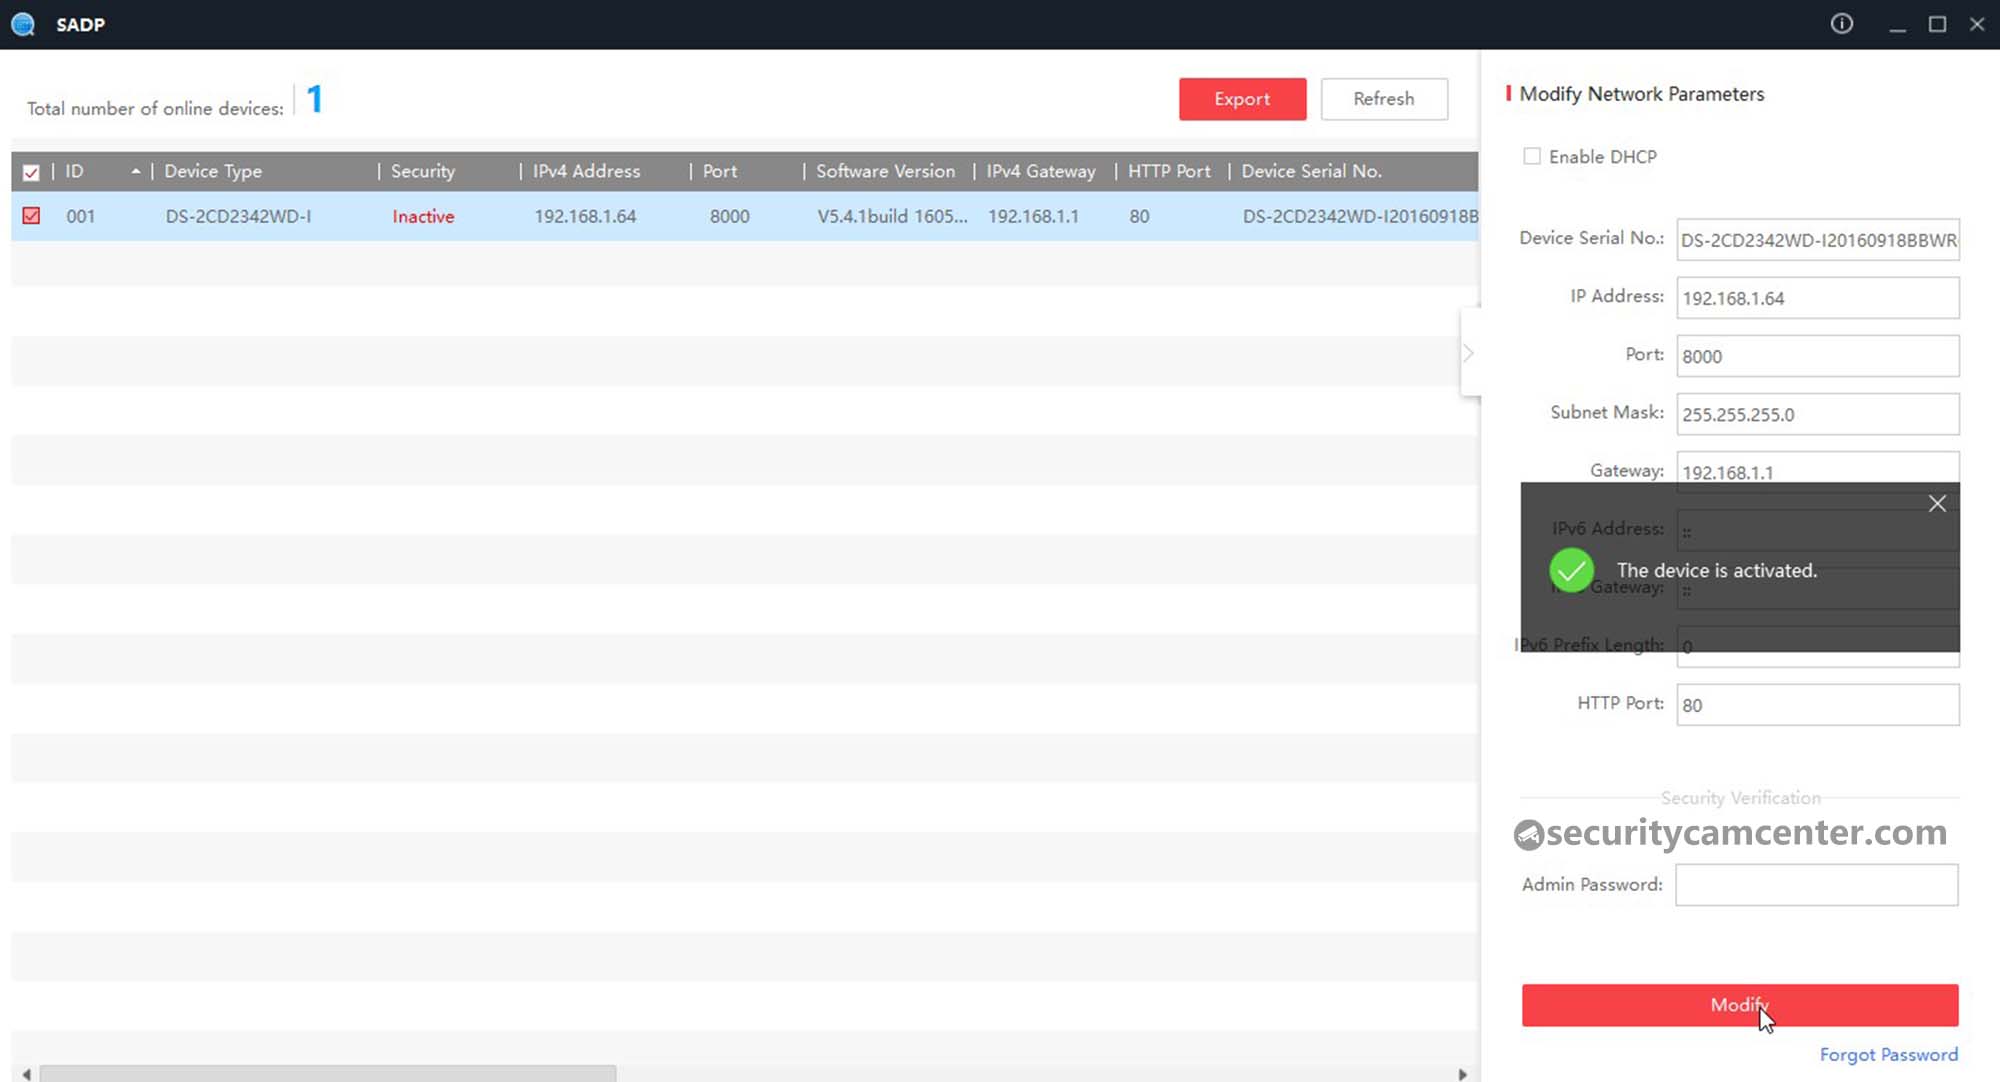
This camera comes on the 5.4.1 firmware version, however, there’s a new firmware version and if necessary you can update your camera. After the camera is on the network (via PoE or DC 12V power adapter), run the SADP tool.
This configuration tool can be found on the CD that comes inside the box, from the Hikvision website, or from our Tool section. By default the camera is inactive, meaning you need to assign a password to the camera and at the same time modify the IP address so it matches your own local network. In this case, we set the IP to 192.168.1.221.
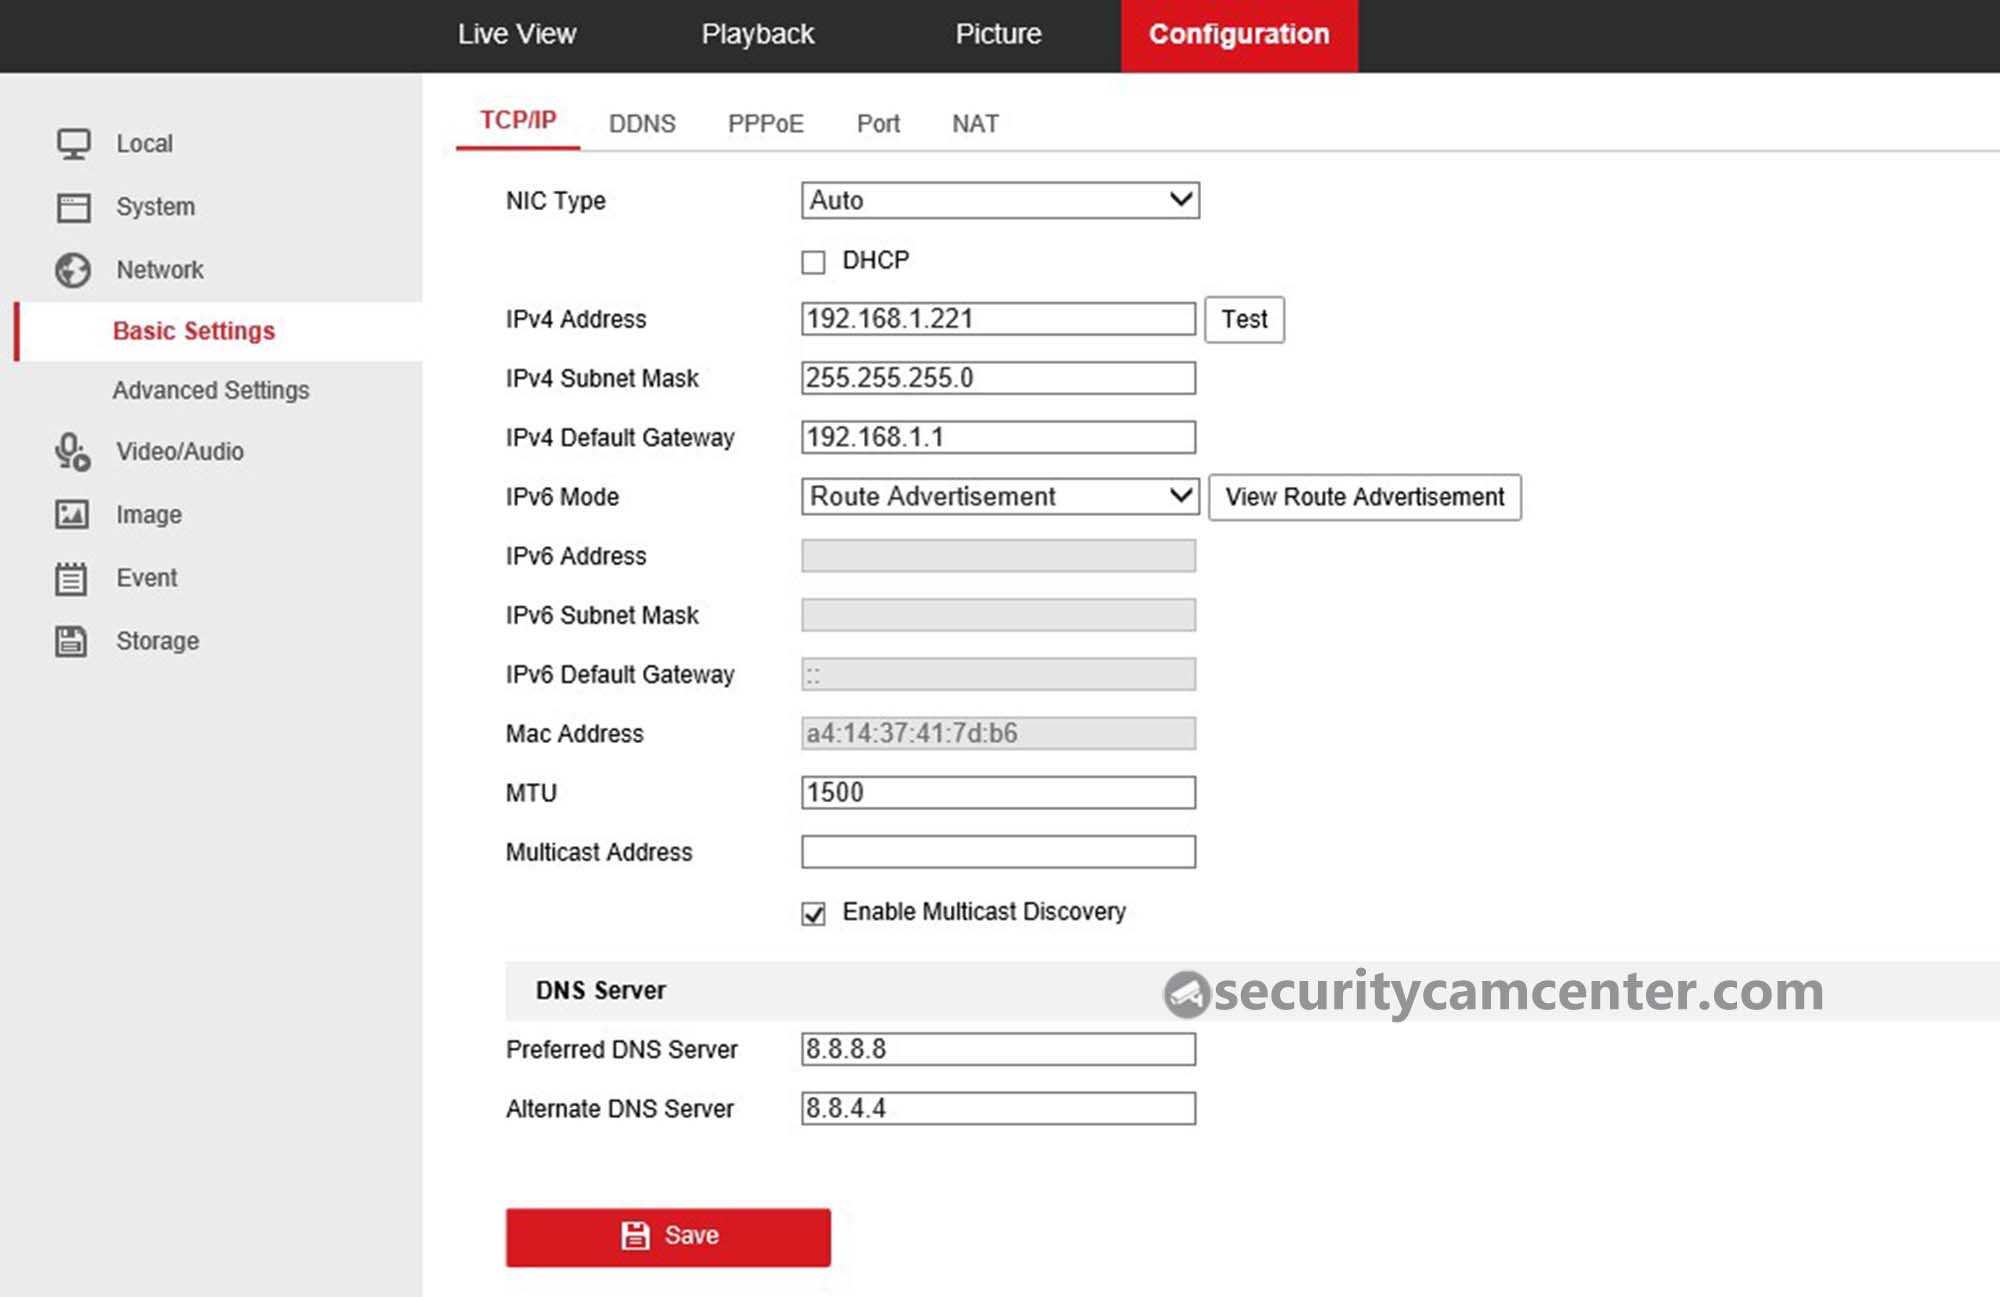
Access the camera via web browser by typing the IP on the URL bar (IE or Mozilla Firefox ESR only). On the Network > Basic Settings you can see the TCP/IP extended settings. Make sure the gateway is set correctly and we recommend keeping the IP static.
Don’t leave the Preferred DNS/Alternate DNS empty, in our case we’re using Google DNS. You might need to check your router settings to get the right DNS.
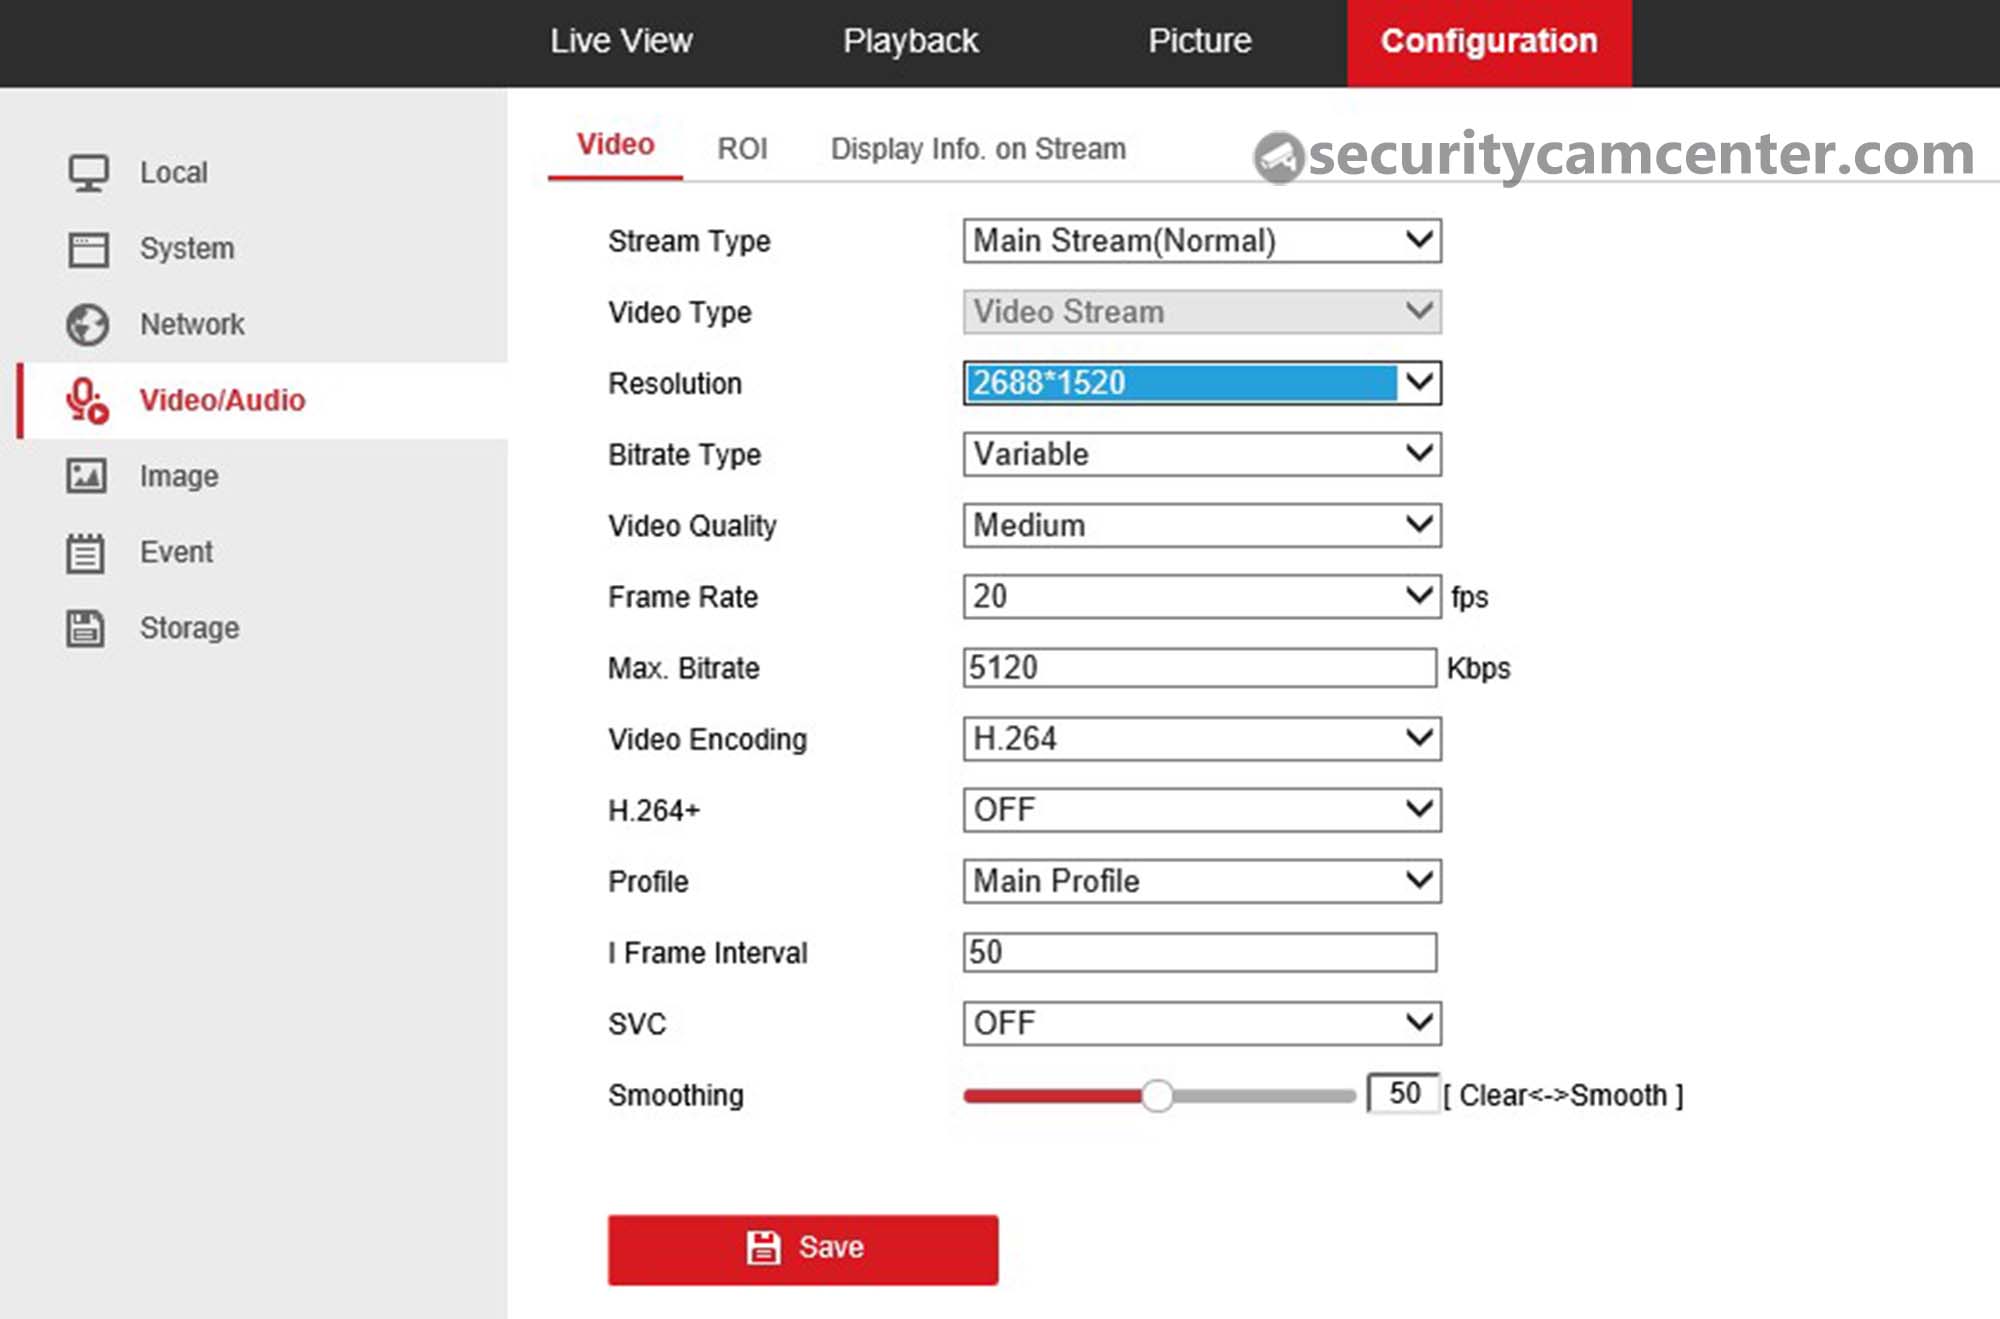
On the Video&Audio (no audio capabilities on this camera) section can set the resolution, frame rate (up to 20fps for 4MP), or bitrate. You can set it to 1080P at 30fps if you wish, but it’s better to get all pixels possible so all images shown in this article are on 4MP.
Set the H264+ ON if you want to save more space on the hard drive without degrading the picture quality. Compared to H.264, H.264+ reduces storage by up to 50% with the same maximum bitrate in most scenes.
The next thing you may want to do is set the time. Select the correct time zone, in our case for New York it’s -05:00. It’s recommended to check the NTP and use the Windows service to update the correct time on the camera.

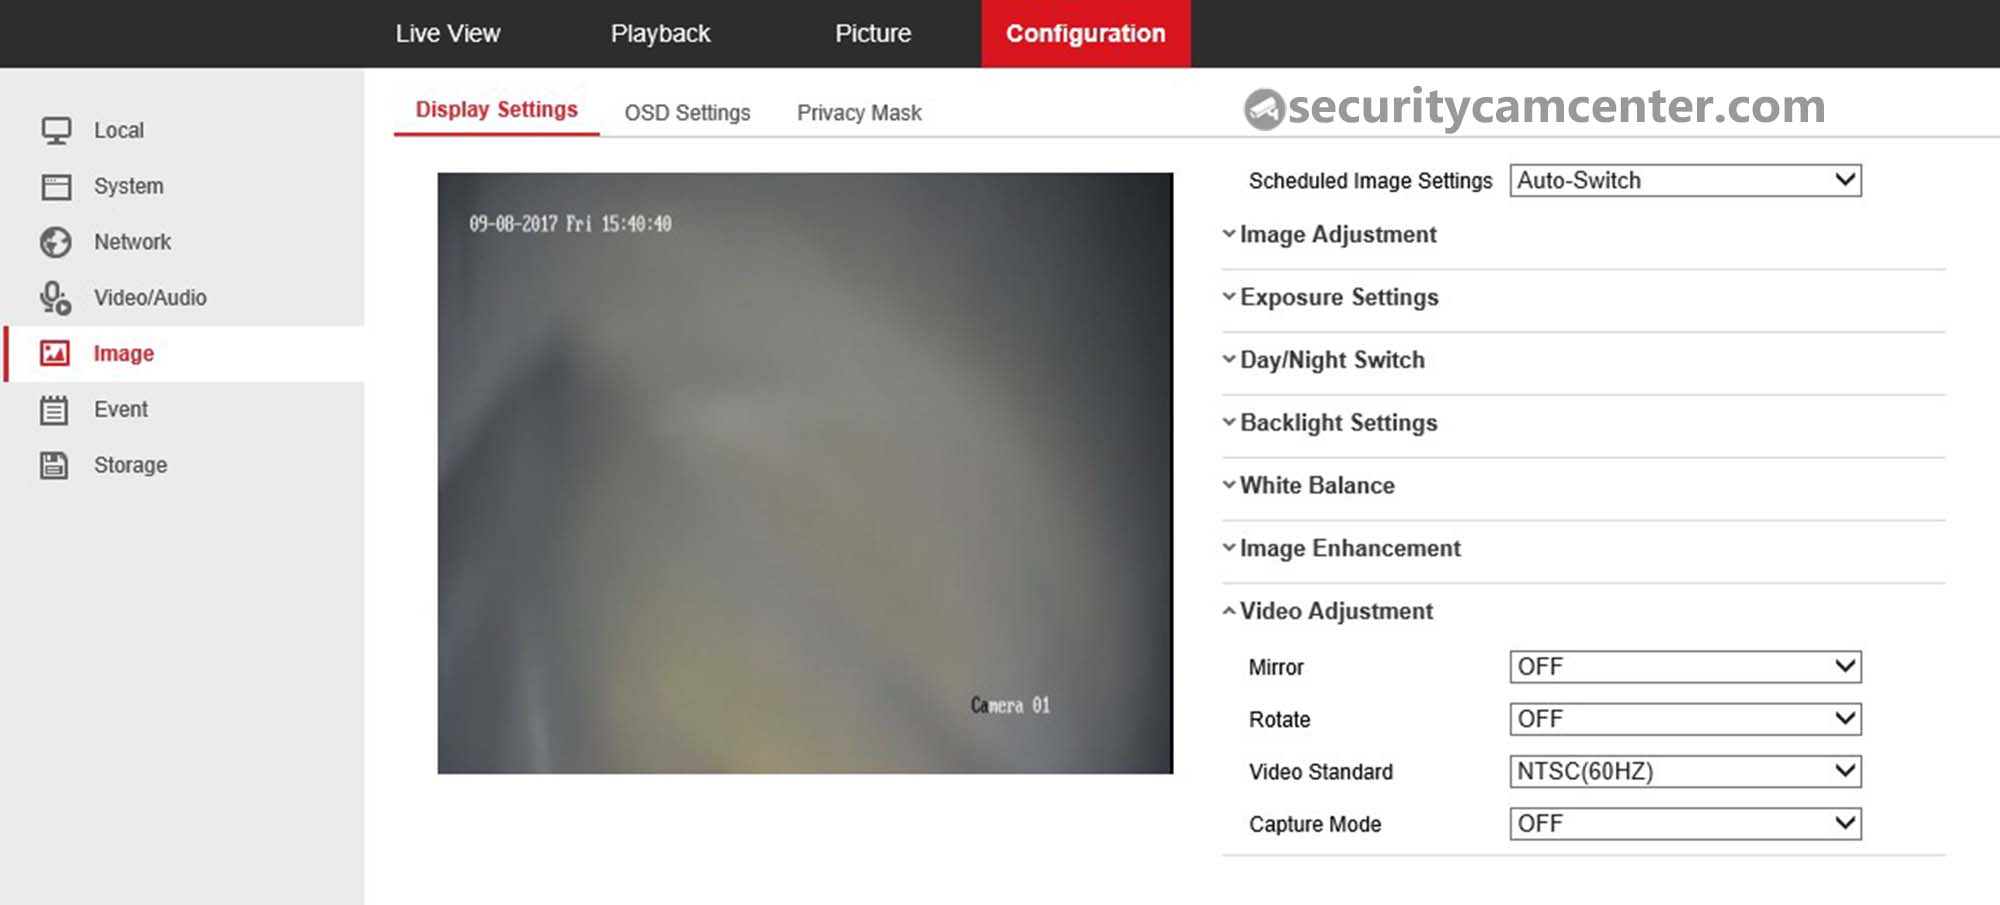
On the Image > Display settings you can control and modify all the image-related settings. The first one is Image Adjustment and that’s where you tweak how the image looks like brightness, saturation, hue, sharpness, and such. The next sub-menu is for Exposure Settings.
We set the maximum exposure to 1/30th. Iris Mode is irrelevant as this is a fixed iris model. WDR is set under the Backlight Settings option. WDR worked very well as it did on other Hikvision cameras.

The Video Adjustment sub-menu is also an important menu to visit. This is where you set up if your country uses PAL or NTSC (USA) standard. You set the Video Standard to 60hz for NTSC and 50hz for PAL.
It will work either way, but 60Hz allows you to use 30fps and multiples of that and 50hz has a maximum of 25fps and multiples of that. Also, you can rotate the image 90 degrees.
This allows you, for example, to see an image as 1080 x 1980 instead of 1980 x 1080. Very useful say inside yards of your home to capture a long narrow area or indoors in a long corridor.
Daytime and Nighttime picture quality
As you can see below, the daytime picture quality is really good: clear, colorful, and sharp. The camera supports the WDR, if your subject is between the camera and the sun then you can enable this feature to avoid the sun blinding. At 20 fps at 4MP, the picture runs smoothly and naturally.
This model also incorporates Hikvision’s EXIR infrared array technology to provide industry-leading illumination in any low- or zero-light environment.
Benefiting from an advanced, highly efficient light source that provides up to 30% more illumination efficiency compared to other LEDs and a revolutionary rectangular lens for uniform scene illumination and seamless HD formatting, Hikvision’s EXIR cameras deliver the most advanced levels of night-time surveillance available on the market today.
I’m very happy with the night time picture quality of this camera and I’m getting positive feedback from all the setups I did. The IR block is separate from the camera avoids any reflection or any type of bleeding on the picture. Check the below footage to get an idea of how the camera performs at night time.
Conclusion
This Hikvision 4MP DS-2CD2342WD-I turret/eyeball camera is small and has such great clarity, low light performance, good color accuracy. The EXIR being separate from the camera’s eye provides a non-bleeding clear image during the night time. The shape of the camera makes it easy to install/handle and at the same time blends well with the environment.
The camera comes in three different lens sizes: 2.8mm, 4mm, and 6mm, offering angles from wide to narrow, perfect for most of the jobs. The Hikvison DS-2CD2342WD-I is definitely one of the best in the market. If you need a complete CCTV system, check our guide of Best IP Camera Systems.