The error message “Live View Failed” shows when you try to view the live stream of your Hikvision camera via a web browser. If you see this message, we have a solution for you.

The problem with Hikvision live view not working is related to a plugin issue between the camera and the browser. Moreover, different camera models and different browsers require plugins that may not be compatible with each other.
The solution is complex, but it comes down to uninstalling the old plugin, installing the one that the camera (or NVR, DVR) requires, and keeping all the devices and apps updated. In this guide, we will go through this problem and you’ll find a way to make the live view show up on the screen.
How to fix the Hikvision Live View Failed issues
As we mentioned, this error message indicates that the plugin necessary to display the video feed is incompatible with the browser, or it’s not even installed at all.
Usually, anytime you access the system (camera, DVR, NVR) through the browser, you’ll get prompted to install the plugin (and “Allow” it to run). Sometimes the prompt doesn’t show up or it will be installed incorrectly.
Uninstall the plugin and install it again
Each device requires its own version of the plugin, if you have multiple NVRs or cameras, it may happen that the plugin may work for one device but not work for the rest. The first thing you should do is uninstall the currently installed plugin.
Open up the Control Panel of your computer and go to “Uninstall or change a program”. Locate the Hikvision web plugin which is called “USSC web components”, right-click, and hit Uninstall. Once it is done, another prompt shows up and you need to click “Allow”.

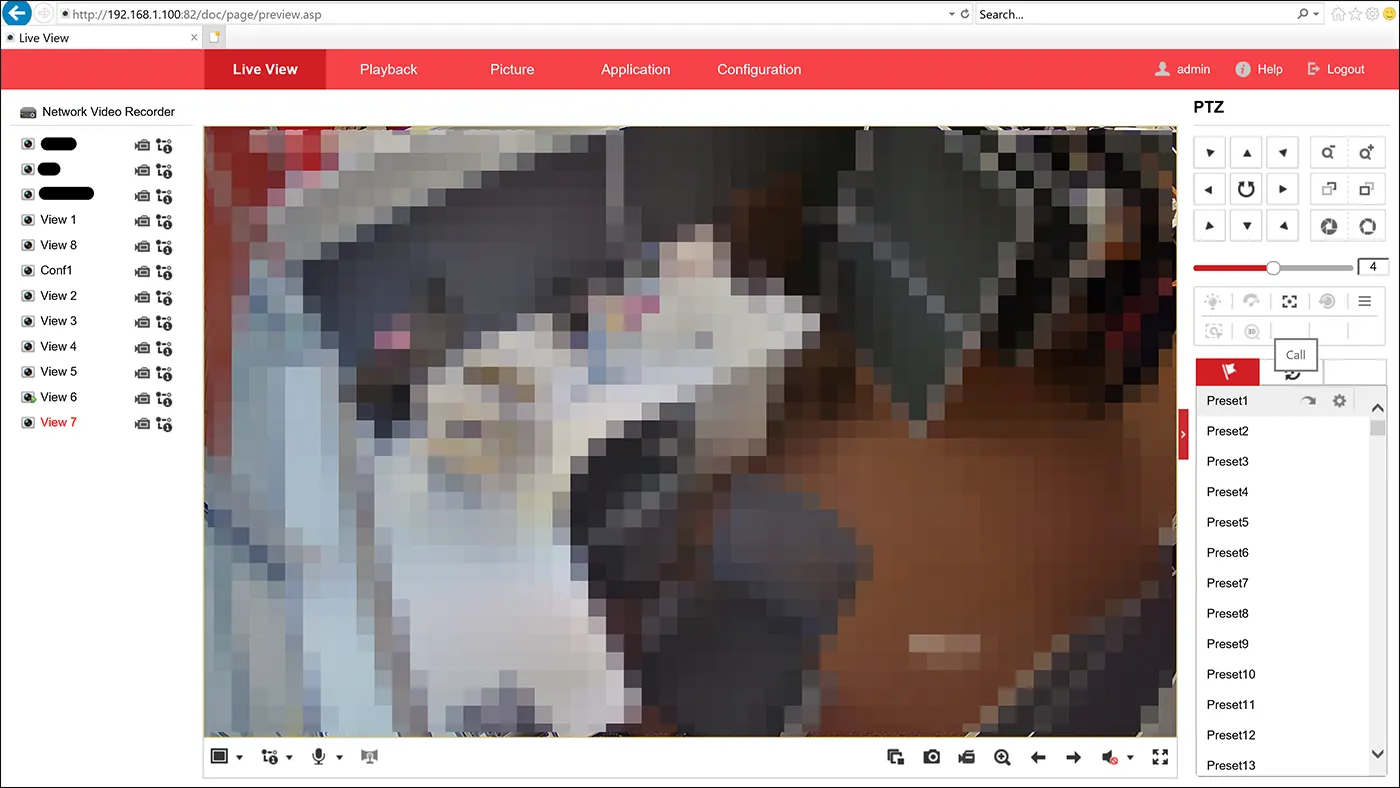
Then access the camera or system again through the browser and when prompted re-install the plugin (as shown in the picture below).

In this case, we are using Internet Explorer which has been discontinued. For Microsoft Edge or Google chrome, check these guides:
- How to view Hikvision cameras or NVR on Google Chrome
- How to use Edge Browser with IE mode for Hikvision devices
When the plugin is installed, access the NVR again and try to see the live view (or press F5 to reload the screen). Normally, the Live View Failed won’t show up again and you will be able to see the cameras.
Update the firmware on Hikvision devices
Sometimes the live view fails because the firmware on the Hikvision IP camera, DVR, or NVR is old and needs to be updated. Actually, the plugin is downloaded from the device and if the firmware is outdated, then the plugin’s version will be old as well and most likely not compatible with your browser’s version.
Open the camera menu via web browser and click on Configuration > Maintenance > Upgrade & Maintenance and then click the Upgrade tab.

Locate the firmware in your computer and upgrade the device and this will solve the problem. Please make sure you have the correct firmware, otherwise, you may end up damaging the device.
If you’re not sure, contact your seller/dealer or even Hikvision USA and ask them to send out the right firmware version.
Use the Chrome IE Tab extension
If for some reason you can’t upgrade your device (especially if you’re using an OEM product), then there’s another way to access the camera. You need to use Google Chrome and an extension called IE Tabs (more details are shared on the link in the intro of this guide).
Note: OEM devices are units sold not directly from Hivkison but from other third-party brands. They don’t have the Hikvision logo or the original model number. The OEMs are usually cheaper but are not supported by Hikvsion USA. The seller/dealer has to support them.
So, run Google Chrome and install the IE Tab extension which allows your browser to use the Internet Explorer engine (from which you can access the video stream regardless).
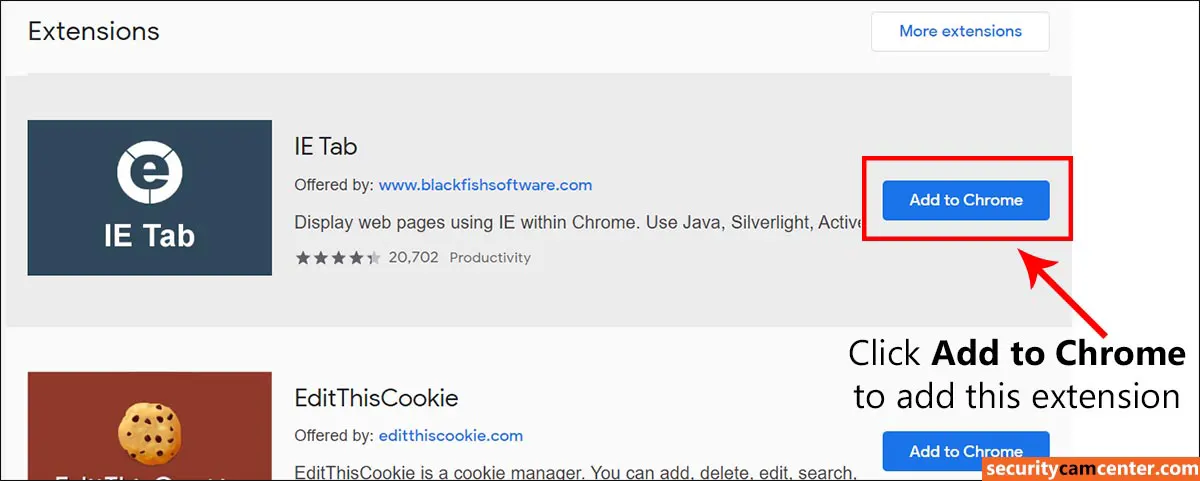
Enable it and then access the camera normally. Enter your credentials and you should be able to see the live view image.

Change the camera protocol
Another reported solution consists of changing the camera’s live view protocol from TCP to UDP.
The difference between these two protocols, the TCP needs to verify the information sent out, while the UDP doesn’t need such confirmation. The TCP creates a more stable connection, but the UDP will show the picture regardless.
Navigate to Configuration > Local and under Live View Parameters, you should see the Protocol option. For testing purposes, make sure the UDP is ticked only (as shown in the screenshot below).
Then Save the settings and go back to Live View to check if there’s any live stream (you may need to restart the browser).

Note that this is not your typical configuration. The protocol should be by default (and recommended) set on TCP mode. If it doesn’t work for you, ensure to go back and reverse the settings.
Use the iVMS-4200 software
If nothing works, then you may access your system using the iVMS-4200 which is camera management software created and maintained by Hikvision.
You can add any standalone IP camera, NVR, or DVR using the IP address and credentials and the system allows the user to see the live view, playback, and adjust other settings.
This is a program that installs on your laptop or computer and you don’t have to worry about plugins, browsers, or compatibility issues. This guide walks you through the software How To Configure Hikvision iVMS-4200 Camera Management Software.
Contact your seller
Lastly, if nothing worked for you, then you should contact your seller or dealer and ask for support. If the unit is made by Hikvision (with logo), then you may reach out to Hikvision USA and they’ll provide further assistance.

There is an easy fix for not being able to stream your Hikvision camera direct on your browser.
Various CCTV security “experts” recommend using work arounds such as browser plugin extensions, or tier 3 browsers. Anyone with IT security experience will tell you this is a really bad idea. If this is your recommended solution, then maybe Hikvision isn’t the right CCTV product for you.
Solution:
Firstly, don’t connect your camera to the Hikvision DVR port with Plug and Play as the protocol. This is fine for a standalone solution where the monitor is connected to the DVR, but it’s not suitable for a network where you want to directly manage and stream from your camera.
Switch your camera network settings to auto DHCP or assign it a fixed IP address to match your network IP schema.
Connect your camera through a network switch. You don’t need to be an IT guru, even a basic unmanaged switch will do the job. Any IP config tweaks are done via your router and camera network settings (not the switch). If your Hikvision camera is POE then use a POE switch, again, a basic unmanaged switch will do the job. If you can’t work this bit out, put it all back in the box… you probably shouldn’t be installing networked equipment.
You’ll be able to connect direct to your camera via it’s IP address, and streaming of footage will work perfectly.
Don’t forget to set a user and password, and encryption key on your camera video stream, and configure this in the browser client.
Finally, I am not suggesting I think the Hikvision design is perfect, this problem should not exist in the first place. Take your grievances to Hikvision, not me. Meanwhile, your work around is above, and please don’t shoot the messenger 🙂