This guide shows how to set email notifications on a Hikvision DVR, NVR, or IP camera using a Gmail account. These email notifications are received once an event has occurred or when the motion is triggered.
If you’d like to get email alerts, we recommend using a Gmail account since it’s free, secure, widespread, and easy to configure. You can use other email providers as well (such as Outlook, Yahoo, etc.), the steps are similar.
NOTE: As of May 30th, 2022 setting your Google Mail Account to allow less secure access is no longer allowed by Google. However, by using a dedicated password for the NVR, you still may use Gmail to receive notifications from the recorder.
Hikvision: How to send notifications using a Gmail account
We assume you already have a Gmail account, if not you can create one for free on gmail.com.
These are the steps that need to be done:
- Set up the Gmail account (or another email address of your choice)
- Add the email setting on the NVR, DVR, or IP camera
- Set up the motion detection (by default, it’s enabled)
- Enable the email alerts (on your device’s settings).
Settings on the Gmail account
The first thing you have to do is to ensure that your Gmail account is configured to allow “less secure apps” to send out emails through your account. These less secure “apps” are actually your NVR, DVR, or IP camera.
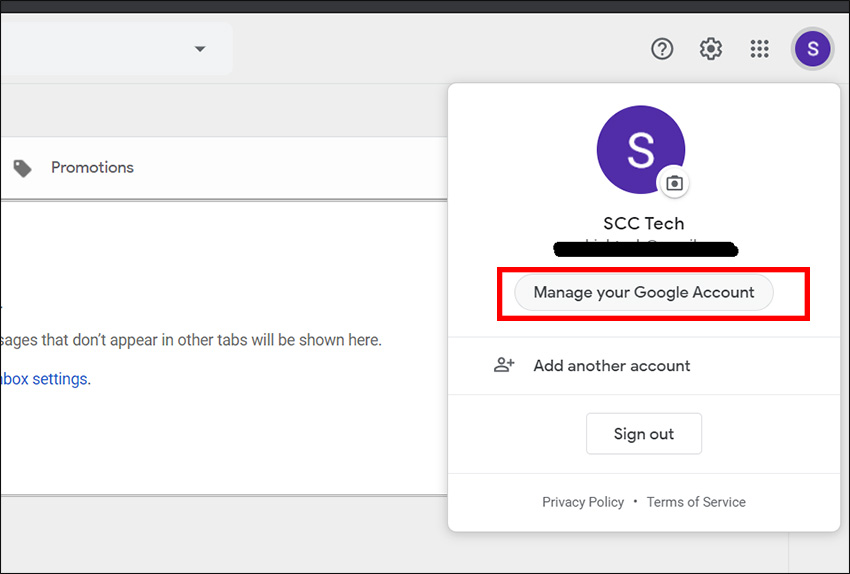
Log in to the Gmail account with your username and password. Then click the account icon on the top right side of the screen.
 Then click the “Manage my Google account” button.
 After that go to the “Security” section on the left side.
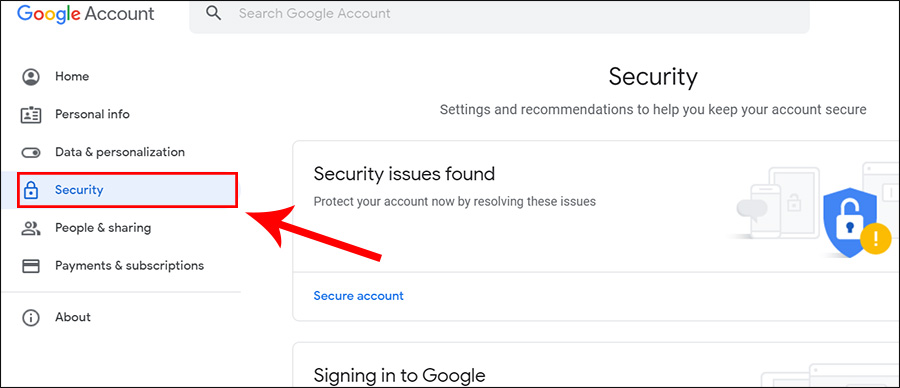 Make sure that the 2-Step Verification is turned ON. Click the App Passwords.

On the next screen, you need to log in by retyping your Gmail password.

Then you should see the screen shown below. If you don’t see it, you need to go back and ensure that the two-step verification is enabled.
Now we need to create a unique password for NVR use only. Basically, Gmail will create a virtual account for the recorder that can be used with the two-step verification enabled. Under Select app, select Other, and then create a name for the account (in this example, we named it “test”). Then hit Generate.

As you can see Gmail generated a new password for the recorder. This is the password that you will use when doing the setting for the email notifications on the NVR, instead of using Gmail’s actual password. You may need to write it down or save it somehow for future use. Click Done, once the password is saved.

Adding the Gmail account to a Hikvision device
Once the above steps are done and the password generated, jump into the recorder. Start by logging into your Hikvision NVR, DVR, or IP camera via the web interface. Once the device has been accessed using your username and password, go to the Configuration section. Click on the Network on the left and then Basic Settings.
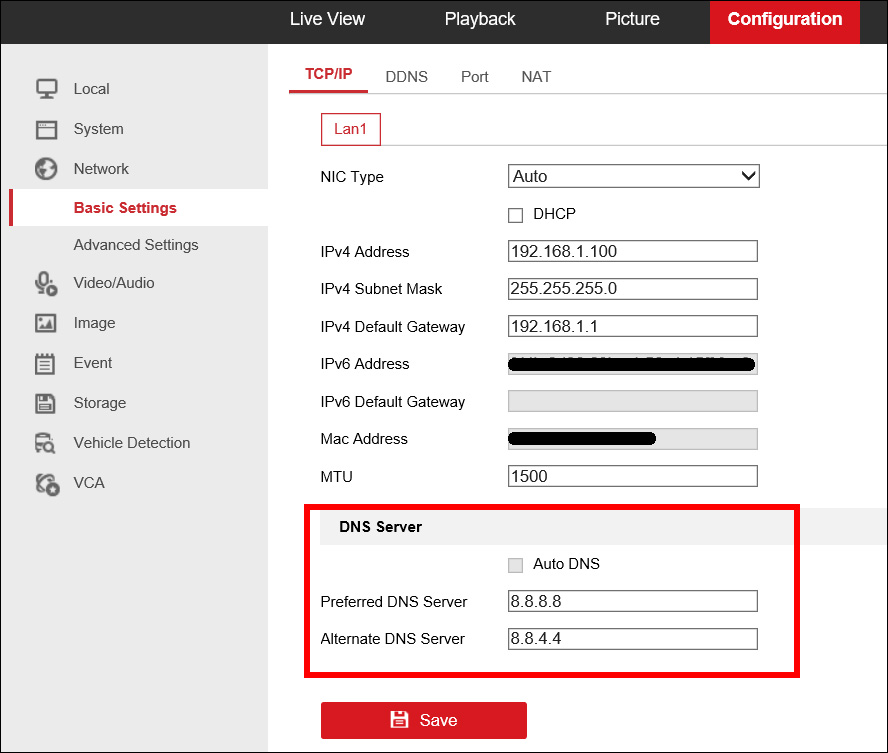 Here you need to make sure these settings are added correctly:
- Preferred DNS: 8.8.8.8
- Alternate DNS: 8.8.4.4
For the next step, under the Network, go to Advanced Settings. Click Email.
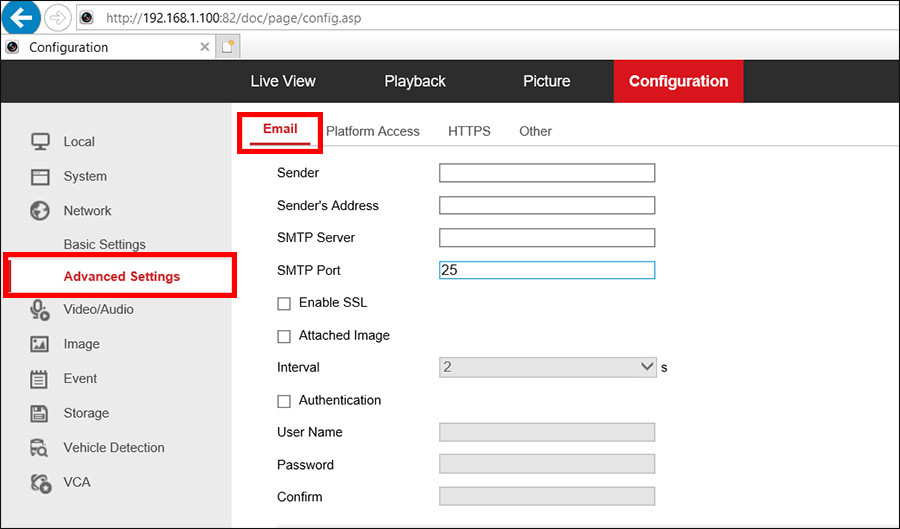 In this section, you need to fill out Gmail’s information.
 Add your information carefully.
- Sender: The sender’s name (which can be anything)
- Sender Address: This is the sender’s email address. We will use the same address for the sender and the receiver. Proven to work properly.
- SMTP server: Gmail’s server port which is smtp.gmail.com
- SMTP port: Gmail’s SMTP port which is by default 587
Make sure all the 3 boxes are checked:
- Enable SSL: in some NVRs you may see STARTTLS, if you do, tick that as well
- Attached image: your DVR.NVR will send out screenshots from the camera
- Interval: by default the NVR will send out 3 photos per camera, this is the time between photos. Use 2-3 seconds.
- Authentication: tick this box too.
Next, add Gmail’s credentials:
- User name: This will be the same as the sender’s Gmail address
- Password: This is the password generated in the previous step. This is not Gmail’s actual password, but the special password generated for a third-party app.
- Confirm: retype the password.
In the last section add:
- Receiver’s name: Can be anything, for example, “My NVR”.
- Receiver’s Address: use the same Gmail address again. You can add up to three recipients in total.
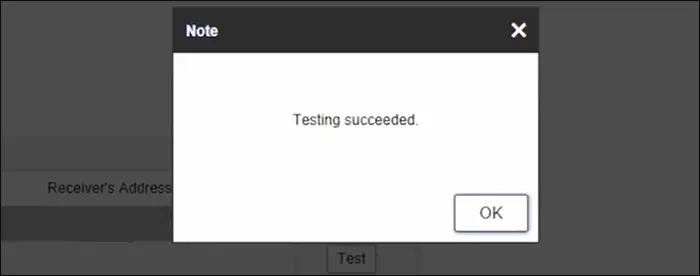
Once finished, click TEST to find out if the connection is established successfully. If not, go over each step again and make sure there are no mistakes. (Remember to SAVE the settings).
The last one, go to the Event section on the NVR and configure the events for each camera. Make sure that on the “Linkage Method” the “Send Email” option is ticked for each camera and event.
 Make some motion in front of the camera to see if you’re getting email notifications from your Hikvision device.
Enabling the Motion Detection
You need to set up motion detection on your device in order to get emails when the parameters (of the motion) are triggered. You can do such settings either through the web browser or directly via the NVR’s interface.
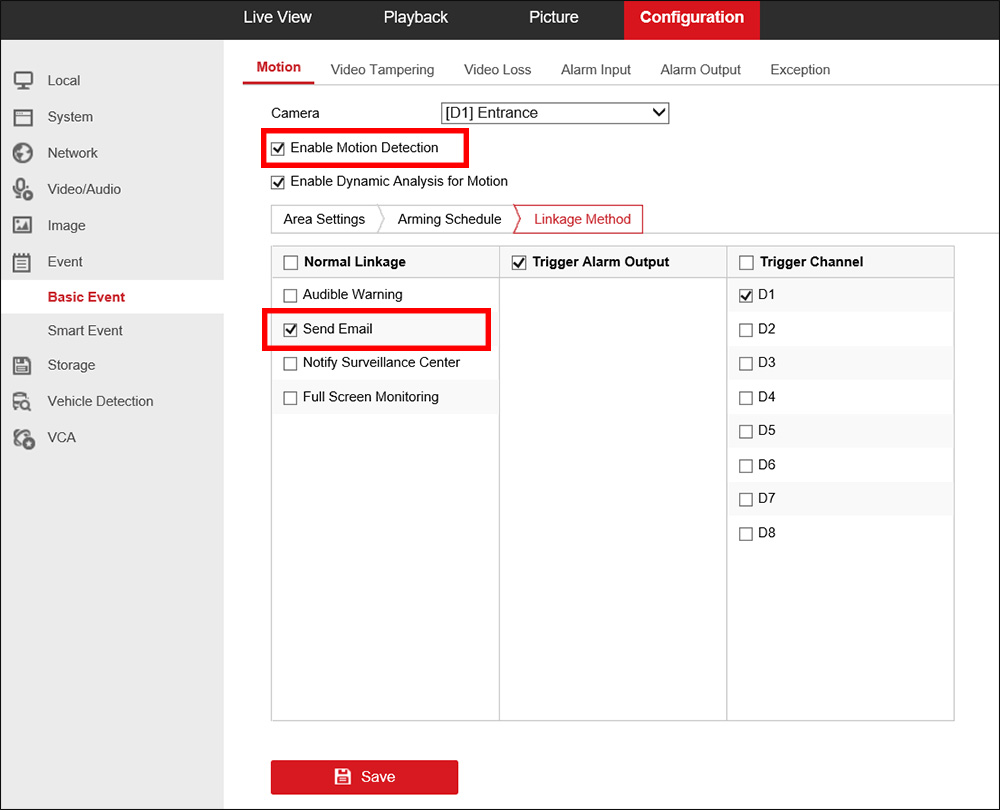
Go to Configuration > Event> Basic Event and then Motion tab. Here you enable motion detection, at the same time you can modify the area you need to be covered and the sensitivity. If you have a recorder, you need to do these settings for each camera.

Enable the email alerts
Make sure the email alerts are turned on and the arming schedule is correct. Go to Linkage Method and check the send email option, as shown in the picture below.

On the Arming Schedule, you can set the schedule when you need the alerts enabled. Let’s say you need these alerts only during a certain time frame.
In this sample, we set the schedule 8AM-8PM. So only during this time frame, we will get alerts.

Pretty much that’s it. Make some moves in front of the selected camera and see if you get the email alerts on your email address.

Hello my friend, im trying to do this on HikCentral Software, i did everything explained here, but get ERROR 374 when i clic TEST-
Thank you for a wonderful explanation including the photos. Everything worked especially when you deal with old models of Hik Vision NVRs. Appreciate it a lot.