Setting up your Hikvision NVR (or DVR) to record only on motion detection can save a lot of hard drive space and more importantly it eliminates the hassle of having to view a whole entire day’s worth of recording to see if an incident happened.
Imagine if you suspect an incident happened and you need to sit down all day there checking all the footage. If it was set up for motion recording, you’ll know exactly which timeframe the motion recording activated.
In this guide, we will show how to do the motion recording settings on a Hikvision NVR via the local interface (directly via the NVR) or through the web browser.
Before we begin, you need to know that the motion detection recordings work only if you have a hard drive installed in your NVR (you need to use a surveillance rated hard drive).
Also, the steps shown here only work for Hikvision cameras. Any 3rd party (ONVIF) camera’s motion detection settings should be configured through their individual web interface.
The Hikvision CCTV systems have a very reliable motion detection algorithm in which you can increase or decrease the sensitivity to meet your particular needs.
Also, you can block out certain areas of the picture that have a high volume of daily traffic in which you do not want the NVR to be triggered to record because of motion in that area (such as a busy street and or a large tree).
All that being said, we need to warn you that motion detection recording may not be for every camera and or CCTV system. For some outdoor scenarios, you may want to avoid recording on motion because you will have a high volume of false alarms.
Also, there is a slim chance that the NVR may not pick up on a particular motion event due to the fact that the algorithm may not be triggered if the motion portion is insignificant.
The chances of this happening in real life are very slim, moreover, the NVR has a few motion settings that you can adjust to get the best out of your CCTV system.
What are False Triggers
A false alarm occurs when your CCTV security system software thinks that there’s a motion going on but in fact the motion is not significant for your security purposes.
Below is a list of False Triggers that you need to keep in mind when setting up the motion detection feature. If these aspects worry you at all, then we recommend recording 24/7 as opposed to recording on motion.
- Trees and leaves
- Weather events such as rain, snow, sleet, etc.
- Wind blowing the camera around.
- Insects, spiders, or flyers.
- A noisy picture due to low light (most common).
Setting up motion detection via the NVR interface
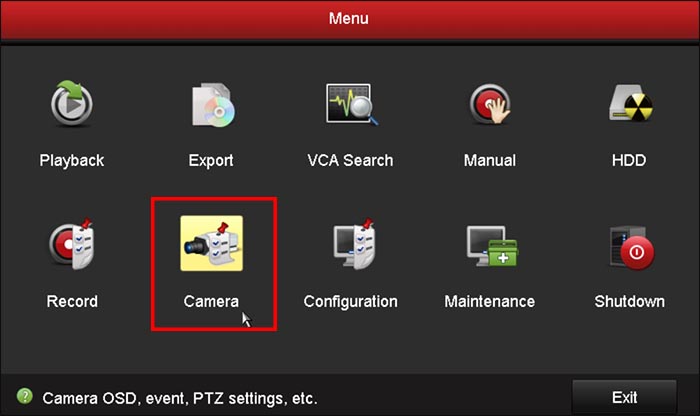
Step 1. Right click and go to the Main Menu. Then go to Camera > Motion.
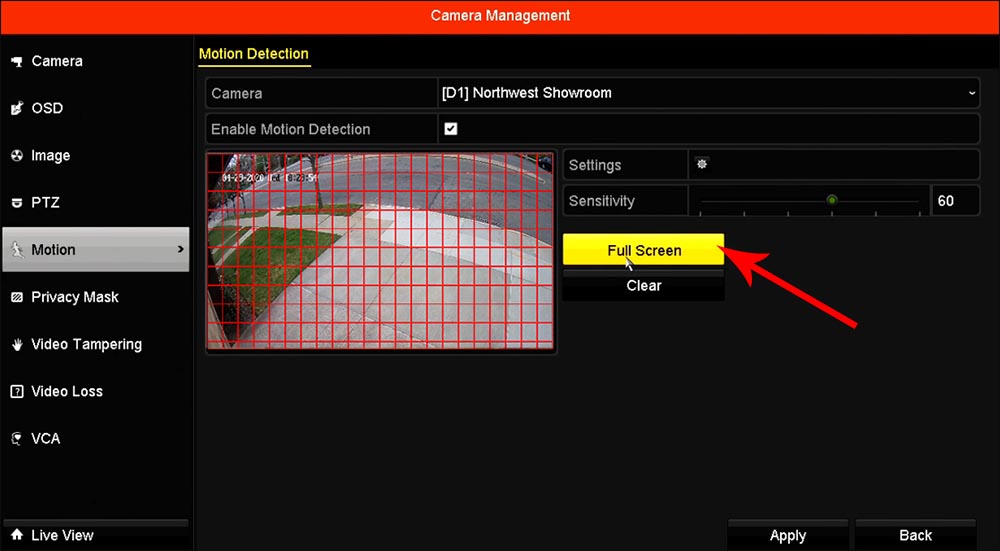
 Step 2. Select the Channel that you would like to detect motion on.

Step 3. Make sure to Enable Motion Detection by ticking the box.
 Step 4. Adjust your sensitivity and zone settings to your liking. Note that active motion detection regions are indicated by the red squares. Click Apply to save the settings.
Setting up motion detection via the web interface
Step 1. Type the IP address of your NVR on the url address box of your browser (use Internet Explorer). If you don’t know the IP address to your NVR you can find it using the SADP tool or by checking the IP address directly on your NVR (go to Main Menu > Configuration > Network).
Step 2. In the live view screen click the Configuration tab at the top. On the left side, click on Event. Go to to Basic Event. Select the camera you would like to enable motion detection on by choosing it from the drop down menu at the top. Next, enable motion detection by checking the Enable Motion Detection box.

There will be three settings below Enable Motion Detection that can be changed accordingly.
-
- Area Settings: Here you can draw an area on the camera’s Live View where Motion Detection will be triggered. To do this click the “Draw Area” button, when done drawing click the button again.
- Arming Schedule: Here you can set to when motion detection is triggered (armed).
- Linkage Method: What to send out when the motion is triggered.
- Audible Warning: NVR will make a beeping sound that indicates that there is motion detection.
- Send Email: Notification will get sent to your email.
- Notify Surveillance Center: Sends a push notification to the iVMS-4500 smartphone app.
- Full Screen Monitoring: When Motion detection is triggered the camera will display in full screen allowing you to see what is triggering the alarm.
After configurations and the adjustments are done, click on the Save button.
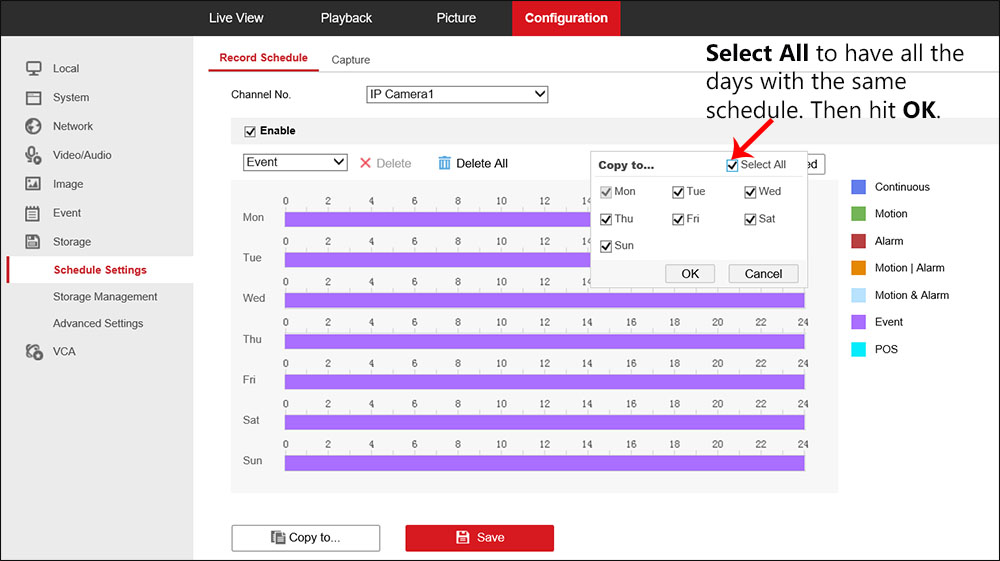
Step 2. After Motion Detection has been enabled on the camera select Storage on the left. In the prompts below, change the Channel No., and change from Continuous to Event.
 Step 3. After setting Event recording for Monday, move your mouse cursor to the end of the yellow bar on the right and a green copy icon will appear.
Click on that icon and click the Select All box to copy the event recording to each day of the week, then click OK to exit out of the menu. Basically, the motion will be armed all 24/7.
 Don’t forget to click Save at the bottom to apply the settings.
