Hikvison IP security cameras offer an option to have the captured snapshots uploaded to a FTP server. Basically, you can set the Hikvision standalone camera to have the captured motion detection snapshot saved on a FTP server.
To achieve this, you need to enable the FTP function on the camera and adjust the right settings. This guide shows how to upload the snapshots to a FTP server on a Hikvision IP camera. The FTP server can be on the cloud or, if you have built it, on your own computer.
Note: these instructions are valid for a standalone Hikvision IP camera. Technically, it works the same way for a Hikvision NVR, if the NVR supports the FTP function. Consult the specification sheet to make sure the FTP feature is supported.
Hikvision camera: how to upload the snapshots to the FTP server
First of all, power up the Hikvison IP camera by using a 12VDC power adapter, or by hooking up the camera to a PoE switch and have it powered by the PoE method.
Once the camera is powered on, connect the camera to the router via an Ethernet cable. If the camera is connected to a switch, then connect the switch to the router
Open up the computer/laptop and run the SADP tool to activate the camera and locate its IP address. If you don’t have the SADP tool, download it from this guide (it includes instructions).
As you can see on the picture below, the Status should be Active, the DHCP enabled and also you can see the camera’s IP address as well.
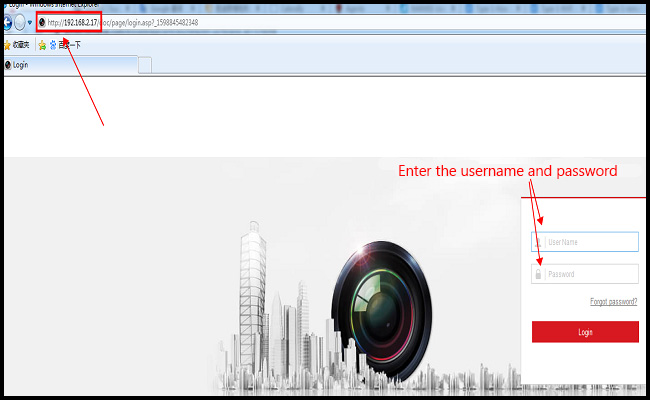
 Open the Internet Explorer web browser and type the IP address of the camera to log into the web interface of the camera.
 Navigate to Configuration > Network > Advanced > FTP to input the FTP server’s parameters as shown below picture:
- Server Address: FTP server IP address
- Port: port of the FTP server. Usually it’s port 21.
- User Name: FTP server username
- Password: FTP server password
- Confirm: Confirm the FTP server password
- Directory Structure: The path you want to upload the captures
(Note: please don’t input the /, :, \, : into the path, it will make it invalid).
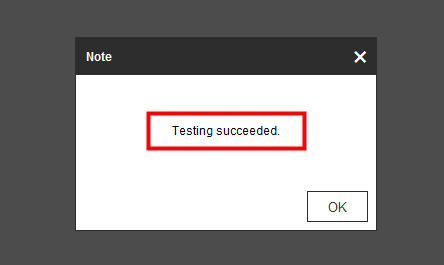
 After you entered the FTP server parameters correctly, click the Test button. If the FTP server works, the test will be successful (message: Testing succeeded). If it fails, recheck the typed parameters and make sure nothing is mistyped.
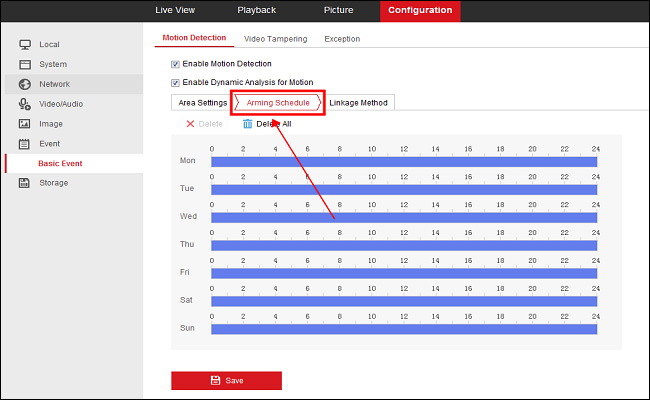
 In the next step, you need to set up the motion detection alarm for the camera. Enable motion detection for the camera > Set up the Arming Schedule > Setup the Linkage Method (as shown in the picture below). Basically in this step you need to make sure that the motion is enabled and the linkage method is ticked.

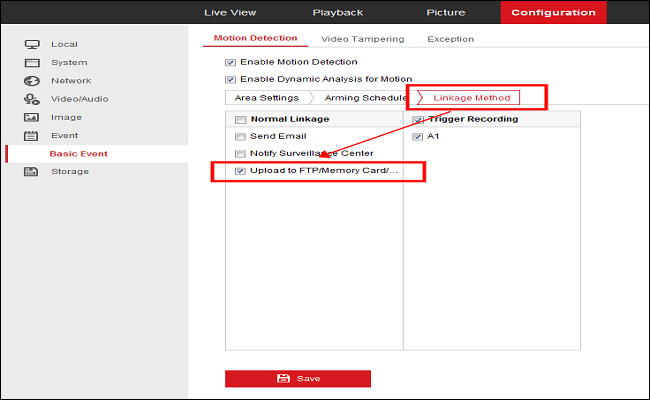
 Make sure the “Upload to FTP” box is ticked (on the Linkage Method tab).
 Next, go to set up the capture schedule for the camera. Navigate to Configuration > storage > Schedule Settings and then Capture tab.
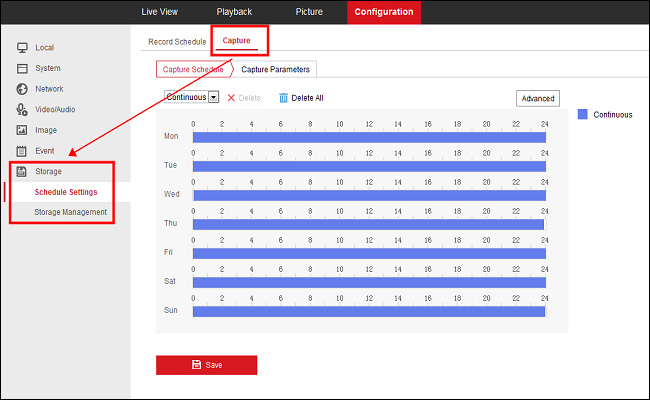 On the Event-Triggered, ensure that the “Enable Event-Triggered Snapshot” is ticked.
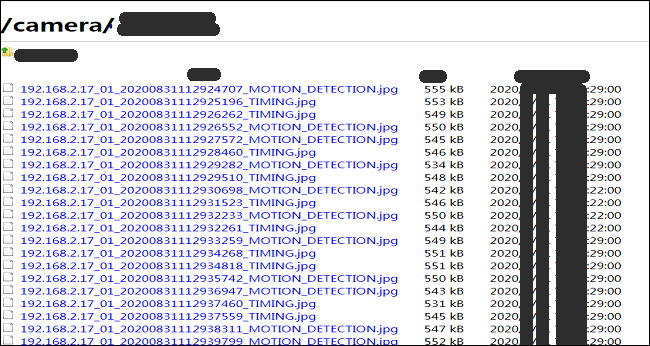
 If all settings are correct, the pictures of the motion detection alarm will be uploaded to the FTP server. An example is shown below.
 If for some reason you are not able to make it work, go back to the FTP settings and make sure all the entered information is correct. Another option is to call or email the Hikvision support team or the reseller/dealer. They are required to provide support for your Hikvision (logo or OEM) security camera.
