In this guide, we will show how to use Wisenet mobile and how to add your Wisenet IP cameras to this app. Once you set up the Wisenet mobile you will be able to see the cameras on your phone, playback, backup, and do other adjustments.
The Wisenet mobile is used for cameras manufactured by Hanwha Techwin’s security network and works on certain Samsung cameras as well. The setup process of Wisenet mobile is quick and intuitive, it can be done in less than 10 minutes.
Set up Wisenet Mobile app
Wisent Mobile App Main Features
Wisenet mobile app allows you to view live video and playback recordings right from your smart devices. You can see the cameras right on the phone no matter where you’re located as long as you have the internet.
The app is available for both iPhone and Android smartphones and it works with SD card IP cameras, Wisenet NVRs and Pentabrid DVRs. Below it’s a list of main features supported by this app.
- Live stream from cameras or NVR
- Playback recordings
- Search by time/events/IVA
- Event push notification
- QR code
- Multi-playback
- Fisheye dewarp
- Add cameras via IP address, DDNS, UID code
- Picture in Picture (PiP)
Download and install Wisenet mobile app
First of all, start by downloading the app. Go to your phone’s App Store and type “wisenet mobile”. Click the “install” button and wait until it’s automatically installed.
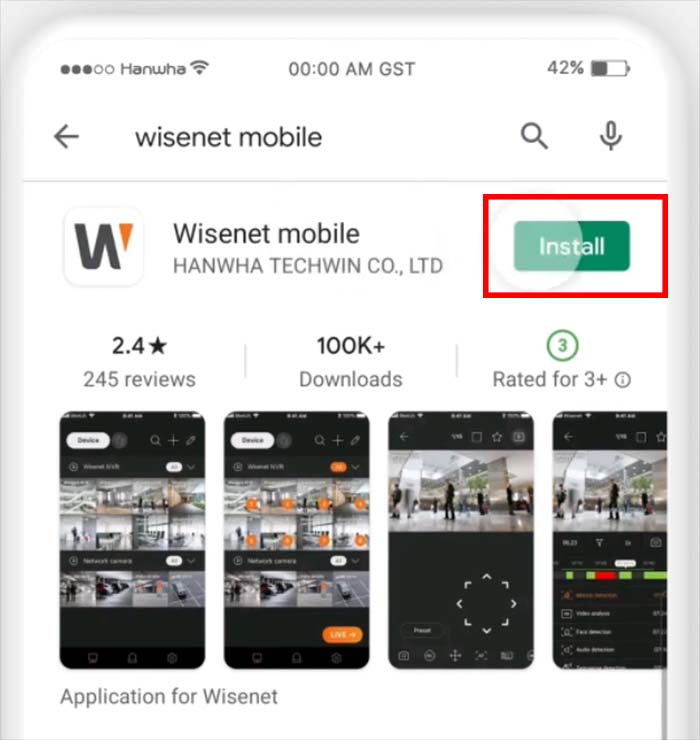 Once the installation is done, you should find the Wisenet mobile icon on the home screen on your smartphone. Click it to run it.
How to add a camera to Wisenet mobile app
Adding a camera to the Wisenet mobile app is pretty easy. Follow the step-by-step instructions below.
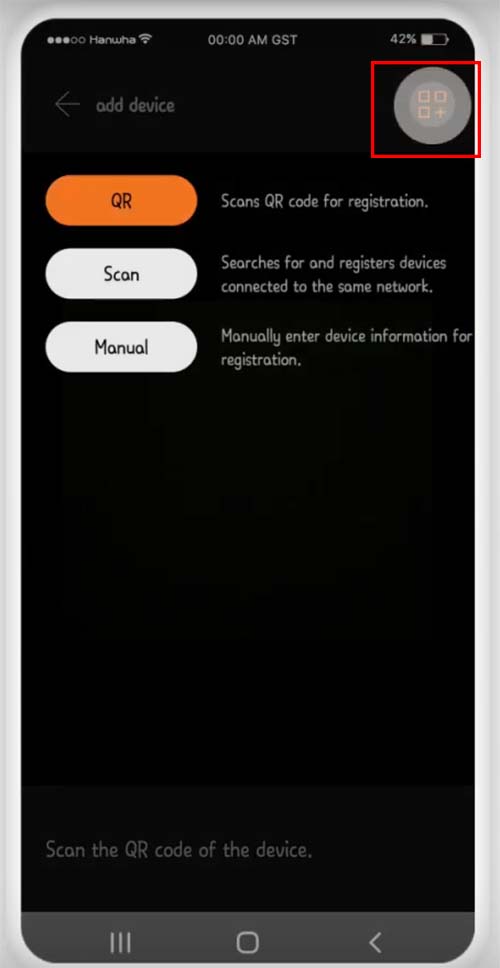
Step 1. Open up the app and click the + button. Click the icon on the right side top corner and select the installation (it looks like a four-split window). Select the installation type.
This can be a QR code, Scan, or Manual. The easy way is to just scan the QR code on the camera’s sticker, point the phone, and scan it.
 Step 2. On the next window, you need to enter a name for the camera/NVR or DVR and then type the username (called Device ID) followed by the password (as seen below).
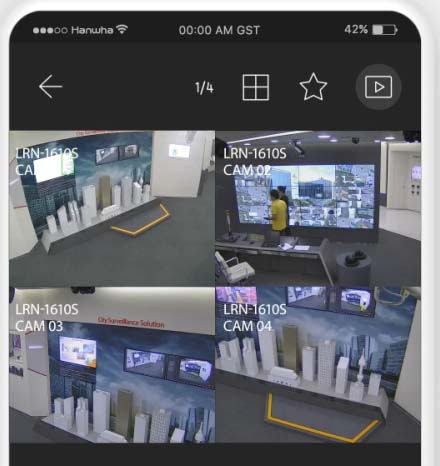
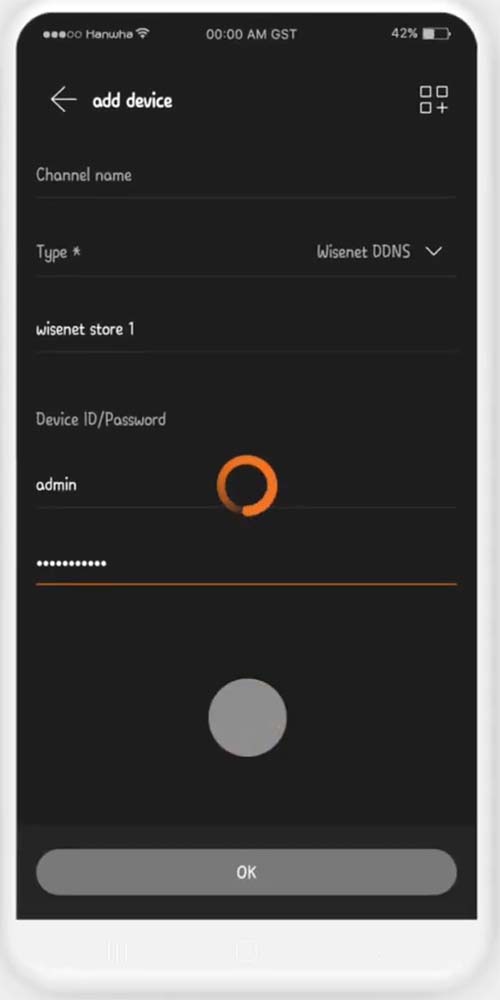 Hit ok once done. If everything is correct you should see all the cameras showing up. As long as you have the internet on the phone (WiFi, 4G, LTE, 5G), no matter where you’re located you will be able to see the cameras and playback as well.
 Apart from scanning the QR code, you can add the information manually. Simply select the “Manual” button and fill out the information on the next window such as the IP address or DDNS hostname, port (default one is 80), and username/password.
Then, if all the entered information is correct, you should see the camera’s live image.
How to Playback on Wisnet mobile app
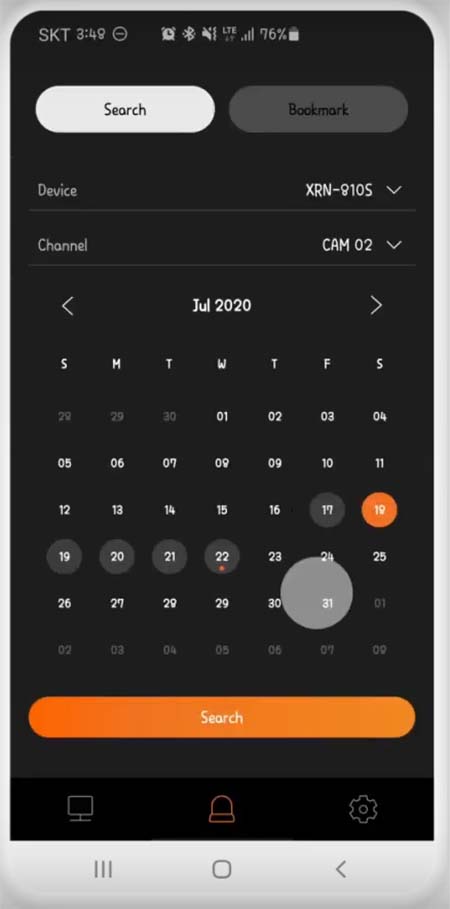
To playback, tap the playback icon and search for the events alarm. On “Channel” you can select one of the available channels (if you’re using an NVR system).
You can find the stored footage for each day and if you find something interesting, click the bookmark icon to save it for easy access.
If you get a push notification for motion alerts, click the notification and the app will automatically playback the video for which you were notified. Additionally, you can expand the playback and get more options from the app.
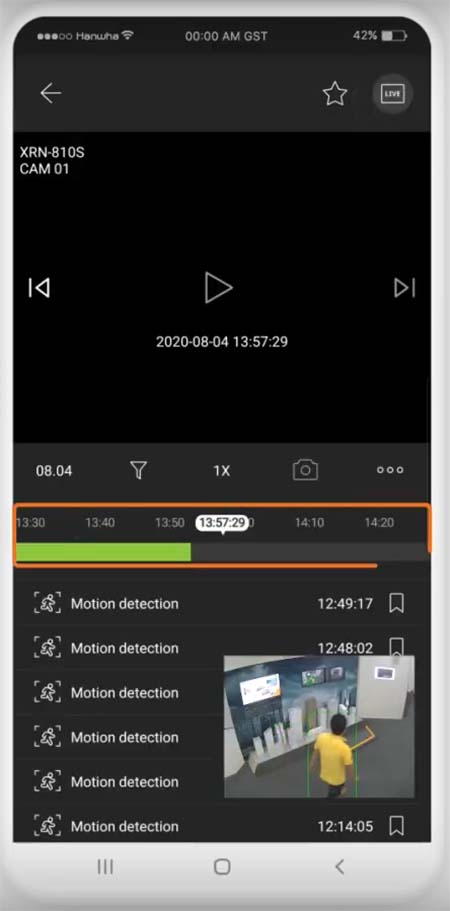 Use the fingers to zoom in, zoom out, or slide the timeline. Or you can click each individual clip one by one. So, that’s all. It’s quite straightforward to set up Wisenet mobile app and it gets even easier if your camera comes with a QR sticker.