The following guide describes the uses of common ports and connections that are used on various NVR or DVR security systems. The availability of ports, their appearance and their functions varies between the manufacturers. However, no matter the brand or the manufacturer, the ports and the connection at the back of a NVR or DVR are universal.
Guide to NVR Ports and Connections
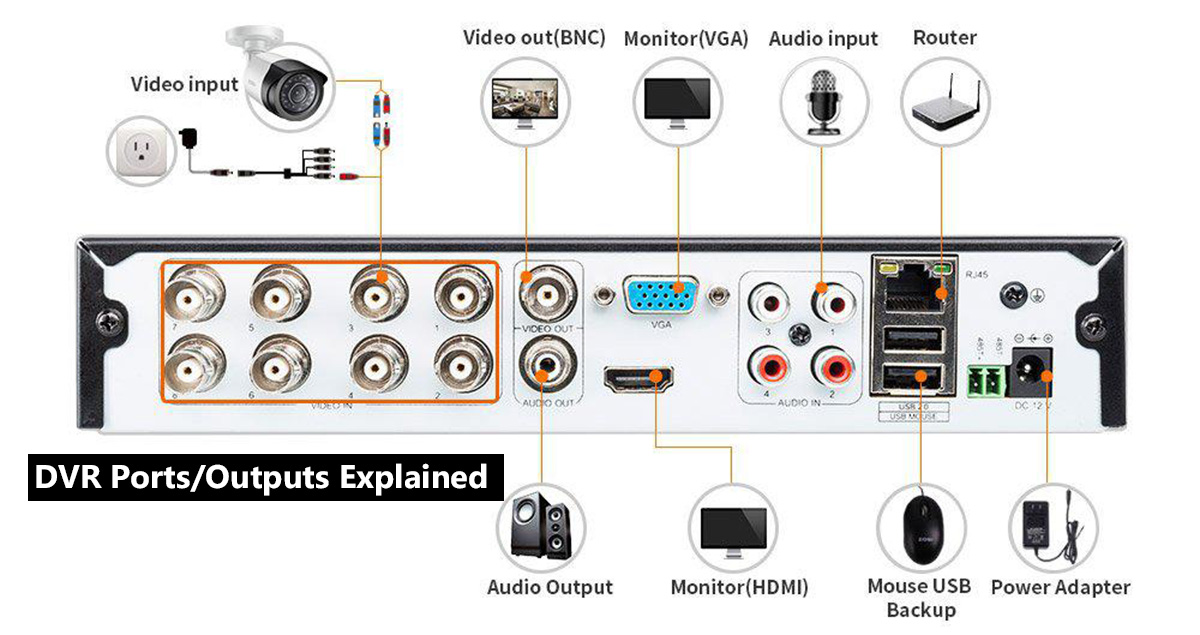
There are many types of NVRs or DVRs on the market under various brand names. Either way, the ports and output/inputs are the same across all the recorders. Below is an example of a NVR. As you can see, this NVR comes with 8 PoE ports to connect the IP cameras and with a HDMI port to connect to it to a smart TV.
 Another example is that a of DVR. As you see below, this type of recorders supports BNC camera which can be CVBS analog or HD-TVI/HD-CVI/AHD HD-over-coax security cameras.
Power / DC 12V Port
 This port is used to connect the male end of a power adapter to provide power to the NVR or DVR. Connect the other end of the power adapter to a power outlet, surge protector, or Uninterruptible Power Supply (UPS). Some recorders will turn on immediately after power is connected, and others use a power switch to turn the machine on or off. It’s recommended to use the power supply that comes with a recorder.
BNC Video Input
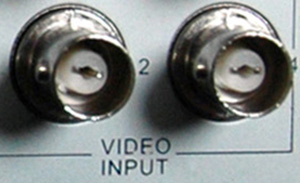 This port is used to connect the video signal from BNC (analog) cameras to the DVR. To connect a BNC cable, push the cable in and twist clockwise. These ports are not found on NVR because they are designed for IP cameras. If your recorder contains only BNC ports, it’s an indication that your machine is a DVR.
VGA Video Output
 Used to connect the DVR or NVR to computer monitors or TVs for viewing using a VGA cable. A VGA cable carries an analog video signal that requires a conversion from the digital signals used by DVRs and LCD monitors.
Note that the VGA Video Output port cannot be used to connect the DVR to a VGA port on a computer or laptop, as these are also video output ports. Also, keep in mind that the VGA cables don’t transmit audio. Nowadays, this kind of video output is almost totally replaced by the HDMI ports.
HDMI Video Output
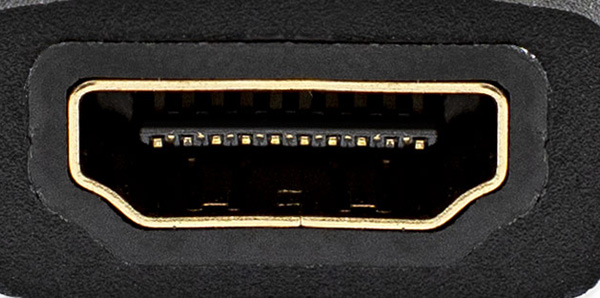 Used to connect the DVR or NVR to smart TVs or compatible monitors for viewing using a HDMI cable. Unlike a VGA cable, an HDMI cable carries a digital signal that does not need to be converted to analog by the DVR or LCD monitors and also it transmit audio
Note that the HDMI Video Output port cannot be used to connect the DVR to a HDMI port on a computer or laptop, as these are also video output ports.
BNC Video Output
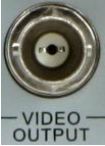 Used to connect the DVR to a monitor for viewing using a BNC cable. To connect an RCA cable from a TV to the DVR, use a BNC-male to RCA-female adapter. Not all the recorders come with this port.
BNC Spot Out Port
 Used to connect the DVR (rarely for the NVR) to a Spot Out monitor using a BNC cable. A Spot Out monitor automatically shows camera channels in sequence, and cannot be used as a main display. Depending on the DVR specifications, you may be able to select which channels will be shown and the amount of time channels are shown before switching.
USB Port
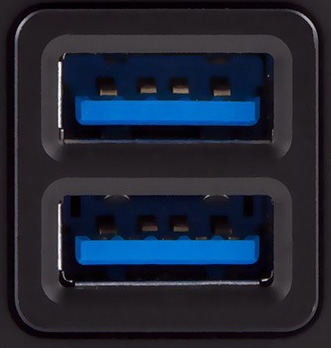 A USB port is used to transmit data to and from external devices. On DVR or NVR systems, USB ports are used for the following functions:
- To connect a USB mouse to control the NVR/DVR user interface.
- To connect a USB Flash Memory drive to backup or archive video from the DVR/NVR.
- To connect a USB Flash Memory drive to perform firmware upgrades for system enhancements.
Network / LAN Port
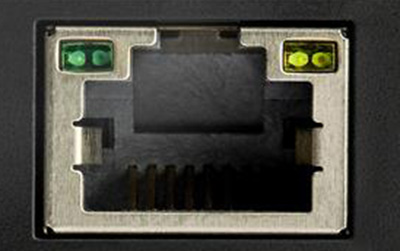 A network port, also known as a LAN or Ethernet port, is used to connect the NVR or DVR to a Local Area Network (LAN) or the Internet, allowing the video signals to be accessed from anywhere in the world. To connect a DVR to a LAN or the Internet, connect an Ethernet cable from the Network port to an available network port on your router and follow the included instructions to configure the NVR/DVR and router for remote access.
PoE Ports
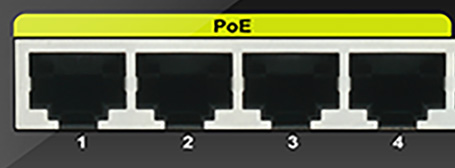 These ports are located at the back of the NVR with built-in PoE switch. You should plug the IP cameras there and the NVR will power up the cameras by itself. So, one Ethernet cable to power and transmit the data for each camera. Usually the NVRs come with 4/8/16/32 PoE ports. Also, there’s no need to do any settings, the NVR will show the cameras automatically.
BNC Audio Input
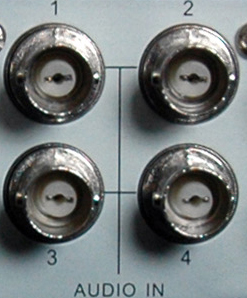 Used to connect the DVR to audio-enabled cameras or self-powered microphones using a BNC cable. To connect audio-enabled cameras or self-powered microphones using RCA cables, use a BNC-male to RCA-female adapter.. The maximum number of audio channels supported varies between DVR models.
BNC Audio Output
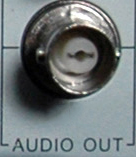 Used to connect the DVR to external speakers or a TV with BNC cables to play sound. To connect the DVR to external speakers or a TV using RCA cables, use a BNC-male to RCA-female adapter.
RS-485 / PTZ Control Block
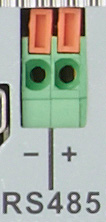 Used to connect the DVR to compatible PTZ (Pan-Tilt-Zoom) cameras. RS-485 Control Block is sometimes incorporated into the Alarm / Sensor Block.
Alarm / Sensor Block
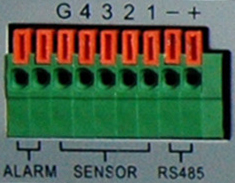 Used to connect the DVR to compatible alarm / sensor devices, such as door sensors and glass break detectors. May also include the RS-485 / PTZ control block.