Setting up a Network Attached Storage (NAS) for your Hikvision IP camera or Hikvision NVR/DVR will create redundant local storage in case your cloud service or built-in hard drives/microSD cards are compromised.
This article will walk you through the steps for setting up QNAP NAS (Network Attached Storage) for your Hikvision camera.
The procedure is the same for Hikvision NVR or DVR. We will do the settings using both protocols SMB/CIFS and NFS. CIFS is the “Common Internet File System” used by Windows operating systems for file sharing. NFS is the “Network File System” for Unix and Linux operating systems.
Adding QNAP NAS to Hikvision IP camera via SMB/CIFS
Set up SMB/CIFS service on QNAP Turbo NAS
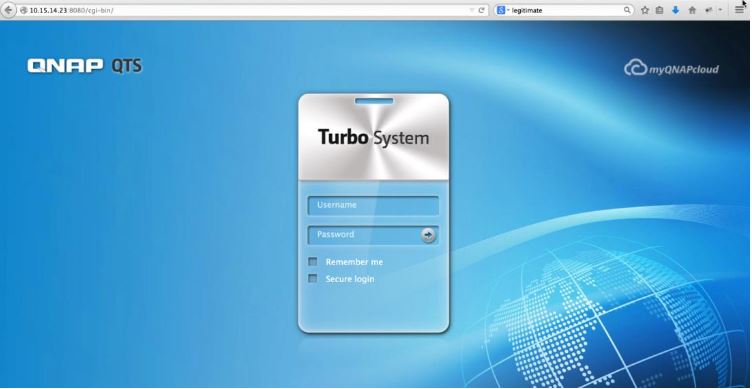
Step 1. Log onto the web page of QNAP Turbo NAS. In this example, the IP address of NAS is 10.15.14.23:8080 (default username/password: admin/admin).
 Step 2. Enable Microsoft networking service. Navigate to Control Panel > Network Service > Win/Mac/NFS. Check the box for Enable file service for Microsoft networking.
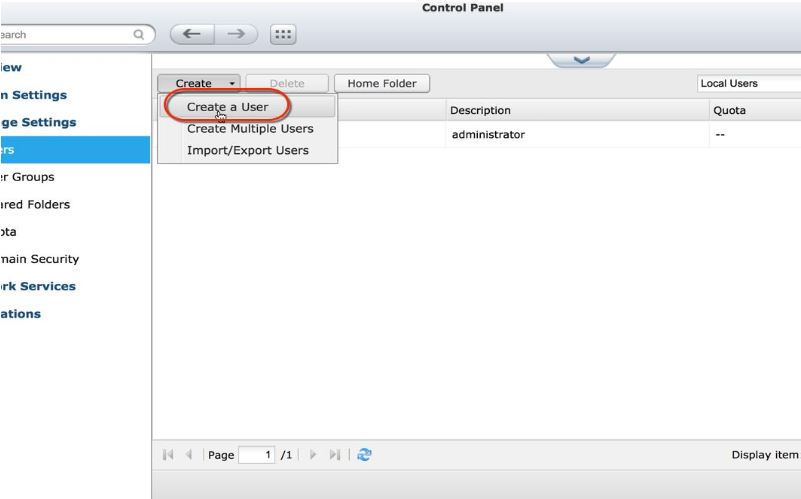
 Step 3. Open the Control Panel, and navigate to Privilege Settings > Users. Click Create > Create a User to start creating a user.
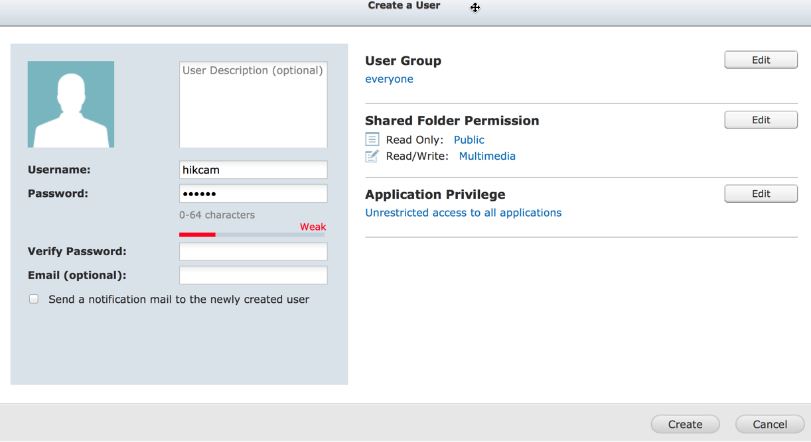
 Step 4. Enter username & password and press Create to create a user. For example: hikcam (this will be used when setting up Hikvision’s camera).
 Step 5. Navigate to Privilege Settings > Shared Folders, and click Create to start.
 Step 6. Enter the folder name, for example: hikCIFS (the folder name will be used when setting up Hikvision’s camera) for storing the video recording.
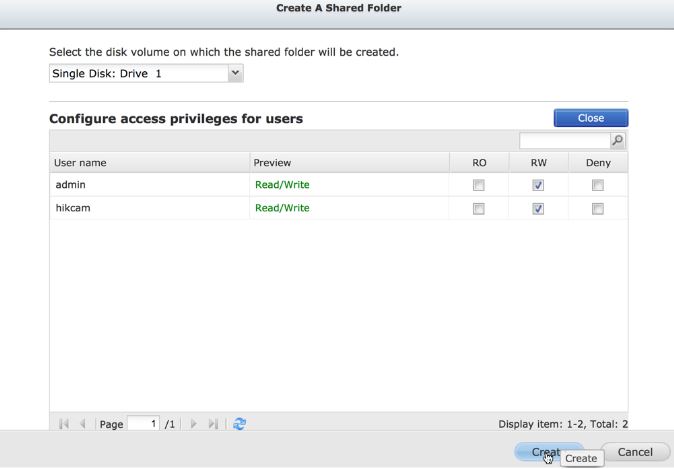
Click Edit to modify the access privileges of the folder.
 Step 7. Enable the RW (Read/Write) access for the user (Ex: hikcam).
Add NAS to Hikvision camera
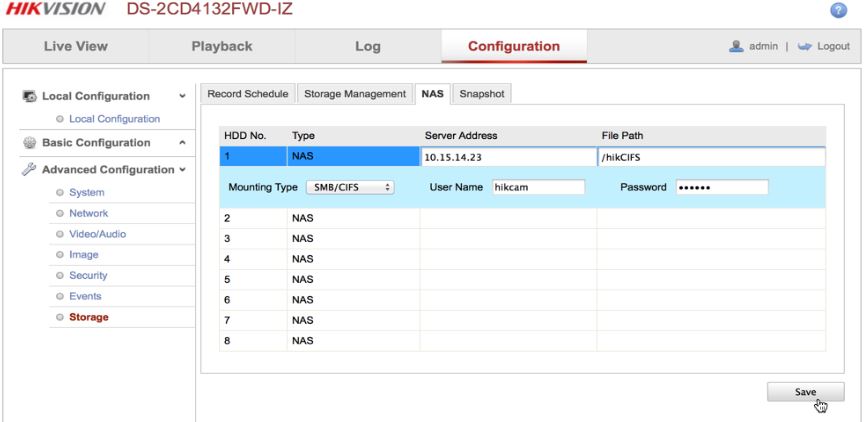
Step 1. Log in to the web page of DS-2CD4132FWD-IZ (this is the model of the Hikvision camera used in this demonstration). Navigate to Advanced Configuration > Storage > NAS. Enter the IP address of the NAS.
In this example, the IP address of NAS is 10.15.14.23, the path of the share volume (/hikCIF), username and the password (hikcam/hikcam: username/pw), choose SMB/CIFS and click Save.
Note: The folder name was configured at step 5, and username/password was configured at step 4.
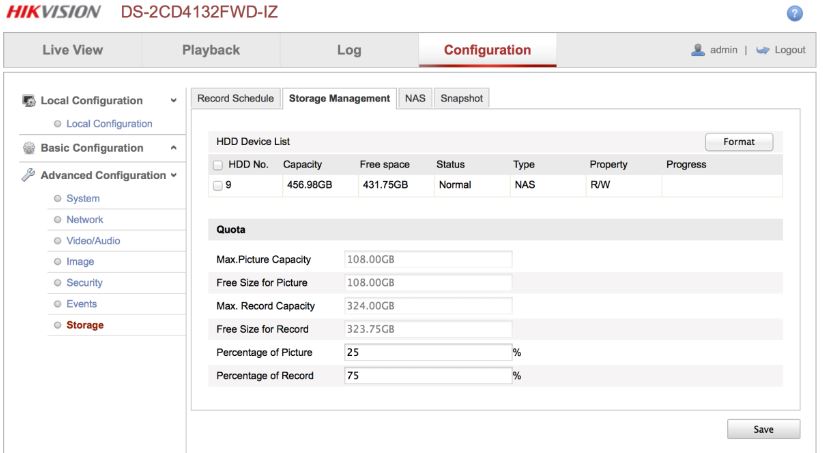
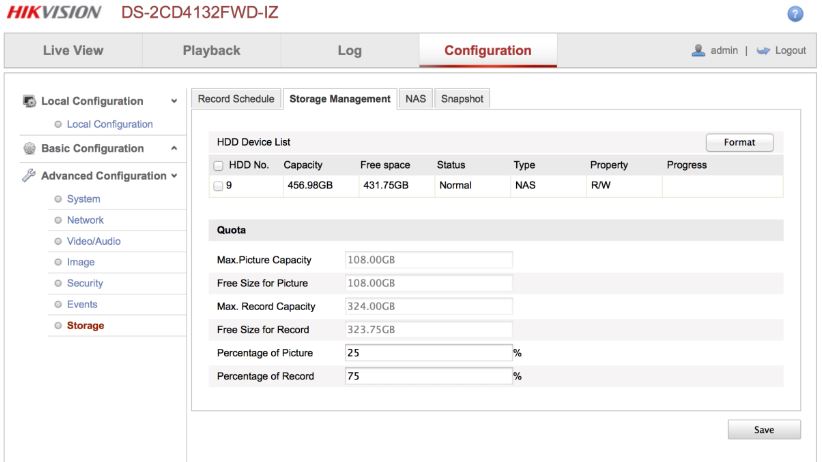
 Step 2. Navigate to Advanced Configuration > Storage > Storage Management. Click Format to initialize the system.
 Step 3. The formatting time will vary according to the capacity of the shared volume. The recording to the NAS will automatically start once the formatting is done.
Adding QNAP Turbo NAS to Hikvision camera via NFS
Set up NFS Service on QNAP Turbo NAS
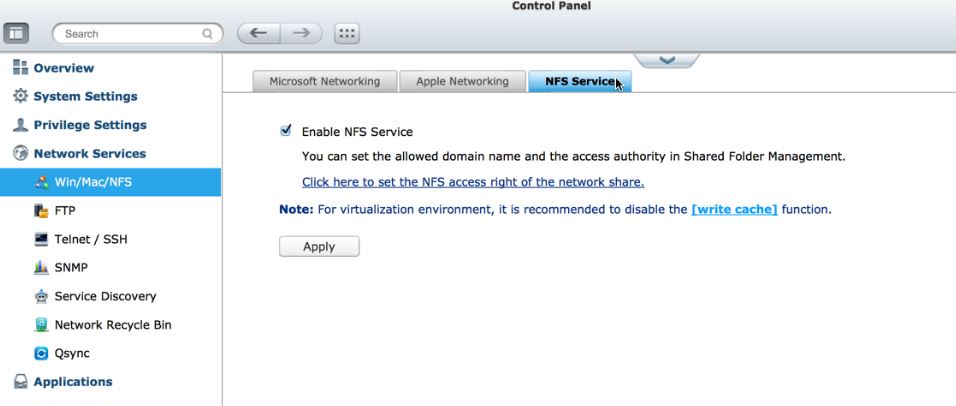
Step 1. Enable NFS service. Navigate to Control Panel > Network Services > Win/Mac/NFS. Check the Enable NFS Service.
 Step 2. Create a shared folder for NFS access. Navigate to Control Panel > Privilege Settings > Shared Folders. Click Create to create a folder.
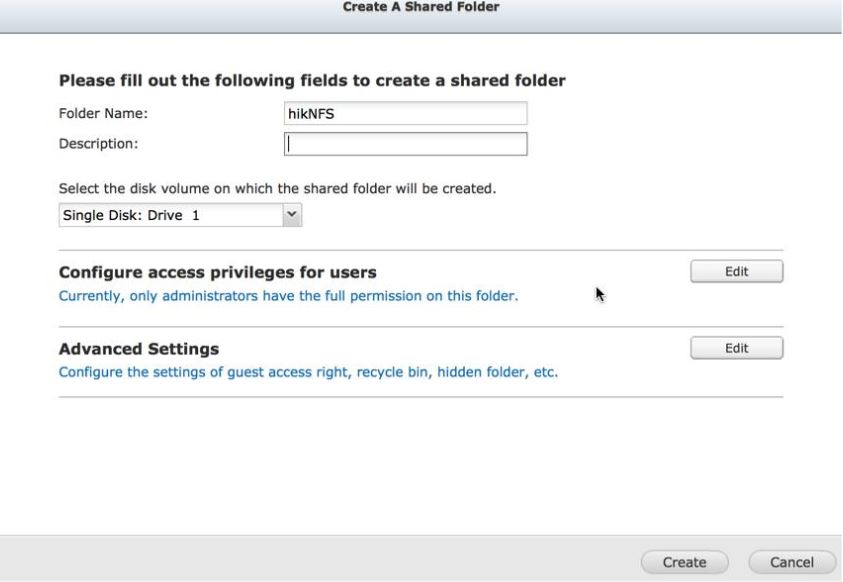
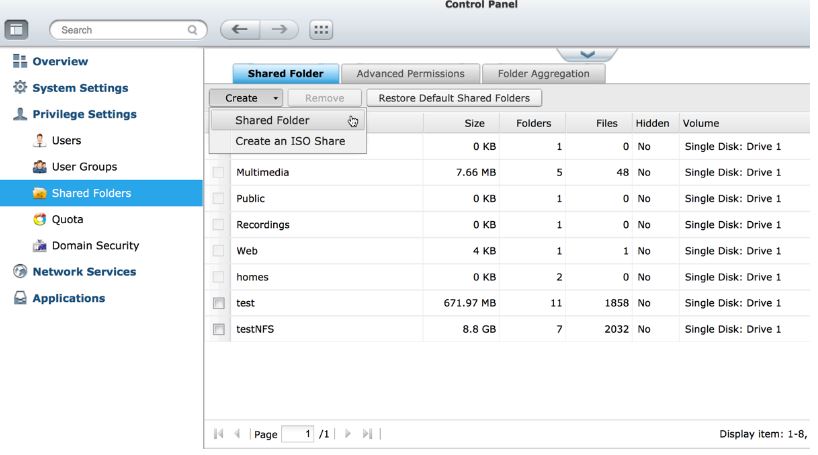 Step 3. Enter the folder name. For example: hikNFS.
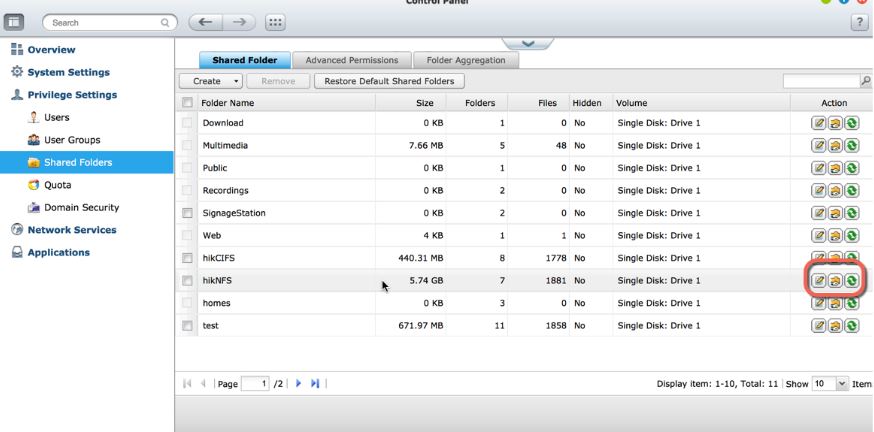
 Step 4. Navigate to Control Panel > Privilege Settings > Shared Folder. Click the ICON to open the access control page.
 Step 5. Select NFS host access to setup NFS access right.
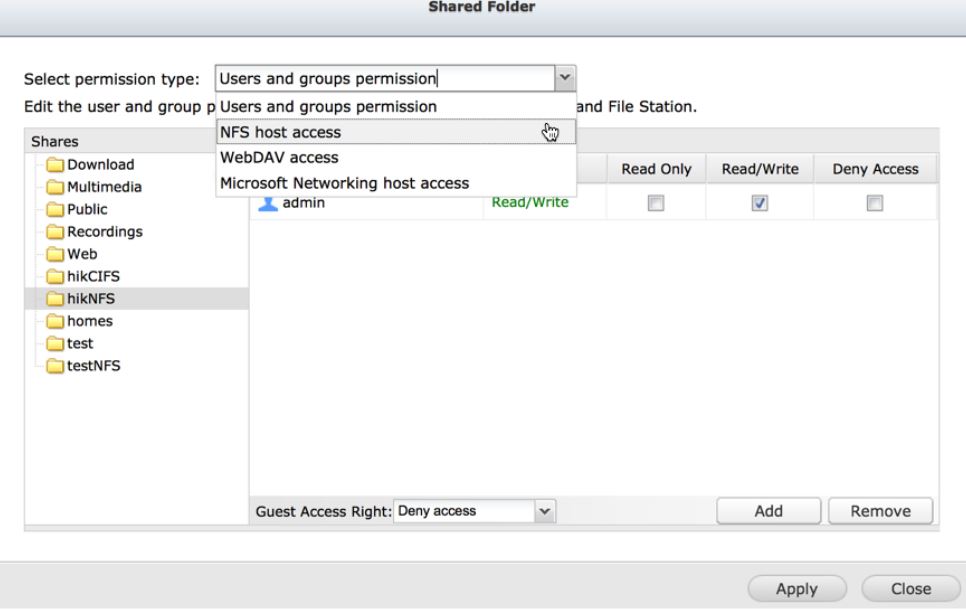 Step 6. Enter the IP field that can access this NAS. (Example: 10.15.14.0/24 (IP ADDRESS/MASK): 10.15.14.1 ~ 10.15.14.254).

Add NAS to Hikvision camera
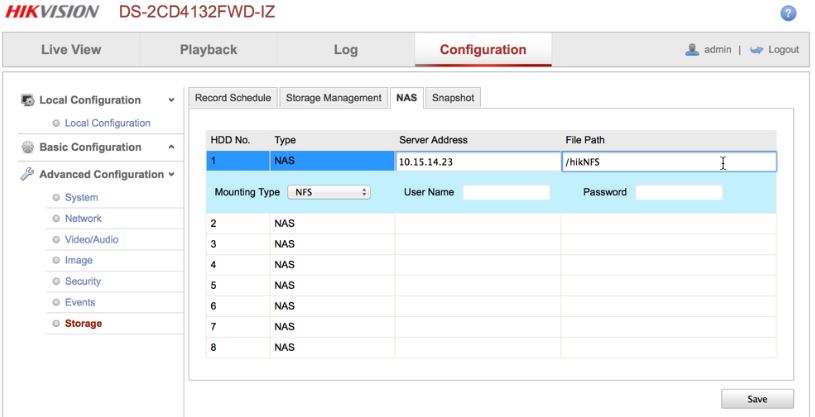
Step 1. Log in the web page of Hikvision cameras (in this example we are using model DS-2CD4132FWD-IZ). Navigate to Advanced Configuration > Storage > NAS.
Enter the IP address of NAS (In this example, the IP address of NAS is 10.15.14.23), the path of the share volume (/hikNFS), choose NFS as Mounting Type, and click Save.
Note: The folder name was configured at step 3. The NFS does not require login credentials but the access security has to be configured on Turbo NAS.
 Step 2. Navigate to Advanced Configuration > Storage > Storage Management. Click Format to initialize the system.
 Step 3. The formatting time will vary according to the capacity of the shared volume. The recording to the NAS will automatically start once the formatting is done.
How to playback the surveillance video stored on QNAP NAS
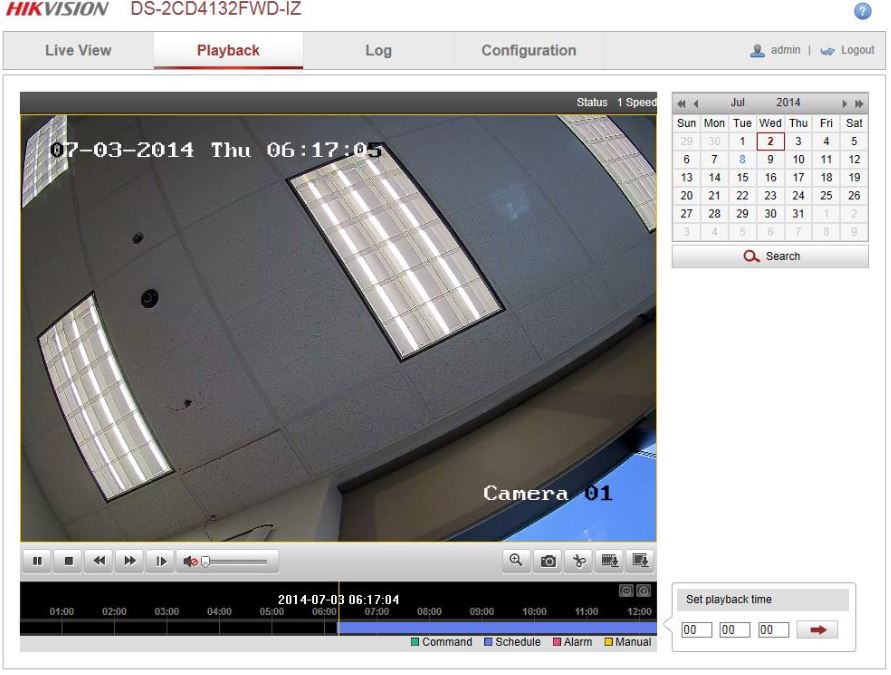
You can playback directly through the Hikvision camera page. Log on to the web page of the camera. Navigate to Playback.
Select the date and click Search. Use Internet Explorer.
Download surveillance video files from QNAP NAS
Log on to the web page of the Hikvision camera. Navigate to Playback. Click on the download icon. Use Internet Explorer or Safari.
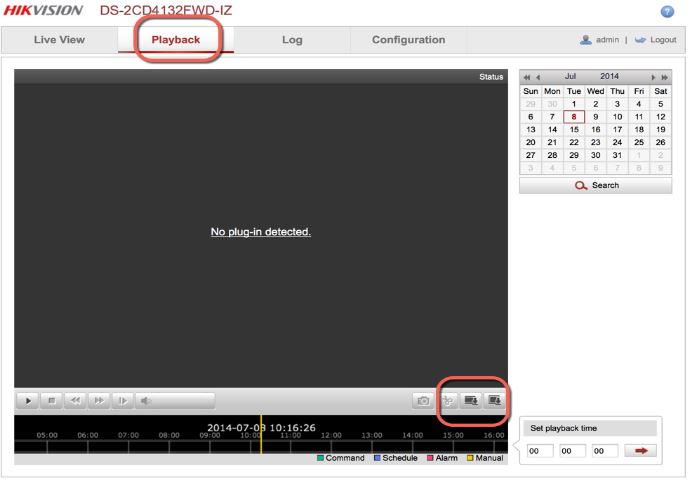 Search the videos with specified Start and End dates and click Download to download the selected videos.


Hi all,
I followed your instructions a few times but were not able to access the nas with a SMB/CIFS connection.
NFS works. I changed between the different SMB versions (1/2.1/3) but it didn´t make any difference.
It always shows me the error message “Mounting to NAS server failed. Invalid directory or incorrect”
My Nas is a QNAP TS239II with QTS 4.2.6 installed
do you have any idea.