Lens flares or other artifacts may show up on Ring cameras and are usually caused by installation problems or other technicalities that can be solved by following this easy guide.
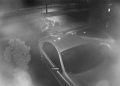
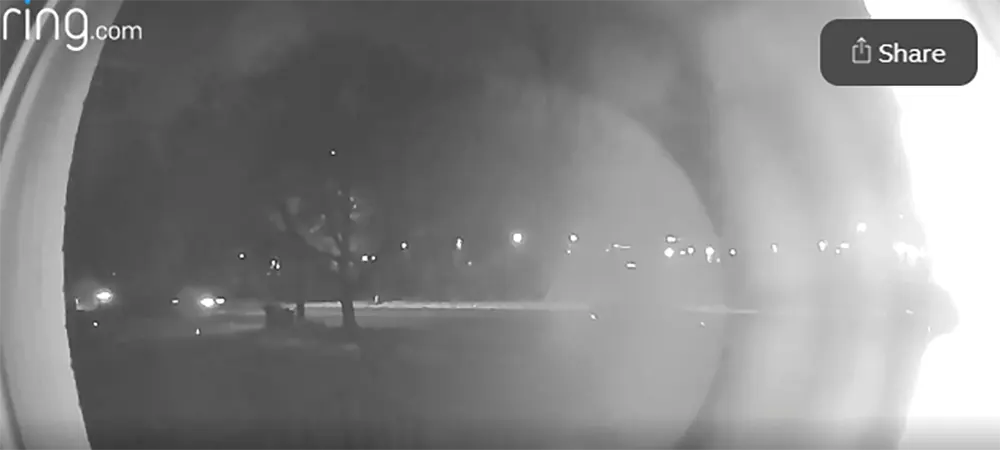
A few samples are shown below. In one of the images, you can see a light ball at the center of the image which basically makes the footage unusable. This is the worst case and indicates a second light source hitting straight on the camera (such as a street lamp).
In the other picture, the flares are coming from the side and whitewashing the whole image. Usually, the flares are artifacts that show up on nighttime images, but they can happen during daytime as well (although it’s rare).
How to Fix Flares and Artifacts (Night Vision Glare) on Ring Cameras
The flares are mainly caused by the reflection of the IR/LED lights from a nearby solid surface, from exposure settings, or by physically improperly installing the camera. For more, check the tips listed below.
Avoid pointing the camera to solid surfaces
This is complicated by all you need to know is that Ring cameras (any other security cameras) use IR lights to capture the image during the night time. If there are no IR lights, the cameras can’t record anything when it gets dark.
This light (which is invisible to human eyes) illuminates the area under surveillance which enables the camera’s sensor to film it. If there’s a solid surface to the camera, the light will hit that spot and bounce back (reflect) to the camera’s sensor and thus creating the flares, glares, or whitewashing that you see on the footage.
When you install the camera, make sure you’re placing it on a spot that doesn’t have a close surface that can reflect the IR lights.
Many times, these cameras are installed in recessed or enclosed spots that hit solid sides and then reflect the camera back. One user, reported taping one side of his Ring doorbell camera which improved the quality of the nighttime image.
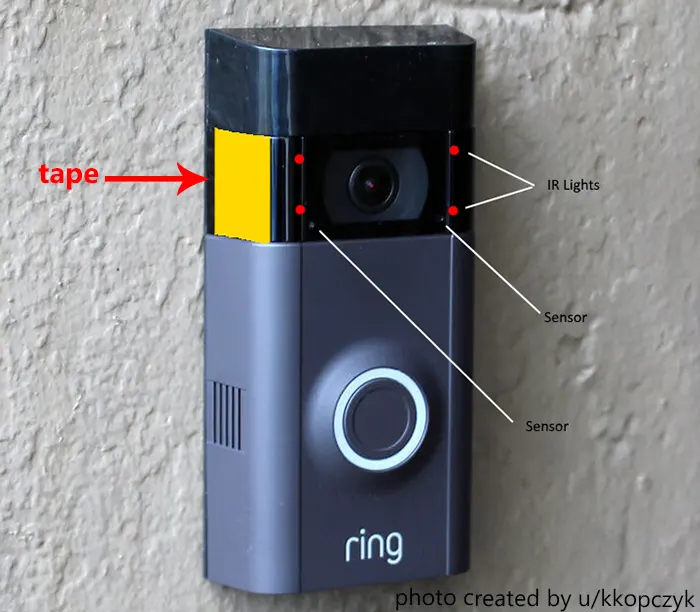 These light beams “fan out”. You get the glare when the “fan” hits those bricks on the side and reflects back across the lens.
What you need to do is block this fan slightly so that the “fan” can no longer hit the bricks. All you need to cover is enough to disrupt that “fan” slightly.
You can use a small piece of black electrical tape and place it where the yellow is on the image. Notice, don’t block the IR lights or the sensors.
Use the wedge kit or a bracket
According to Ring Support, sometimes this problem can be solved by using a wedge kit to change the angle of the Ring camera and placing it above the level of the brickwork.
Additionally, you may use any other type of bracket that enables you to bring the camera forward from the wall. By doing so, you avoid the solid areas on the side that may reflect the light. One way to install the camera using the wedge is shown below:
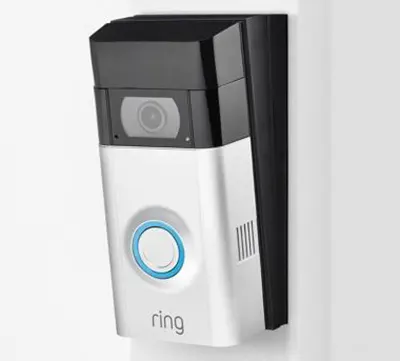
The wedge allows you to mount your camera flat against angled siding, or if your door is near a staircase, mount the unit at an angle for a better view and improved motion detection.
Check the exposure settings of your camera
While there are no exposure adjustment toggles, you can use the HDR toggle. Activating HDR (High Dynamic Range) may be an effective solution for your Ring camera if there is an extreme difference in lighting between the doorbell camera and the area under surveillance.
If you own a Ring camera with the HDR option, follow these steps to turn it on:
- Select the icon with three horizontal lines on the top left of the screen.
- Select Devices.
- Select the camera from the list then hit Device Settings.
- Choose Video Settings and turn on the HDR function.
With HDR mode on, the extreme differences in shade and sunlight should be reduced, hopefully solving the problem of overexposure (whitewashing phenomenon).

Reposition the camera
Another thing you can try is to adjust the camera angle or re-install it at another spot with better conditions. Sometimes, even small adjustments (such as lowering the camera a little bit down) may help reduce the flares.
Additionally, you can use the live mode on your smartphone to track differences and improvements while adjusting the camera’s angle. Try a few angles until you get a satisfactory image. Usually, a height of four to six feet is optimal to take full advantage of the Ring camera’s wide view.
Remove the plastic protection
This is obvious but many people and installers miss it. The camera comes with plastic sheet protection that covers the camera’s sensor which is supposed to protect the camera during handling and installation.
Once the camera is set in place, you need to remove this plastic sheet that will mess up the camera’s sensor if left in place.
While this is common knowledge, we have to mention that many people are too lazy to physically inspect the camera and expect everything to be solved by the phone app.
Clean the camera
Once in use, the cameras will get dirty especially if exposed to the elements. Inspect the cameras closed and wipe off any dirt or dust collected in the camera’s lens.
Additionally, remove any insects or spiders that may have built nests around the camera. You can use special chemicals to spray the camera and will get various insects away from the camera.
Contact Ring Support
If none of this works, you may contact Ring support for further assistance. With that being said, the issue is usually not related to the camera’s hardware (or software) but it’s exclusively caused by the installation method and position. That’s what Ring will tell you, so be warned about it.
Conclusion
Flares, artifacts, or glares that show up on Ring cameras are caused by an improper installation. When installed, you have to avoid enclosed or recessed spots that make the IR light hit the sides and reflect back to the camera’s sensor.
Try to install the camera into a different spot, or adjust the angle. Also, you can use wedge kits, or brackets to bring the camera forward.
Another method is to use tape on the side and reduce the amount of IR lights that may hit the corners. Lastly, keep trying and adjusting until you’re happy with the image quality.