Uniview recorders with alarms can be used for numerous different reasons and in numerous situations. Most alarms are used to trigger an event such as triggering an email, trigger recording, trigger a light or door contact, or just triggering an alarm marking in the recording.
Setting up Alarms via the web interface
First load the recorders web login in Internet Explorer by typing the local or remote IP address of the recorder into the URL bar. Once the login displays log into the recorder (default login is username: admin and password: 123456). Once logged in close the “Change default password” pop up at the top of the screen. Next open the “Settings” tab and navigate to “Alarm > Alarm Input” on the left-hand menu.
Alarm Input
Alarm inputs will need to be setup for the recorder to “trigger” and event such as recorder, door contacts, emails, etc. Once in the Alarm input menu the first option will be to select the Alarm input number that you want to change. Alarm numbers that are in format “A <-(#)” are for the recorders alarm input on that channel. Alarm numbers that are in format “D <-(#)” are alarms that are for attached cameras.
The next Alarm input menu option is going to be “Alarm Type”. In this drop down the two options are “N.O. and N.C.” were N.O stands for Normally Open and N.C. stands for Normally Closed. This option will be determined based off your install. For example,a door contact that will trigger recording when the door is open would be a N.C. circuit because the door contacts are normally “closed (connected)”.
Were as a switch that would trigger a light would be N.O. circuit were the light is off when the circuit is not connected (normally open) and once the circuit is connected (closed) the light triggers the event. The next Alarm input menu option is On and Off, any alarm inputs that you want to use make sure this setting is set to on.
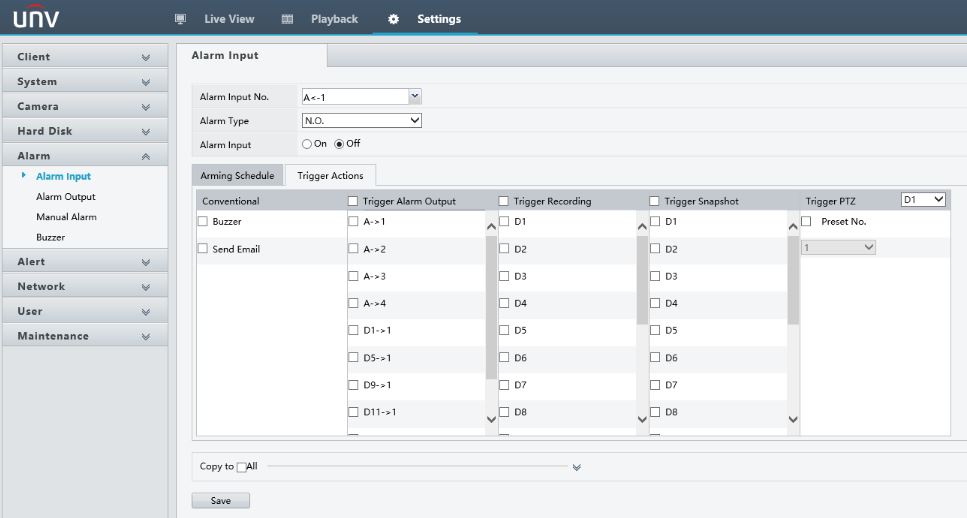 Arming Schedule will be the next option that you want to set up. The arming schedule can be set so that the alarms only trigger at certain times of the day. Up to 8 different periods can be set for each day.
The last options to set will be under the “Trigger Actions” tab. The options you will have in here is trigger buzzer / send email (or both), trigger and alarm output, trigger recording, trigger snapshot, and trigger PTZ preset. These settings will have to be set based off the reaction you want the recorder to have when the alarm is triggered.
Alarm Out
Alarm Output can be used to trigger another device to perform an action such as if Alarm input 1 gets motion from a motion detect sensor then it can trigger Alarm Output 1 which will provide 12 volt power to a contact and it can open a garage door or more.
The settings for Alarm Output are N.O or N.C. states, and Duration (in seconds). The Duration will allow you to set how long the external device will be triggered.
Manual Alarm
Manual Alarm allows you to hand trigger alarm outputs. To manually trigger the alarms, check off one or more of the alarm outputs listed and then click the trigger button in the upper left corner of the menu.
Setting up Alarms in EZView
Once the EZView app has been downloaded, installed and opened on your phone. The first step will be to navigate to the main menu and then to devices. Once in the device’s menu hit the add button in the upper right and add your device to the app. Once your device is added and you can connect to the device you will now be able to set up the alarms.
Under the devices menu if you tap on your device a small menu will pop up at the bottom of the screen with the option “Alarm output”.
 Once in the Alarm output menu you will be able to trigger and enable alarm outputs on your recorder and the cameras that are connected to the recorder.
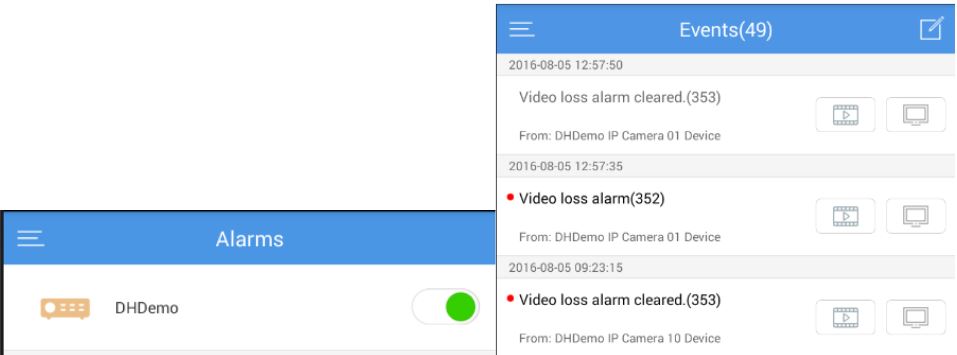 Under the main menu there is an option for “Alarms”. This menu contains the ability to enable your alarm inputs and general alarms such as motion detect (this is only enabling alerts on the phone). The option in the menu is just a slide bar. Once the bar is enabled to navigate back to the main menu and then to events, all of the alarm events will be listed in the menu with the ability to see a live view or last 5 min play back for this alarm.