If you have a Hikvision WiFi security camera and you’re looking to set it up with your WiFi network, this is the right guide for you. WiFi security cameras are very popular nowadays and obviously, there are a few tricks to connect them to the WiFi.
In this guide, we will show step by step how to connect a Hikvision WiFi camera to your local network. Once done, all you need is to power up the camera and it will be linked wirelessly to the router (or the NVR).
Before you start, make sure your IP security camera is indeed a WiFi one. Additionally, you need to use a laptop/computer and an Ethernet cable for the initial setup.
How to set up a Hikvision WiFi camera
To set up any WiFi IP security camera, you need to connect it with a cable first. In our case, connect the camera to your router (or switch) and then run your laptop to do the settings.
Step 1. Run the SADP tool on your laptop. This is scanning software made by Hikvision and can be downloaded here.
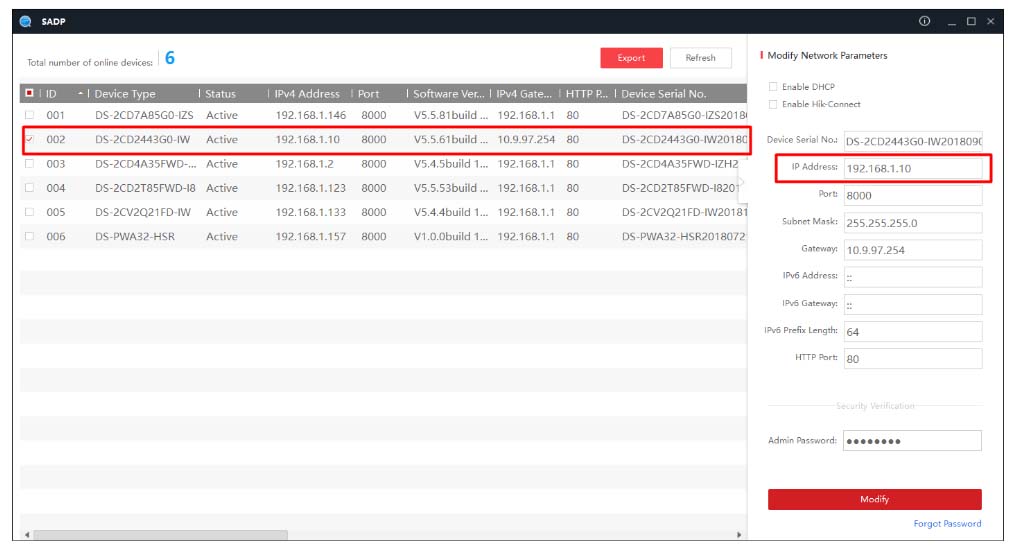
Basically, the SADP tool will scan your local network and list all the found IP cameras, including the WiFi camera which is already physically connected to the network.
As seen below, the IP cameras show up on the SADP. For example, the camera we’re interested in is the second one. It will show the IP address (such as 192.168.1.10) and other useful information such as the firmware version, camera model, ports, etc.
Note: The IP address of the camera should be in the same segment as the router. If the router’s IP address is 192.168.1.1, the camera’s should be 192.168.1.XXX (where XXX is a number between 2~254). If your camera has a different IP format, you can modify it on the right panel of the SADP tool software.
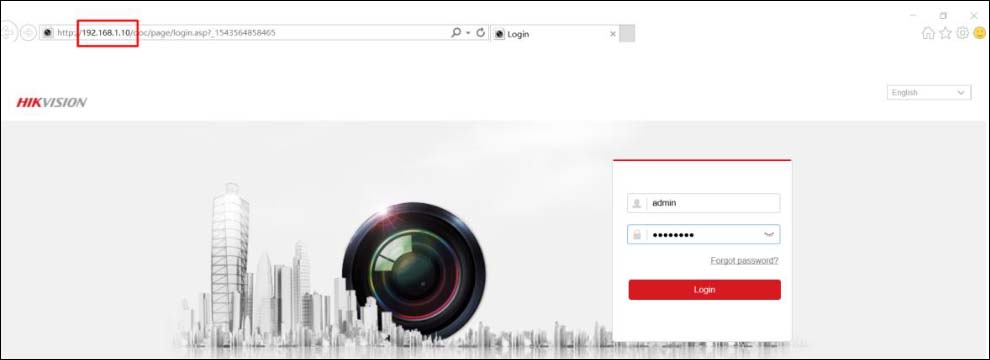
 Step 2. Set the WLAN IP address on the WiFi camera. Type the IP address of the camera on the web browser (192.168.1.10), use the IE browser. Then enter the login to the camera using its username and password.
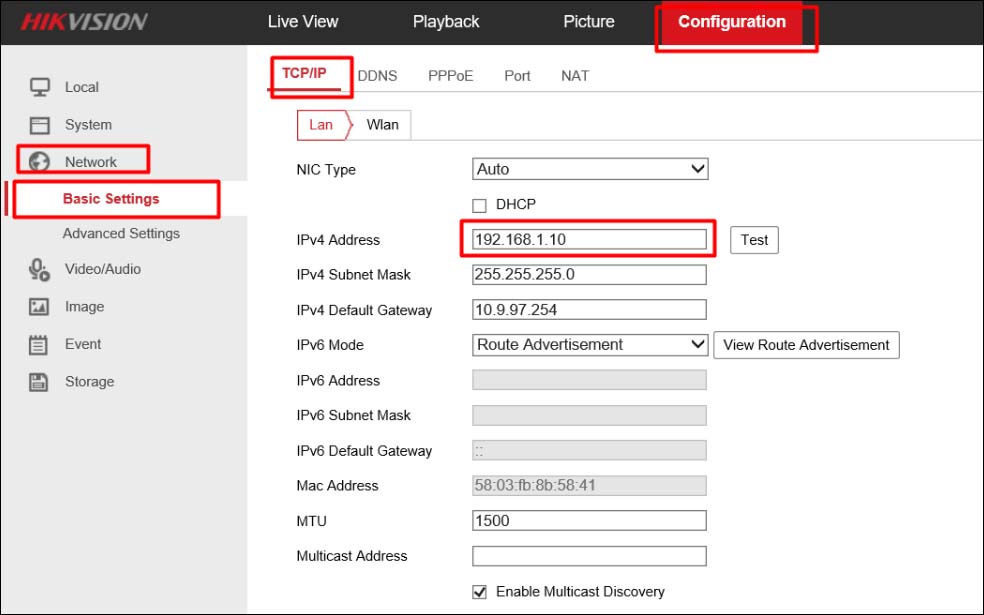
 Step 3. Navigate to Configuration > Network > TCP/IP tab. Here you can check the IP address which (in our case) should be 192.168.1.10 (as shown in the picture below).
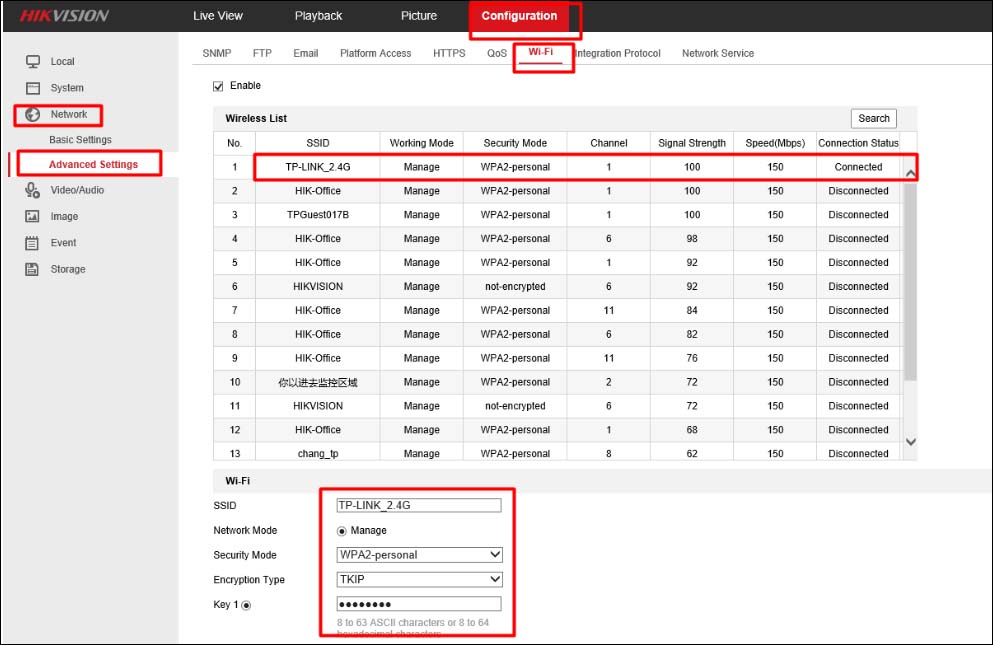
Step 4. Go to Configuration > Network > Advanced Settings > Wi-Fi, and then click Search. The camera will automatically search for all the WiFi signals in its vicinity.
Select your WiFi and then enter the right parameters such as the WiFi password. Once done, click Save.
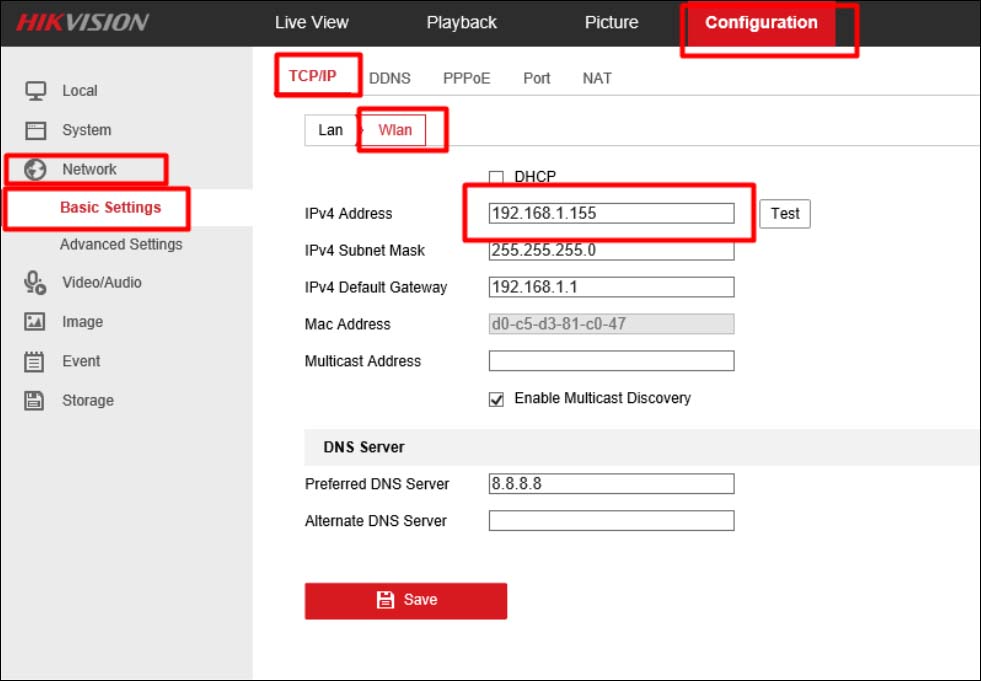
Step 5. Then you have to go to Configuration > Network > Basic Settings > TCP/IP and select the Wlan tab. In this section, you need to set another IP address of the camera which should be different from the LAN on (192.168.1.10).
To clarify it better, the WiFi camera will have two IP addresses: one is called LAN and this is when the camera is wired to the router/switch; the second one called Wlan, and this is the IP address when the camera is on WiFi mode (no cable connected to it). For this demonstration, we set the Wlan: 192.168.1.155.
Note: Make sure the IP addresses you use are available, otherwise you may have an IP conflict if other devices on the network use the same IP address. Additionally, add the correct Subnet Mask and Gateway.
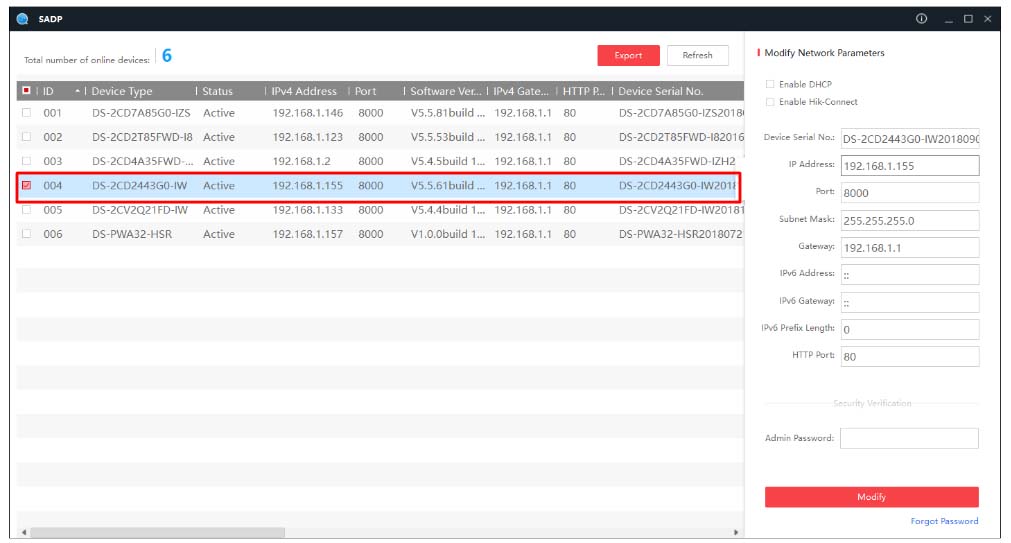
 Step 6. Login to the WiFi camera via the WLAN address. Unplug the cable between the camera and router. Refresh the SADP tool and you should see the WLAN IP address of the camera listed over there.
This means the camera is transmitting the data via the WiFi (not cable since we’ve already disconnected it.
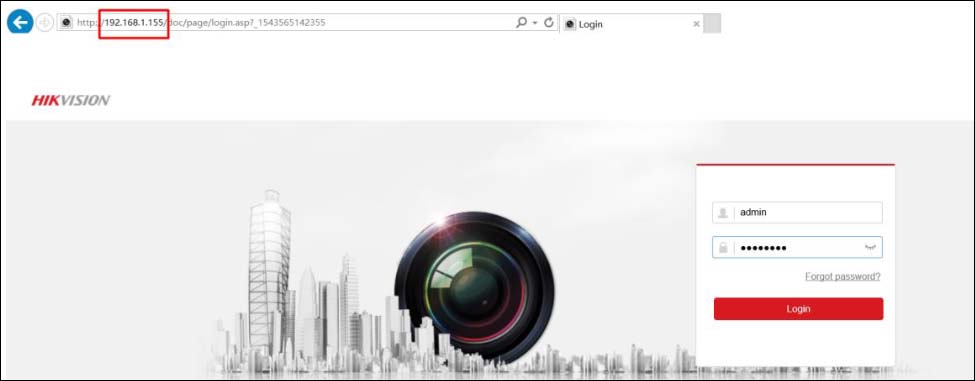
 Step 7. Access the camera via the WLAN address. Type in the WLAN IP address (192.168.1.155) to the IE browser. If all is good, you should see the login screen of the camera. Enter the username and password.
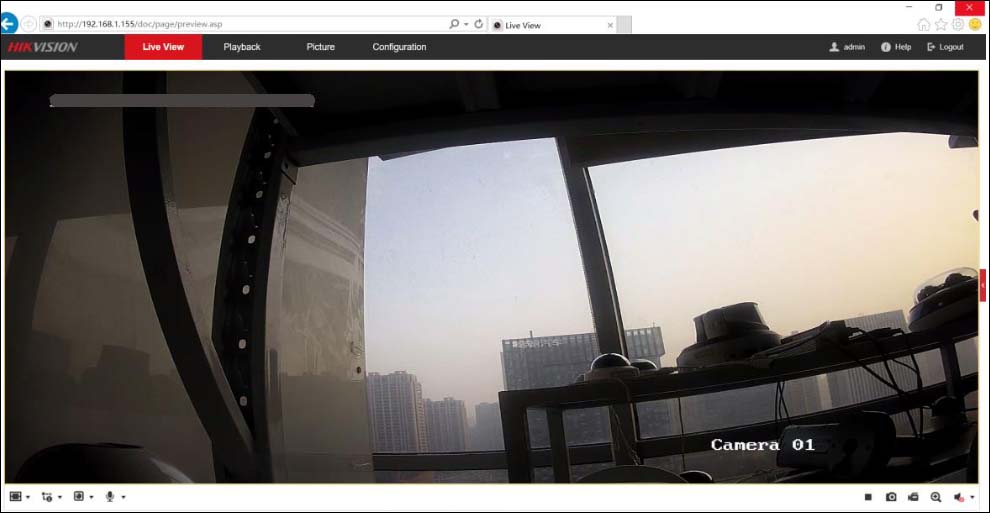
Step 8. As you can see on the screenshot, the camera is working fine and we can see the live feed. Basically, now the camera is sending out the data via WiFi (and no cable).
 At this point, you’re done. You can use the camera as a standalone, or if you have an NVR, you can add the WLAN IP address there and it will show as if it was a regular wired camera. The stronger your WiFi coverage, the better and smother the camera’s live picture.
Note: Even if the camera is not a Hikvision one, the steps and the logic is similar across all the manufacturers.
