This article will show how to enable Face Detection feature on Dahua recorders using the New Interface (New SystemUI). As you may know, Dahua recorders (NVR, DVR) offer Face Detection option and if set correctly, it’s a very useful feature.
The system will take a screenshot of all faces that pass in front of the camera and list them for you. That way it’s very easy to playback or just take a general look at the footage.
This is face detection and not face recognition (two different things). Consult this article for extra information: What is the difference between face detection and face recognition?
The faces are captured as snapshots with time and date stamps, making it easy to review all people who appear in view of the camera in a certain time frame.
This is presented in an interactive thumbnail gallery, where the user can click on any face and review the video footage where they appeared.
Dahua uses two methods of facial detection: picture stream facial detection and video stream facial detection. With picture stream, the camera detects faces and categorizes them, sending data to the backend server.
With video stream, the camera sends images to the backend device, where they are decoded and faces are detected. Facial detection is not capable of identifying individuals; it’s just a method of collecting face snapshots for later manual review.
Face Detection setup on Dahua devices
Before you start, make sure that the Dahua device supports the Face Detection feature and that the system is running on the New System User Interface. Even if your Dahua CCTV system is using the old interface, the steps and the instructions are almost the same.
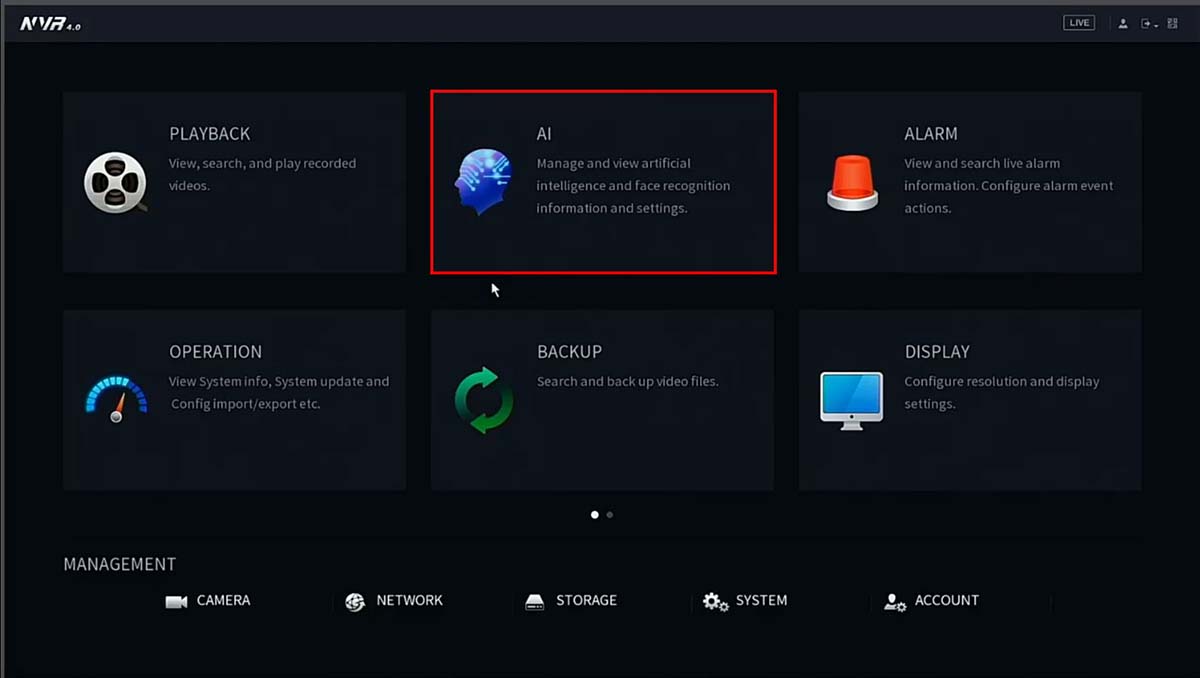
Step 1. Login into your recorder using your username and password. From the Main Menu select AI (stands for Artificial Intelligence).
 Step 2. A Smart Plan must be created for the channel. Select Parameters and then Smart Plan.
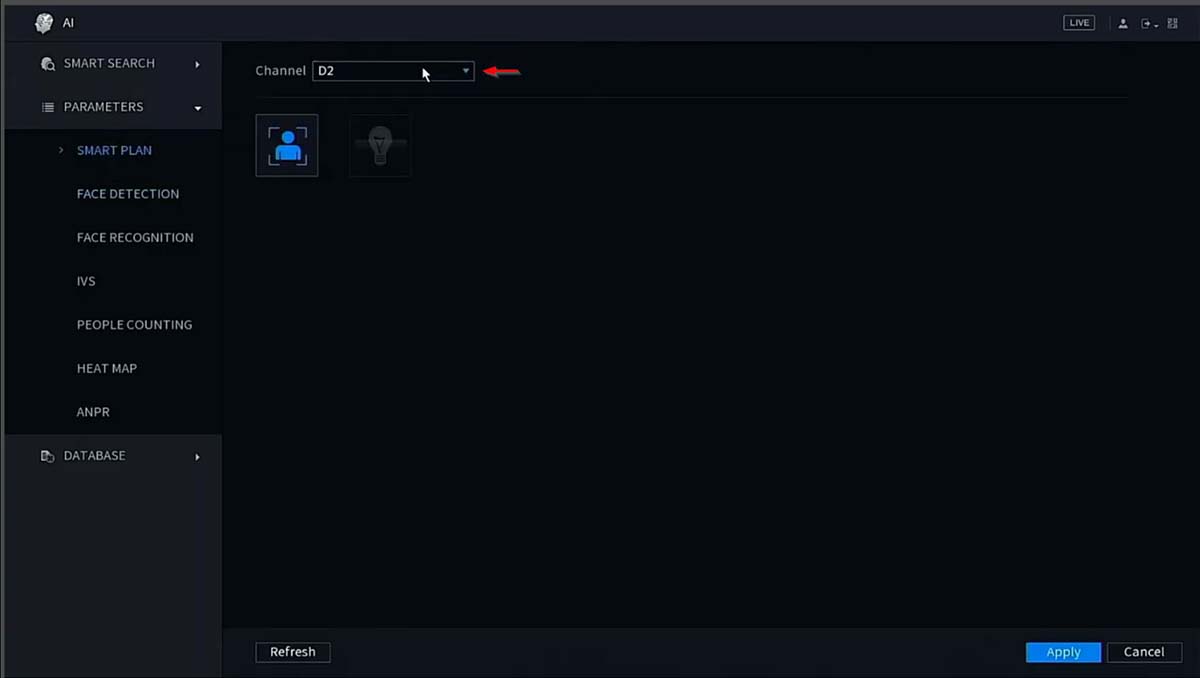
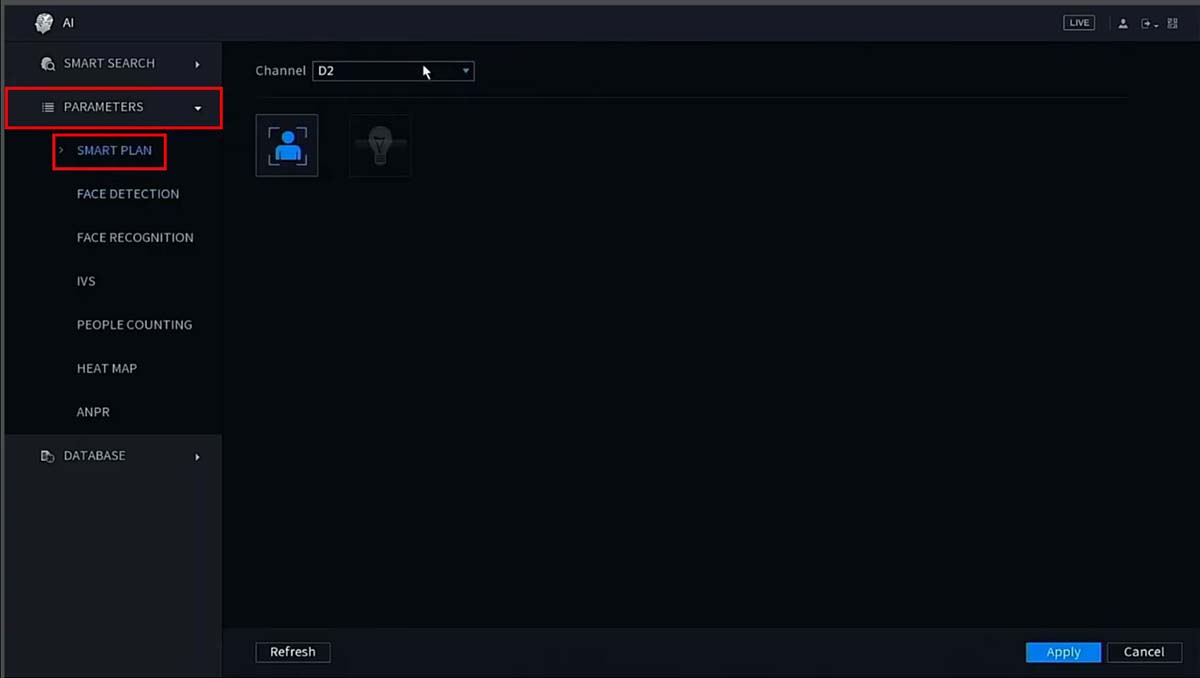 Step 3. Use the drop-down box to select the channel. For example (in our case) Channel D2.
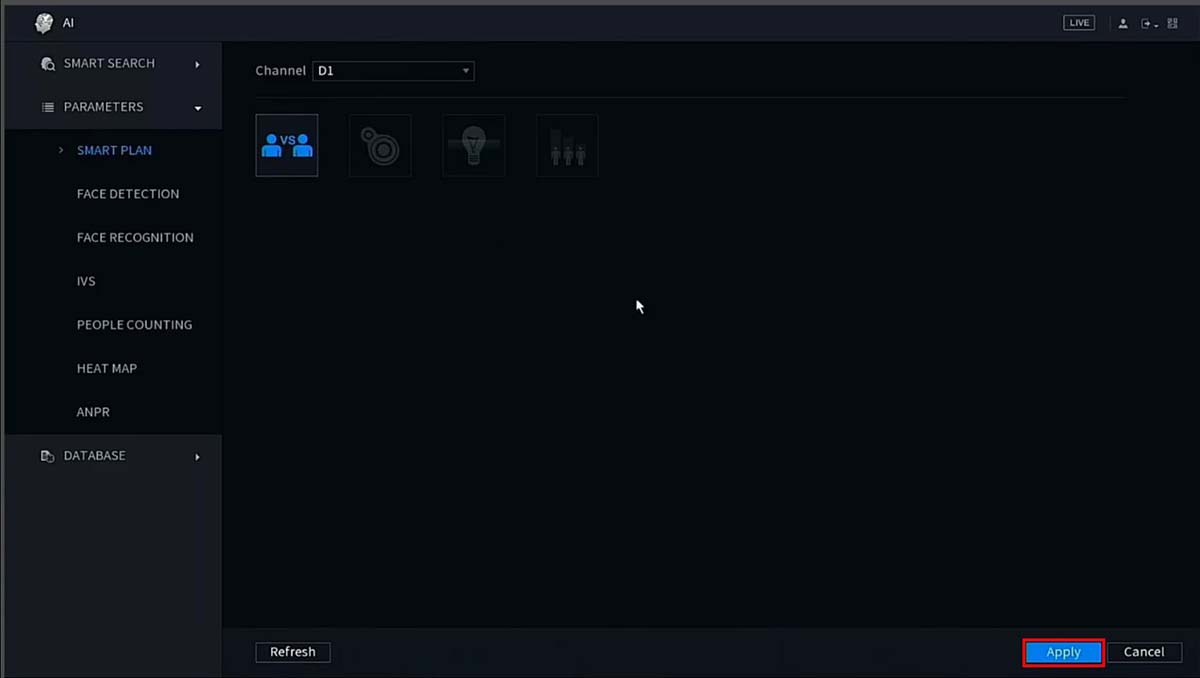
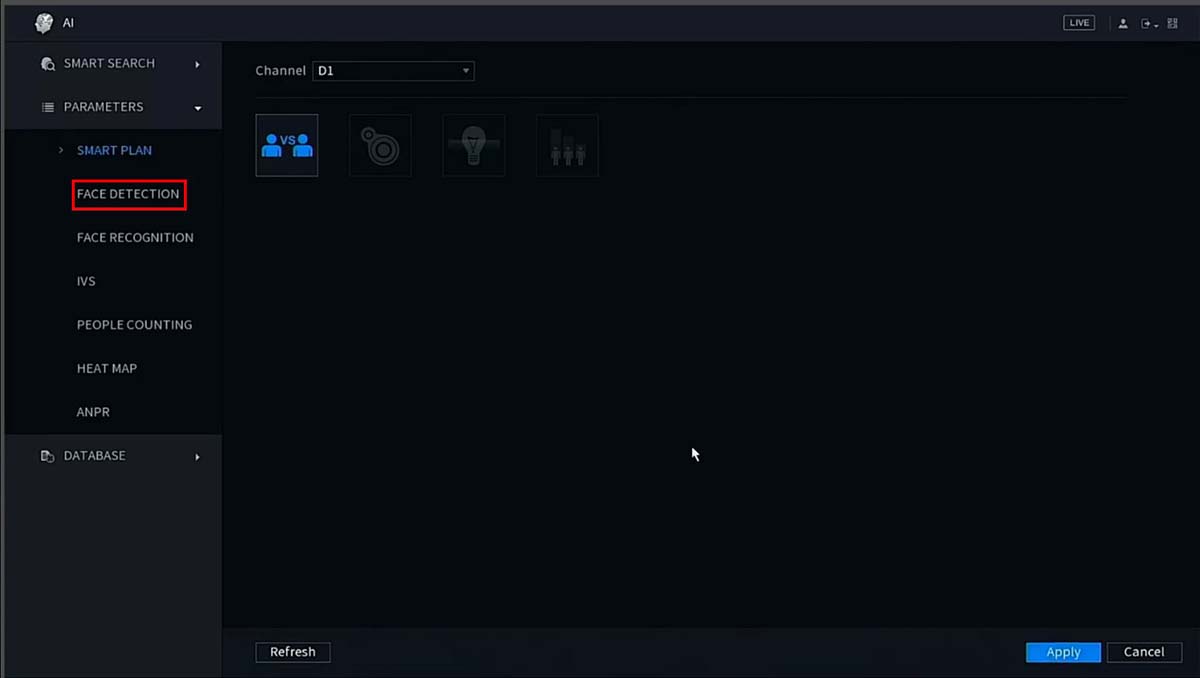
 Step 4. Click to select/enable Face Detect (the first icon, as shown on the picture below).
 Step 5. Click Apply to save the settings.
 Step 6. Now the Face Detection feature must be enabled. Select Parameters > Face Detection.
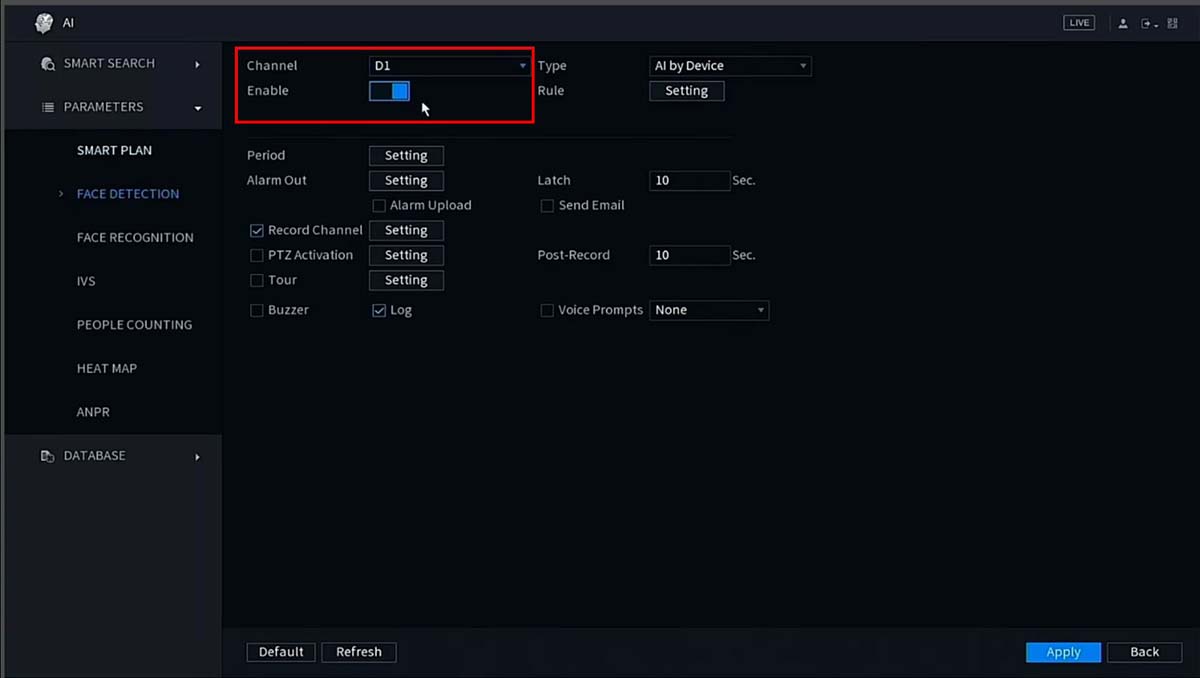
 Step 7. Use the drop-down box to select the channel. Toggle the switch to Enable. The Face Detection feature is now enabled.
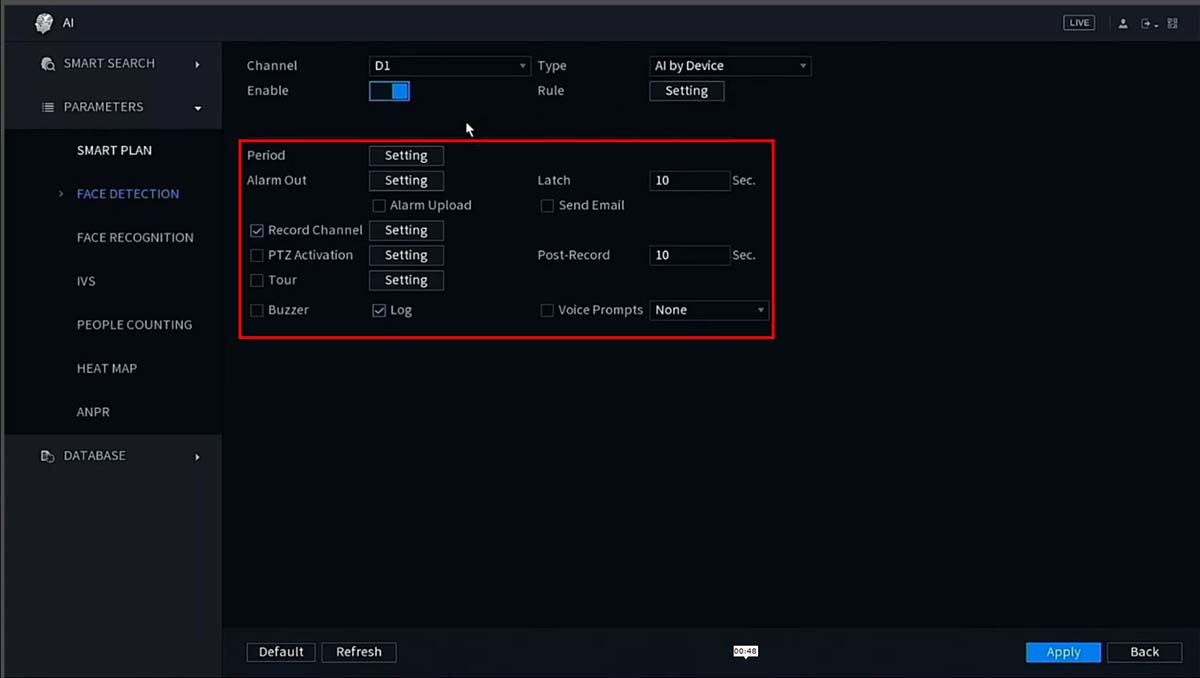
 Step 8. Use the additional parameters to adjust other settings for the Face Detection feature (such as Period, Alarm Out, Record Channel, Post-Record) etc.
 Step 9. The Live View can now show live Face Detection. So whenever someone is passing in front of the camera, the software will take a screenshot of the face and store it for you.
 Note: this guide works for Dahua and their OEMs sold under these brands: Activecam, Advidia, Amcrest, Ameta, Ascendent, Backstreet Surveillance, BV Security, CCTV Security Pros, CCTV Star, CP Plus (Orange Line), Dax Networks, eLine, ENS (formerly Eastern CCTV and SavvyTech), Expose, Lorex, GSS, Honeywell, IC Realtime, Ikegami, Impath Networks, Inaxsys, IndigoVision, Infinity CCTV, Innekt, Intelbras, KBVision, Lumixen, Maxron, Montavue, Oco, Optiview, Rhodium, RVI, Saxco, Security Camera King (Elite), Space Technology, Speco, ToughDog, Tyco Holis, Tyco Illustra Essentials, Unisight, VIP Vision, Watchnet, Winic, Zuum.


