Smart PSS is a camera management software that lets you monitor, playback, and backup your cameras using your computer or laptop. It is created by Dahua and it works for their devices, including the OEM versions which are usually sold under various brand names.
Smart PSS and be installed on a computer running Windows or even Apple’s Mac. Click on this link to download the latest version and have it installed on your device.
Obviously, you can check your security camera system via the recorder, but using Smart PSS you can do the same thing by using a computer which offers extra convenience.
In this article we will guide you through the basic functions and features of Smart PSS, starting by installing it, adding a device (recorder) to the software, playing back the footage, and exporting the recordings. Once done, you’ll get an idea of how to properly use this software.
Smart PSS Quick Start Guide
Installing the Application
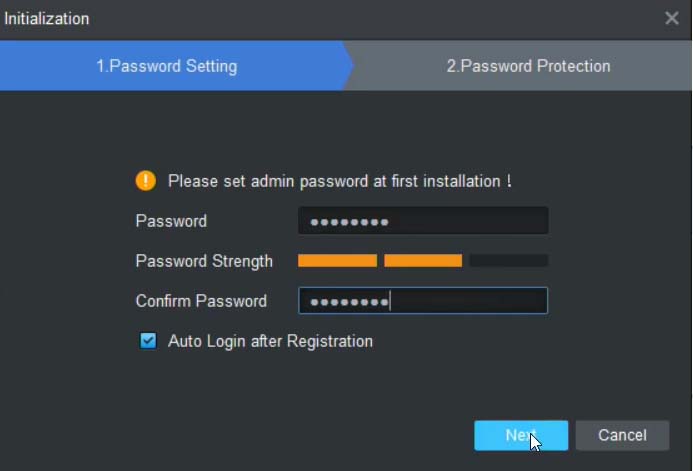
Once you’ve downloaded Smart PSS (Windows or Mac), double click to open the installer and follow the prompts to set up a password and security questions. (You can download the Smart PSS on this link).
These login details are used to access the program and to restrict access to unauthorized users. Keep in mind, that’s the password for Smart PSS only, it’s not the password for the recorder or your cameras.
When the installation is finished the application will open and ask for this admin password (which is the password you’ve just created). A shortcut will also be placed on the desktop for easy access.
How to add your recorder to Smart PSS
You can add your devices such as recorders (DVR, NVR) or standalone IP cameras to the Smart PSS and have these systems monitored straight from your computer.
These security camera systems can be added locally (using the local IP address) or even remotely (using the external IP address of the system or the DDNS hostname if you’ve set up one). To add a device, click on Devices from the Main Menu.
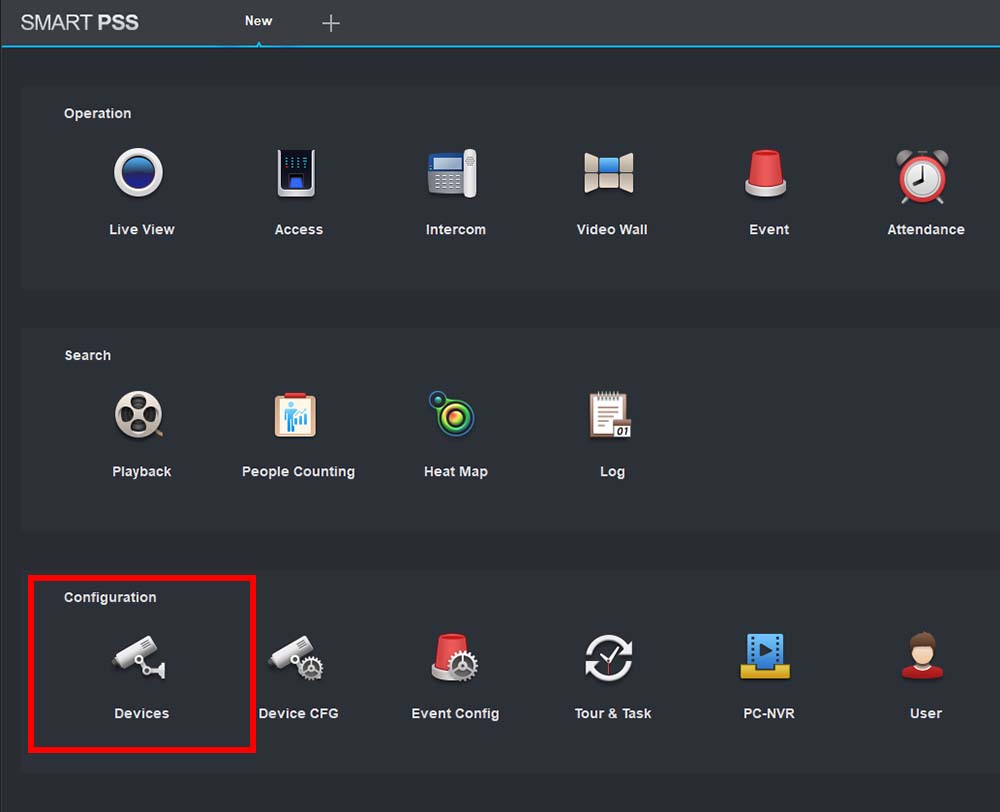 There are two ways to connect (add) your recorder into Smart PSS, via Serial Number and IP Address. SN is best to use if you are unsure. Otherwise, you can use auto search and add the local IP address/device.

Enter your device’s login details
These settings will be the same as the login details you use to login into the recorder. If you do not have the login details you will need to acquire them from the installer or owner of the machine. Once you have entered the details click Add to save the device.
- Device Name: Enter a reference name for the site or recorder. Let’s say “my house” or “my store”.
Method to add: Choose between the Serial Number and IP address - SN or IP/DOMAIN: Enter the SN or IP address of your device. You can find the SN on the recorder’s sticker or on the settings (of the recorder).
- Group Name: If using multiple sites, you can group them for easier viewing.
- User Name: The username of the account you are using to log in. This is the username you use to access your recorder.
- Password: The password of this account (recorder).
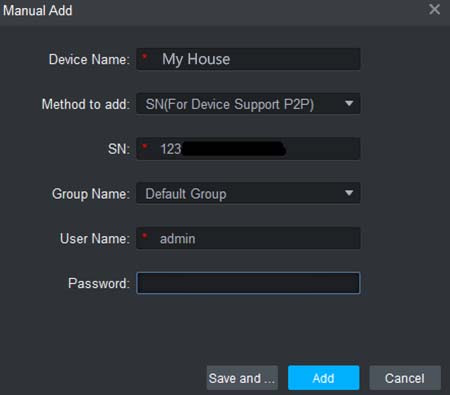
Once the recorder is added your device should appear as “Online”, if the status says otherwise then check the following troubleshooting tips:
Offline (Locked) – It means that the device has had too many failed login attempts. The password may be incorrect or there is another connection to the recorder with the incorrect password. Make sure you’re using the right password.
Offline (Invalid username or password) – The SN/IP of the device is not currently connected. Verify the recorder is online and connected. Check the cable to ensure that the recorder is connected to the internet.

How to watch your cameras in Live View
Once you have added your device, select the plus icon at the top left. From there you can click on Live View (under the “Operation” tab).
 Click the arrow to expand the recorder and list available cameras. Then click and drag or double click each channel to load it into the view.
 To open a camera channel in fullscreen simply double click on that channel. To revert back to the channel split, double click again.
To change the channel split, choose from the presets or create your own custom split in the bottom right corner. If you have a PTZ or motorized camera, they can be adjusted from the PTZ panel of Smart PSS.
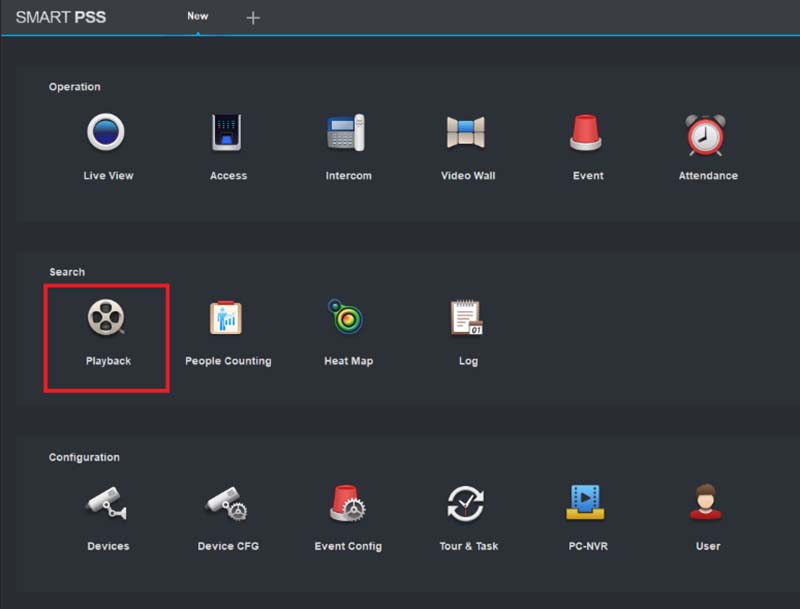
How to Playback Footage
Using Smart PSS you can playback the videos stored in your recorder. If you need a full extended guide, consult this article: How to playback on SmartPSS.
From the Main Menu, go to Playback under the search tab.
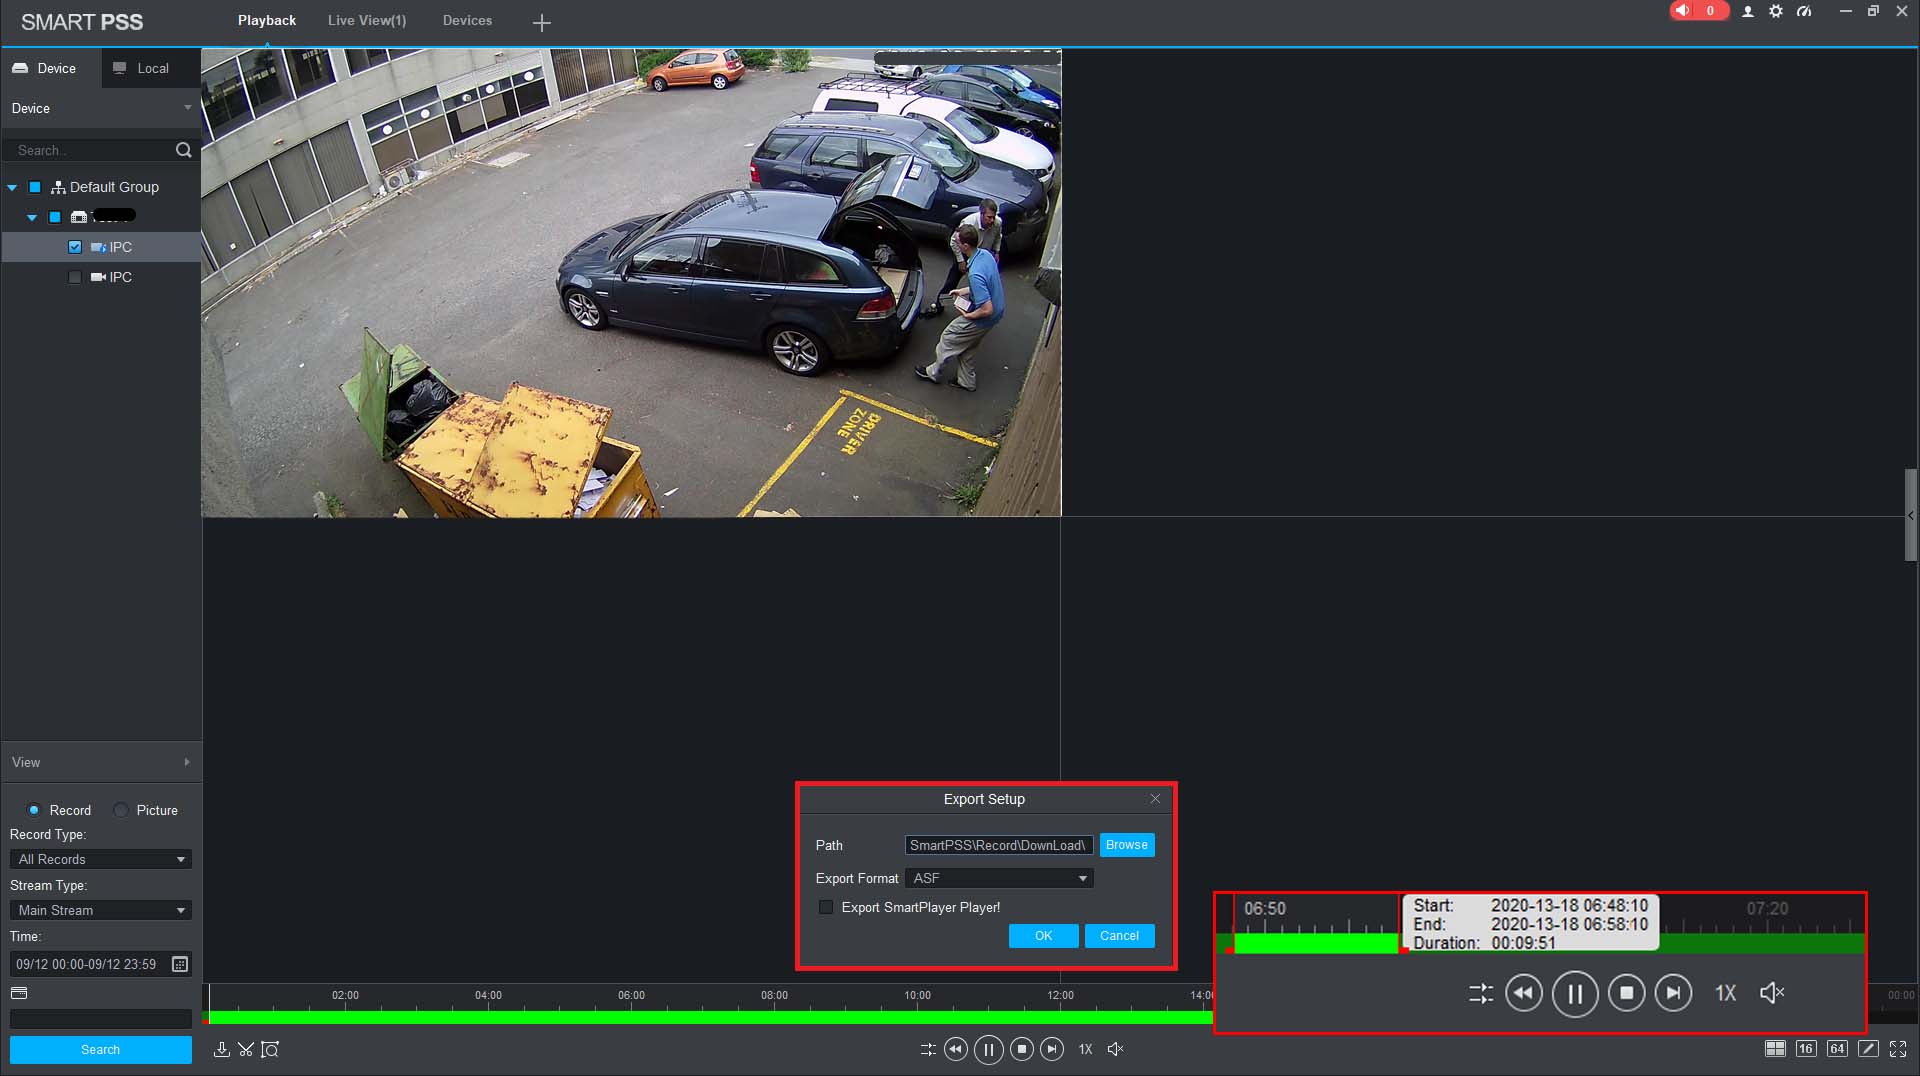
 On the left panel, you need to choose the cameras for playback, the date and time to be searched.

How to backup the videos via Smart PSS
Once your timeframe is correct, click on search. After the search completes, click on play to start playback. If you select multiple cameras at one make sure to turn SYNC on (that way they’ll all play simultaneously).
 When footage is playing back you can click the scissors icon bottom left-hand corner (see the screenshot below). This will pre-select 1 hour of footage on the timeline bar.
Click and drag the red box to change the start/end time. Once you have the correct time, click the scissor icon again to cut the footage. This will prompt you with a backup window asking where you would like to export (save) the file.
Conclusion
Using the Smart PSS software is intuitive and easy. The interface is similar to that of the recorder and follows the same logic. First, you have to add the recorder to the software and then you can perform various actions such as watching the cameras live, playback, backup, etc.
This camera management software is quite useful if you intend to check your security camera system via your computer.
Smart PSS supports all Dahua branded equipment and their OEM line (which is sold under various brand names). If you’re looking for a complete security camera system, take a look at our Best Security Camera Systems.


