This guide shows how you can configure different types of camera views for automatic cycling of cameras in live view on the monitor/TV connected to your Dahua DVR or NVR. These settings are found under the Monitor Tour function on your recorder. In other words, this feature makes the cameras’ views to switch from one to another, or from 4 split view to another 4 split view, etc., continuously auto rotating. It’s an interesting function that facilitates the camera monitoring, especially when you have a lot of channels.
In this example the tour mode on your recorder and be configured to display:
- Display channels 1, 2, and 5 in single view
- Display channels 2, 3, 5, and 7 in 4 view
- Display channels 1 thru 8 in 8 view
- Display channels 1, 3, 4, 6, 7, 8, 11, 13, and 15 in 9 view
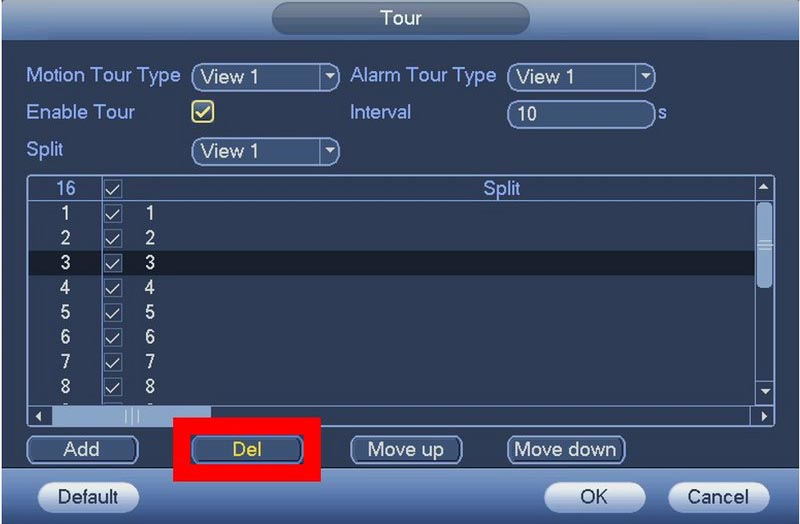
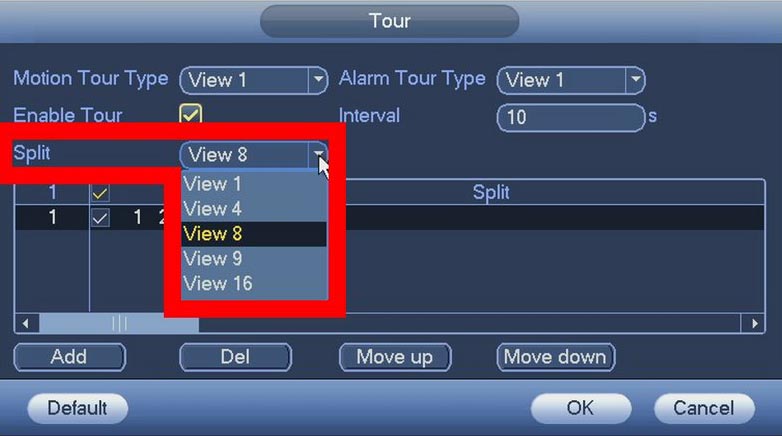
Step 1. Log directly into your recorder by typing your username and password. Go to Main Menu > Settings > Display and the Tour. You’’ll see the menu shown below. On the Split option you can select the way you want your channels to be split. In our example, we’ll choose Select the Split View 1
 View 1: View 1 camera at a time windows.
View 4: View 4 cameras at a time
View 8: 1 large window, 7 smaller
View 9: View 9 cameras at a time.
View 16: View 16 cameras at a time.
Step 2. Click a Channel you want to remove.
 Step 3. Click Del to remove the highlighted channel. Repeat Step 2 and 3 to remove additional channels.
 Step 4. Click Add to manually add more channels.
 Step 5. Select the desired Channel from the list. Click OK
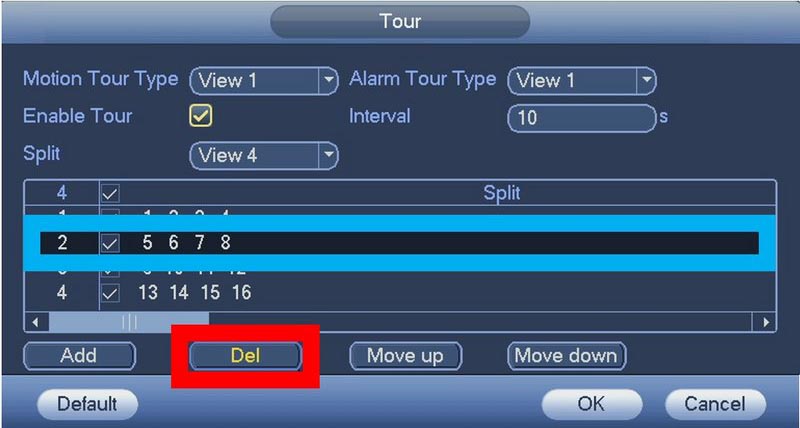
 Step 6. Select Split View 4.
 Step 7. Click one of the Channel Sequences you want to remove. Click Del. In this example, all sequences are removed so we can manually add a custom sequence.
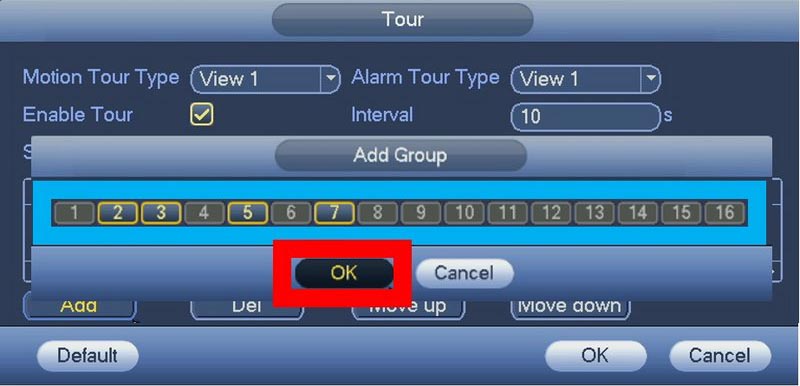
 Step 8. Click Add.
 Step 9. Select the desired Channels from the list. Click OK. Repeat Step 8 and 9 to configure more views.
 Step 10. Select Split View 8.
 Step 11. Click one of the Channel Sequences you want to remove. Click Del. In this example, only the second sequence is removed. Only cams 1-8 will appear in an 8 window view.
 Step 12. Select Split View 9.
 Step 13. Click one of the Channel Sequences you want to remove. Click Del. In this example, all sequences are removed so we can manually add a custom sequence.
 Step 14. Click Add.
 Step 15. Select the desired Channels from the list. Click OK. Repeat step 14 and 15 to configure more views.
 Step 16. Click OK. Tour will begin once motion is detected.
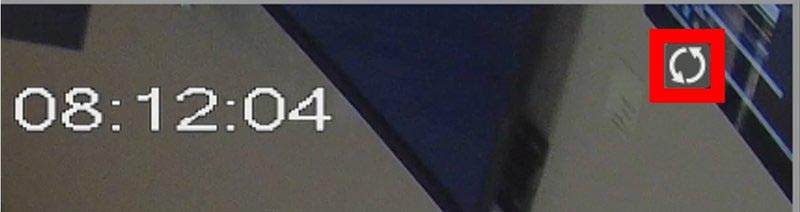
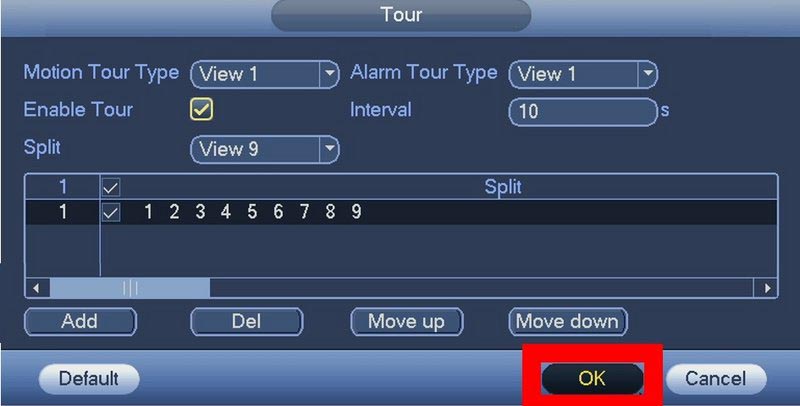 Step 17. Once the tour mode begins a refresh icon will appear in the top right corner. Click the refresh icon once to lock the current view. Click once more to resume the Tour. To disable Tour, return to Step 2, untick Enable Tour and click OK.
Note: this guide works for Dahua and their OEMs sold under these brands: Activecam, Advidia, Amcrest, Ameta, Ascendent, Backstreet Surveillance, BV Security, CCTV Security Pros, CCTV Star, CP Plus (Orange Line), Dax Networks, eLine, ENS (formerly Eastern CCTV and SavvyTech), Expose, Lorex, GSS, Honeywell, IC Realtime, Ikegami, Impath Networks, Inaxsys, IndigoVision, Infinity CCTV, Innekt, Intelbras, KBVision, Lumixen, Maxron, Montavue, Oco, Optiview, Rhodium, RVI, Saxco, Security Camera King (Elite), Space Technology, Speco, ToughDog, Tyco Holis, Tyco Illustra Essentials, Unisight, VIP Vision, Watchnet, Winic, Zuum.


