It is always recommended to have separate user accounts for each user on a Zosi DVR. That way you’ll avoid any network conflicts and have the cameras’ picture run smoothly. Even when setting up the system for remote viewing on the phone app, use separate accounts for each person who will view the cameras.
To add a new user on Zosi DVR or NVR is very easy and intuitive. In the next section we’ve explained how to create users and how to set the permissions of each account. Let’s say you want user A to view only certain cameras, simply select those channels on the settings. Or you can even block certain accounts from play-backing or exporting footage.
Adding a user account on Zosi DVR or NVR
Go to Operation > Setup > Users. The User Management screen displays an overview of the active users and their current permission levels. From this menu add users, delete users, or change your current password.
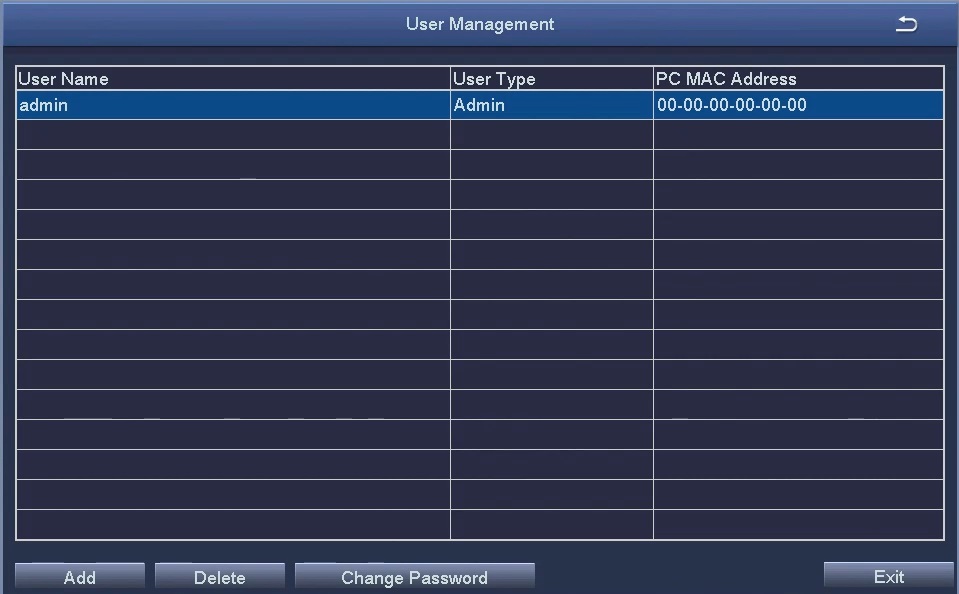
- Add: Adds a new user. When adding a user specify their username, password and user permission level. User permissions include Normal and Advanced users. Advanced users have all permissions enabled by default. Normal users can have their permissions restricted on the Authority tab. It is recommended that there is only one Advanced user on the system (so, keep only one super admin account).
- Delete: Delete a user from the NVR.
- Change Password: Change the password of the selected user. First, enter the old password before changing to the new password.
If it is your first time setting the system up, or you haven’t set a password yet, the “Old Password” field will be left empty.
Users and Permissions
Below is an example of adding a new user account.
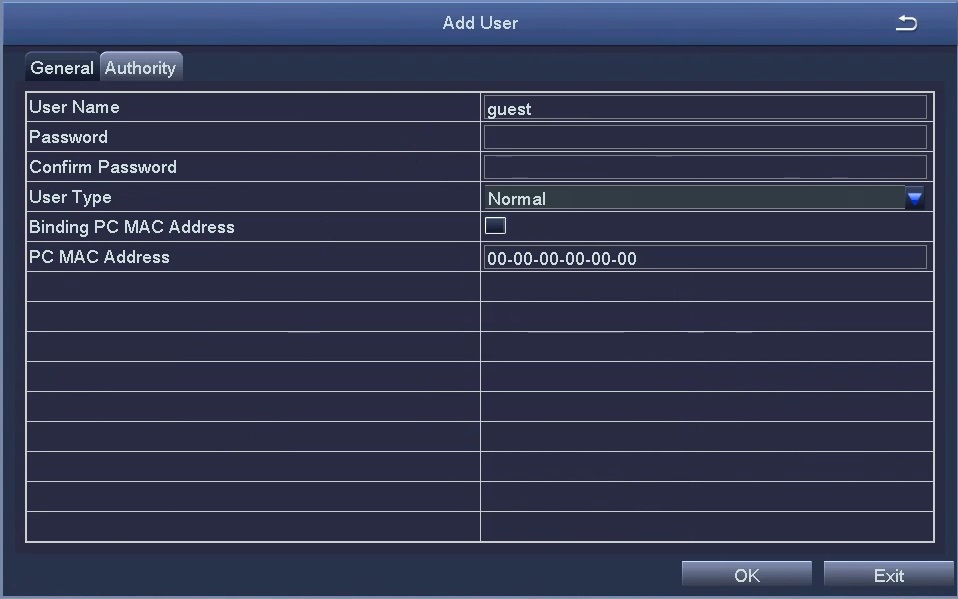
- User Name: Enter the username for the new user using the virtual keyboard
- Password: Type the password used to log in.
- Confirm Password: Confirm the password used to log in.
- User Type: Select the user permission level.
- Binding PC Mac Address: Select whether to limit access for this user to a specific computer’s MAC address. If checked the user will only be able to access from a predetermined computer. If unchecked, the user will be able to access from anywhere regardless of his MAC address
Click Adding A User and then Authority.
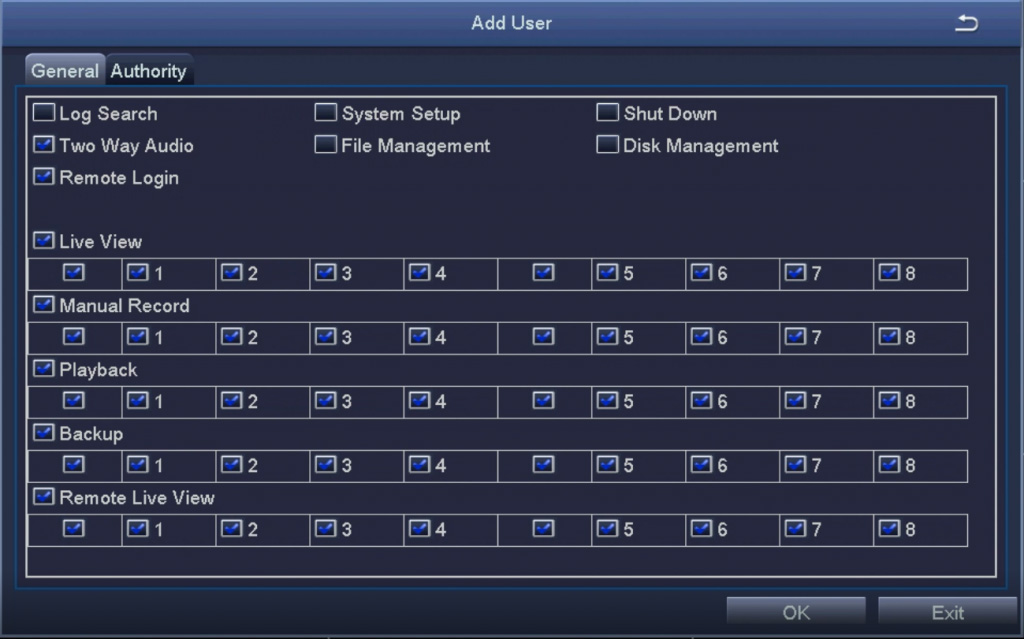 Select between enabling and disabling user permissions on this menu. Enable access by ensuring a check mark appears in the relevant box. For each heading select whether you want the user to have access to the designated menus or channels. All permissions set are unique to the specific user. New permissions will need to be created for each new user.
Only an “Advanced“ account (administrative) is able set permissions for other users. For example, you can allow this particular user to see all the cameras but the account can’t be able to playback or remote view on the phone. The choices are basically endless, whatever fits your criteria.