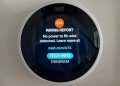
If your Nest Thermostat displays a blinking green light at the top, it indicates that the device is updating its software.
Smart thermostats like the Nest require regular software updates to ensure optimal performance and security. Google frequently releases updates to enhance functionality and address any security vulnerabilities.
Typically, the update process should take only a few minutes, but it may extend up to 15 minutes.
If the green light continues to blink beyond 15 minutes, it suggests that the device may be frozen and requires a restart to resolve the issue.

How to Fix Nest Thermostat Blinking Green Light
Restart Your Nest Thermostat
When your Nest Thermostat freezes during a software update, performing a restart can often resolve the issue.
Before proceeding, it’s important to confirm which model of the Google Nest Thermostat you own, as the troubleshooting steps may vary.
Option 1: Restart the Nest Thermostat
For Nest Learning Thermostat or Thermostat E:
- Press and hold the center button for 10 seconds until the screen shuts down, then release it.
- Press and release the display again. It should now restart.
Note: If the screen is already off, hold the center button for more than 10 seconds. The device may need to download the update again, but it should restart without issues.
For Nest Thermostat:
- Pull the thermostat off the base.
- Remove the batteries from the battery compartment.
- Replace the AAA batteries with new ones, or use a set you know is working.
Reattach the thermostat to the base and allow it to restart.
Option 2: Remove and Replace the Display
- Gently pull the display off the base.
- Reconnect the display to the base.
This will force the device to restart. It may need to download the update again, but it should restart without a problem. Ensure the thermostat is properly connected to the base, as improper seating can cause power issues.
Check Your Wi-Fi Connection and Signal Strength
Nest Thermostats depend on a stable Wi-Fi connection to interact with the Google Home app or Google Nest App.
Without a reliable connection, you may encounter various issues, including problems with firmware updates.
Check Your Wi-Fi Connection
Start by verifying if there are Wi-Fi issues in other parts of your home, especially near your thermostat.
Stand next to the thermostat and perform a speed test on your phone or laptop to assess the internet connection’s speed. This will help identify any broader connectivity issues.
If your Wi-Fi speed is slow, try power-cycling your router and modem by turning them off and then back on. This is a good practice to do occasionally to maintain optimal performance.

Check Your Signal Strength
A strong Wi-Fi signal is essential for any device that relies on it. Signal strength can be affected by obstacles and the distance between the device and the router.
Concrete walls and other devices can interfere with the signal.
Conduct a Wi-Fi speed test in various parts of your home to identify any dead spots and move the unit closer.
Charge Your Nest Thermostat Using the USB Port
If you’ve removed your Nest Thermostat from the wall, you may have noticed a USB port on the back. This port can be used to charge the device, especially if it is blank and displaying a flashing green light.
Charging the thermostat not only helps it power up but can also facilitate software updates.
Additionally, moving the thermostat closer to your Wi-Fi router during charging can ensure it receives a strong signal.
Steps to Charge Using the USB Port
- Remove the Thermostat from the Wall: Gently pull your thermostat off its wall mount.
- Connect the Charger:
- For the 2nd and 3rd generation Nest Learning Thermostat or the Nest Thermostat E, use a micro-USB cable.
- For the 1st generation Nest Learning Thermostat, use a mini-USB cable.
Note: This method is not applicable to the latest model, the Nest Thermostat.
Plug Into a Wall Charger: Connect the other end of the USB cable to a USB wall charger. Avoid using a computer or USB port from another device for charging.

Check for the Blinking Red Light: If you see a blinking red light, it confirms that the device is charging.
Wait for the Device to Charge: Charging may take several minutes or up to an hour. If it takes longer than an hour, there could be another issue that needs addressing.
Reconnect to the Wall Base: Once the device has enough charge, the display screen will light up with a message prompting you to reconnect it to the base. Reattach the thermostat to the wall mount to complete the process.
After charging and reconnecting the thermostat to the base, check the power levels to ensure the device is functioning correctly. This step can help identify if there are larger issues that need further troubleshooting.
When your Nest Thermostat fails to complete a software update or freezes, it is crucial to check the power readings.
Insufficient power might be the reason behind the blinking green light. This check is only possible if your thermostat is powered on and the screen is not blank.
Check the Power Levels
Access the Settings Menu:
- Press down on your Nest Thermostat.
- Turn and scroll to the gear icon, labeled “Settings.”
- Click on the Settings icon.
- Navigate to Technical Info:
- Scroll to the right until you reach “Technical Info” and select it.
- Choose “Power,” which should be the top option.
- Review the Power Metrics:
You will see four metrics: Battery, Voc, Vin, and lin.
The primary metric to focus on is the Battery level. The battery voltage should be greater than 3.7V (volts). This value indicates the charge level of the thermostat’s internal rechargeable battery.
If the voltage drops below 3.6V, the thermostat might shut down certain features like Wi-Fi or the display to conserve power, leading to low battery messages or a blank screen.

Another critical metric is lin, measured in milliAmps. The lin value should be greater than 20. If lin is at or below 20, you may encounter similar issues, even if the battery appears charged.
If your device lacks sufficient power, it’s recommended to check the wiring.

Factory Reset the Thermostat
Sometimes the most effective solution is to perform a factory reset, allowing the device to start fresh and update its software, which can resolve the blinking green light issue.
Keep in mind that this will erase your settings, and you’ll need to go through the setup process again
How to Factory Reset Your Nest Thermostat
For Nest Thermostat:
- Go to Settings.
- Select Factory Reset.
For Nest Thermostat E or Nest Learning Thermostat:
- Press your thermostat ring.
- Go to Settings.
- Turn the ring to Reset and press down.
- Select All Settings.
After performing a factory reset, you’ll need to set up your thermostat as if it’s the first time, so make sure you have your Wi-Fi password handy.
Once reconnected to Wi-Fi, the thermostat will automatically update its software.
Final Word
Nest Thermostats are excellent smart home devices but can occasionally face issues like a blinking green light. To resolve this, restart your Nest Thermostat and check your Wi-Fi connection and signal strength.
Additionally, try charging your thermostat using the USB port and check the power levels and wiring.
If these steps don’t work, performing a factory reset on the thermostat might help. Ensure proper wiring by installing a C (common) wire, as this can fix most Nest Thermostat issues.