In this step by step guide, we will show you how to configure email alerts on your Uniview NVR. These alerts can be used for motion detection or when a hard drive has malfunctioned (both explained in this article). This feature is useful and can help you have a better control on your Uniview security system. In this guide we will do the settings via the web browser and at the same time we will demonstrate how to load up the web interface.
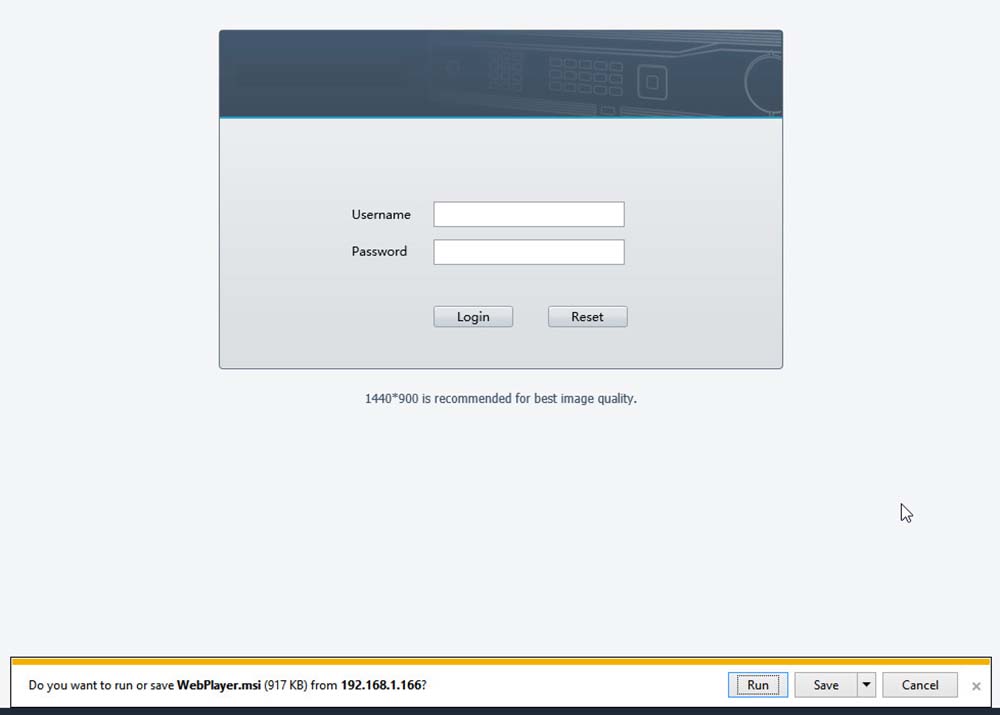
Step 1. Open up either Internet Explorer or Mozilla Firefox and type in the IP address of your NVR and hit “Enter”. (In this example, the IP address of our Uniview NVR is http://192.168.1.66:8080 and 8080 is the http port, yours may be a different one).

Step 2. If this is the first time accessing your NVR via a web browser, you will be prompted to download a plugin. Please click on the “Download” link to start the download. If not, please skip to Step 4.
 Step 3. If this is the first time accessing your NVR with a web browser and you have downloaded the plugin, you may receive a popup asking whether or not to Run/Open or Save the plugin. Choose “Run/Open” and follow directions on the screen. After plugin has installed, restart your browser and type in the IP address of the NVR again and hit “Enter”.
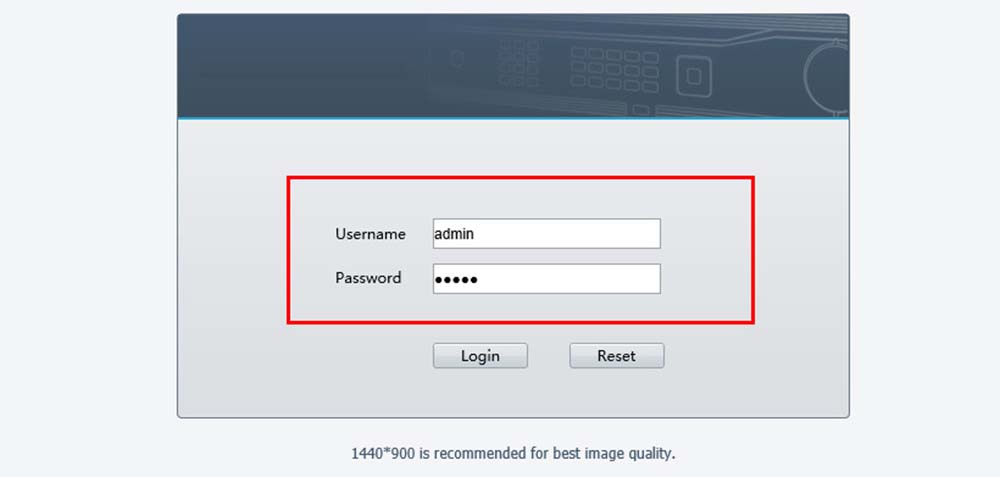
 Step 4. Type in your username and password and click on the “Login” button. The default username and password for Uniview CCTV systems are: username: admin; password: 123456.
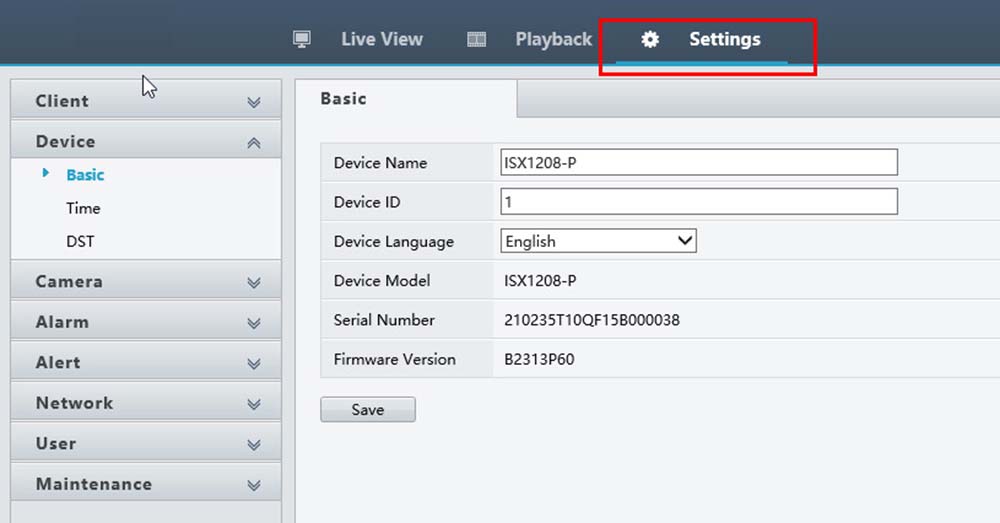
 Step 5. Once you have successfully logged in, you will see a grid layout with blank squares. You will see some tabs near the top left hand portion of the page. Click on the Settings tab and then you will be taken to the configuration section similar to the picture on the left.
 Step 6. From the column on the left, click on the Network category and then click on the Email subcategory. You should then see a screen similar to the image on the left.
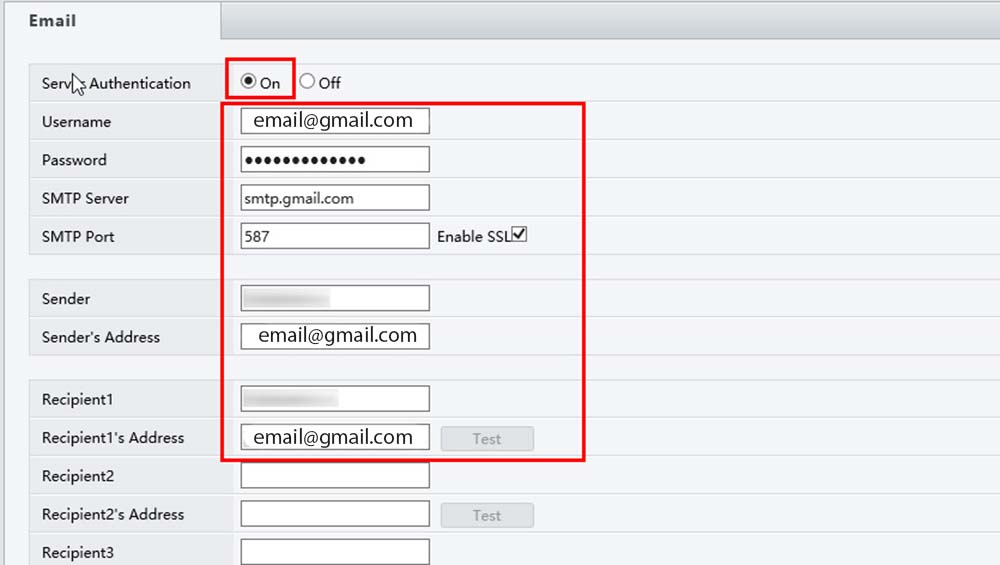
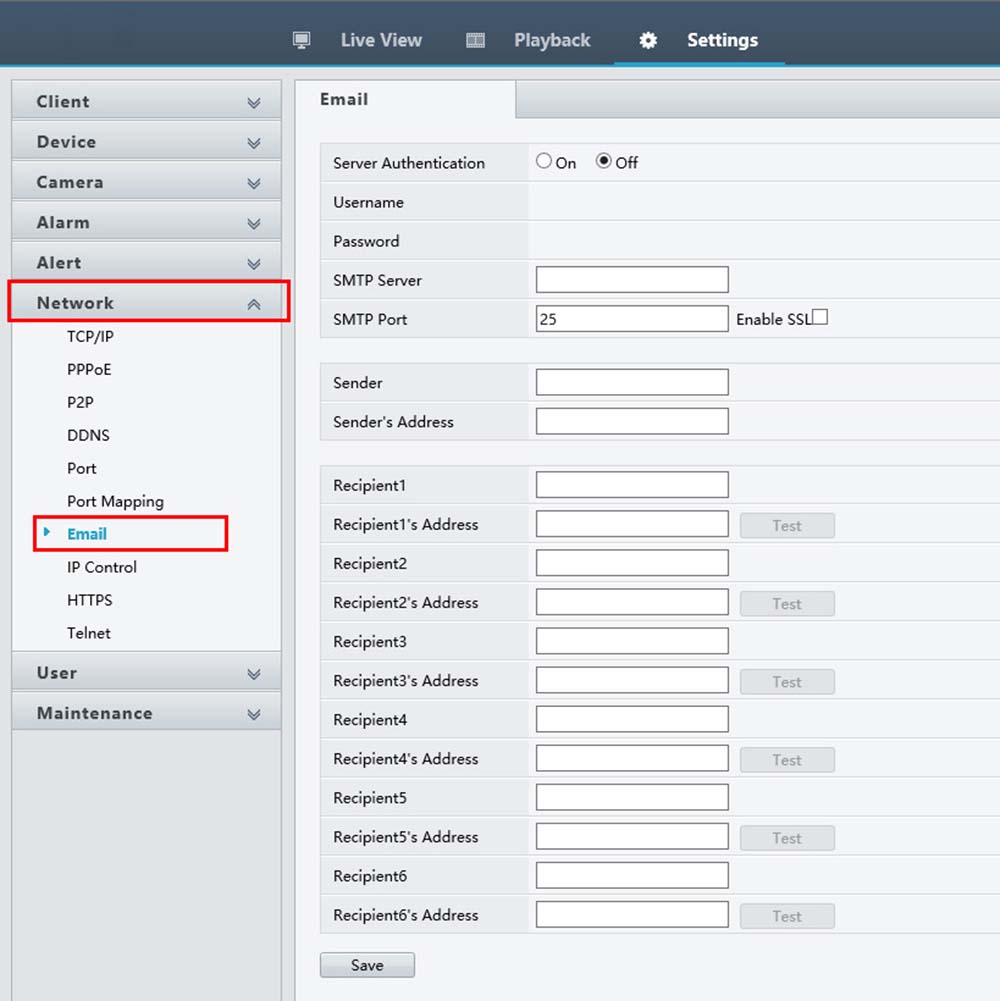 Step 7. We will now need to enter information for the email server to use to send email. If you know that your ISP or business supports an SMTP server, then you can contact them to get that information and fill in the fields marked in the image to the left. If you are using Gmail as your email service, they already support sending email using SMTP.
If using Gmail, this would be the configuration:
Server Authentication: On
Username: [enter your Gmail email address in full]
Password: [enter your Gmail account’s password]
SMTP Server: smtp.gmail.com
SMTP Port: 587
Enable SSL: Yes/Checked
Sender: [Name you would like to appear in email]
Sender’s Address: [your full Gmail address]
Below this section, you will see spaces for up to 6 email addresses you can send an email to. For each email address, you will also need to enter in the recipient’s name.
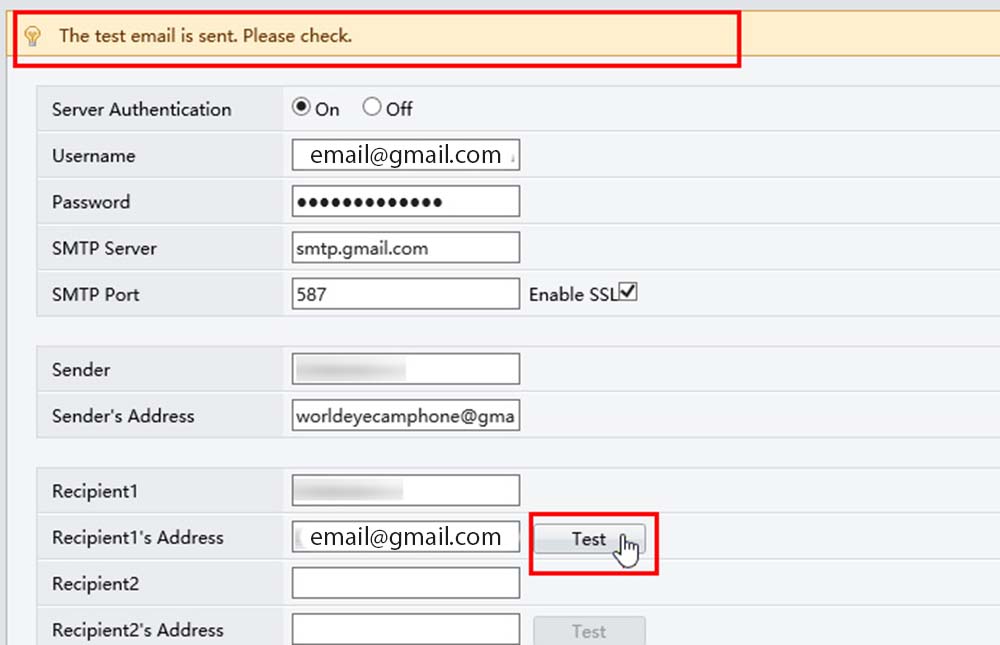
 Step 8. After each recipient’s name and email address you have entered, you can now test to see if your settings are correct. Click on the Test button next to each recipient you are trying to send an email to. If successful, you will see a status message at the top of the web page stating that the email was sent. At this time, you can check the recipient’s email to confirm the email. If you receive an error message, then confirm your email server’s information in the section above and click on the test button again to see if the test is successful. If all tests run successfully, click on the Save button to save all changes made.
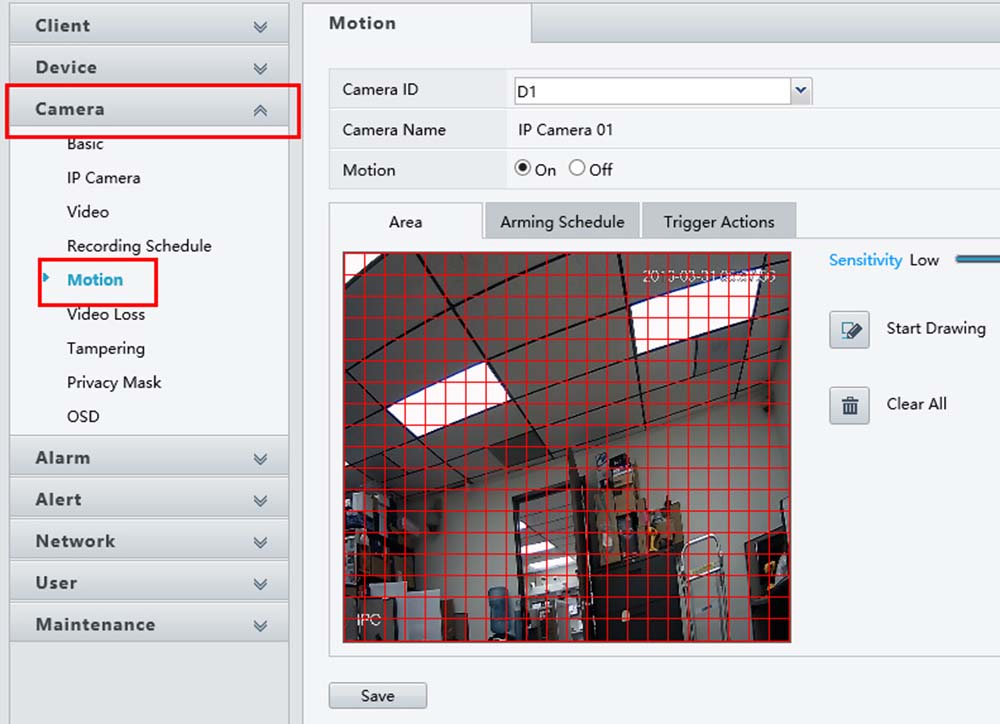
 Step 9. Most customers who enable email alerts will want to be alerted if a certain camera detects motion. Follow this and the next step in order to enable motion alert emails for your Uniview NVR. First, click on the Camera category from the column on the left and then select the Motion subcategory. You should see an image similar to the one on the left. For each camera that you will want to enable a motion alert for, you will need to choose the camera number from the Camera ID drop-down menu.
 Step 10. Now for the camera that you are trying to enable email alerts for, click on the Trigger Actions tab. Next, make sure that the Motion option is turned on, and that the Send Email checkbox is checked. Make sure you do this for each camera that you want to enable email alerts for. After you have done this, click on the Save button below to save all changes and wait for the confirmation message that it has saved successfully.
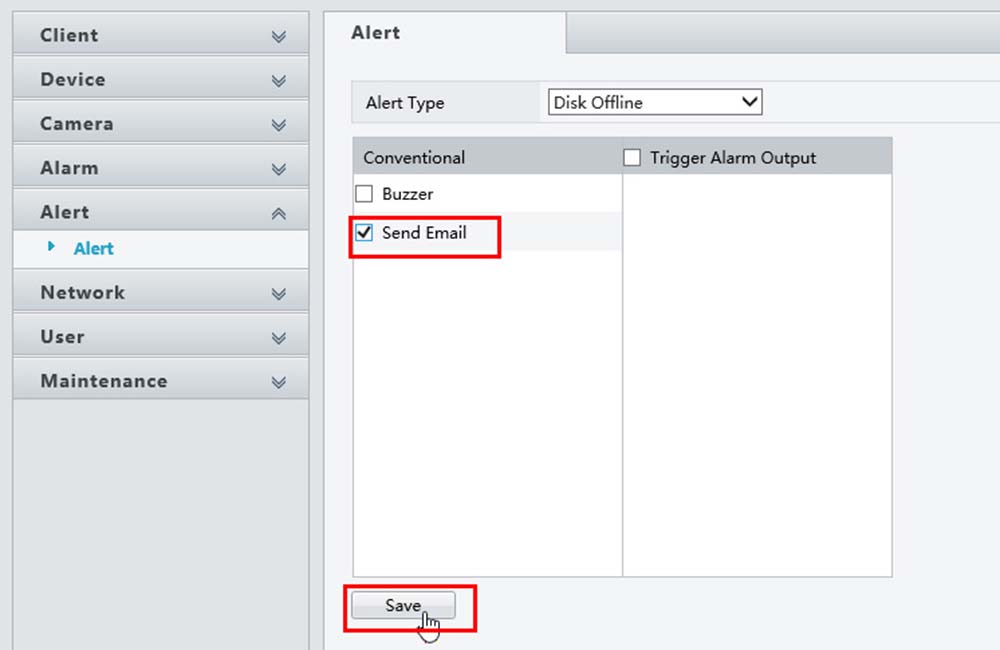
 Step 11. We can also enable email alerts for when there are errors on the HDD inside of the NVR that stores the video footage. To do this, we must first click on the Alert category on the left hand side and then make sure that the Alert subcategory is selected.
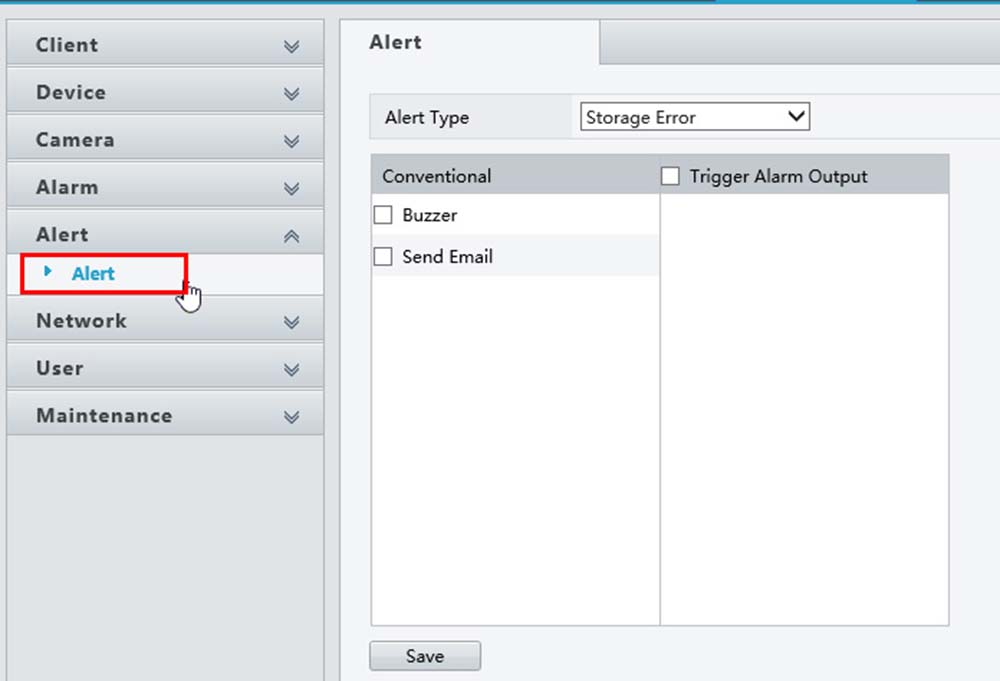 Step 12. In the Alert Type drop-down field, you can see all available choices for enabling email alerts. The most common alerts you should enable are Storage Error, Disk Offline and Disk Abnormal.
 Step 13. For every Alert Type you want to enable, just make sure that the Send Email box is checked. After you have configured the alerts to your liking, make sure to click on the Save button and wait for confirmation of changes.
And that’s basically all you need to do. In this guide we discussed and explained: how to install the web browser plugin, how to enter the email settings, how to enable email alerts for motion detection or NVR malfunctioning events.