In certain cases you many need to move the Hikvision date/time tag to a different spot on the monitor/TV. Let’s say you want to move the OSD (On Screen Display) timestamp from the right side to the left side. The method works for any Hikvision (brand/OEM) NVR or DVR.
It’s a small trick that makes a big difference, especially if certain spots on the screen are too bright and you can’t clearly read the timestamp. Or if the timestamp is blocking areas of interest on the screen.
How to move the timestamp tag on a Hikvision NVR or DVR
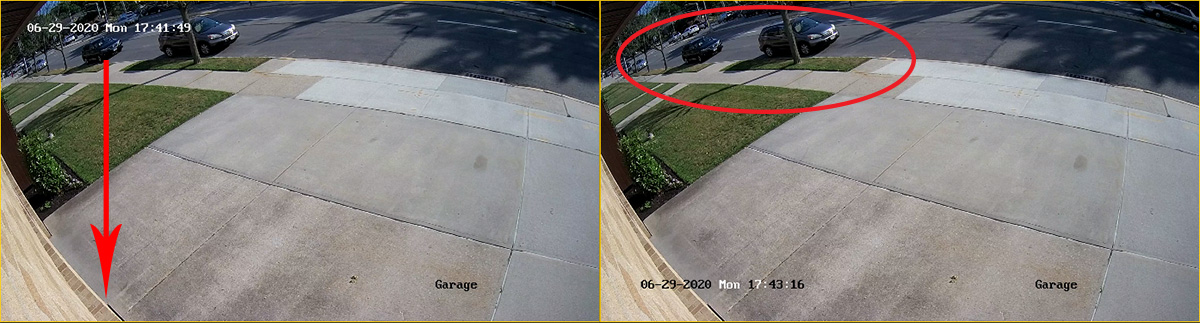
Take a look at the picture below and let’s move the OSD tag to the bottom of the screen. As you can see, the current position of the timestamp is blocking the scene on the top left side (which may be an area of interest). Under these conditions, it’s more convenient to place it at the bottom of the screen.
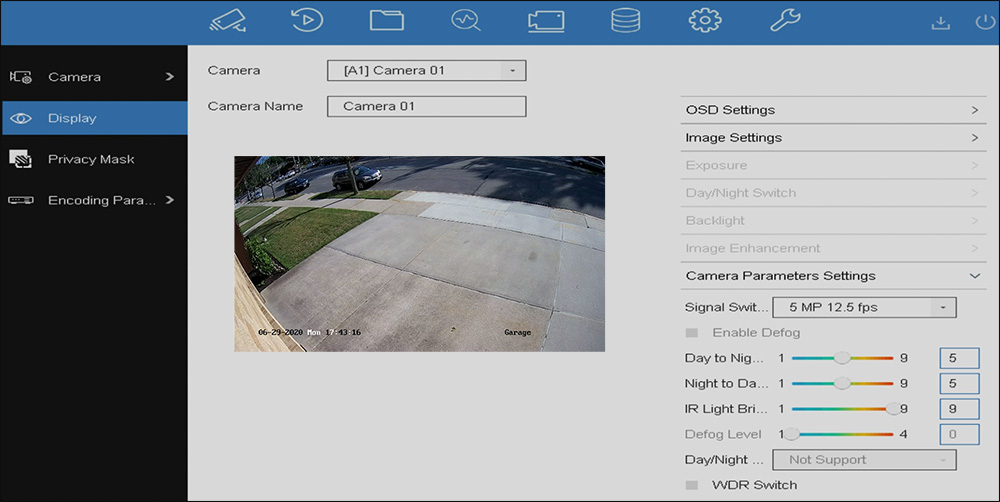
 Access the Hikvision NVR/DVR system via the web browser (Internet Explorer). Navigate to Configuration > Image > OSD Settings. From there you can drag and drop the timestamp to your preferred position.
 On the Display Mode section, there are three options:
- Transparent and Flashing (the timestamp will be transparent and go on and off the screen)
- Transparent and Non Flashing
- Not Transparent and Not Flashing (solid color).
Also, you can do these settings directly from the NVR/DVR. Login and go to Camera > Display (or OSD Display) and drag and drop to reposition the camera.
 Apart from moving the OSD timestamp, you can change the camera name, select what kind of information you want to be displayed on the video (such as time, date, camera name). These instructions are the same across all the Hikvision DVRs, NVRs or even standalone IP cameras.
