Heat Map is an intelligent function supported by various Hikvision security cameras. By configuring this feature you can have a generated map of the areas with the most traffic in your location.
It can be a pretty useful tool if you’re trying to gather data about the foot traffic in your business and make the correct adjustment based on that feedback. The heat map will be color-based and it shows which areas under the camera’s eye get more motion.
This guide shows the instructions on how to configure the Heat Map function on a Hikvision camera and explains all the terminology found in the settings section of the camera.
Note: Before you start make sure the camera supports the Heat Map function. You can check the camera’s setting, the spec sheet, or contact the seller/dealer for more information.
How to configure Heat Map function on Hikvision IP camera
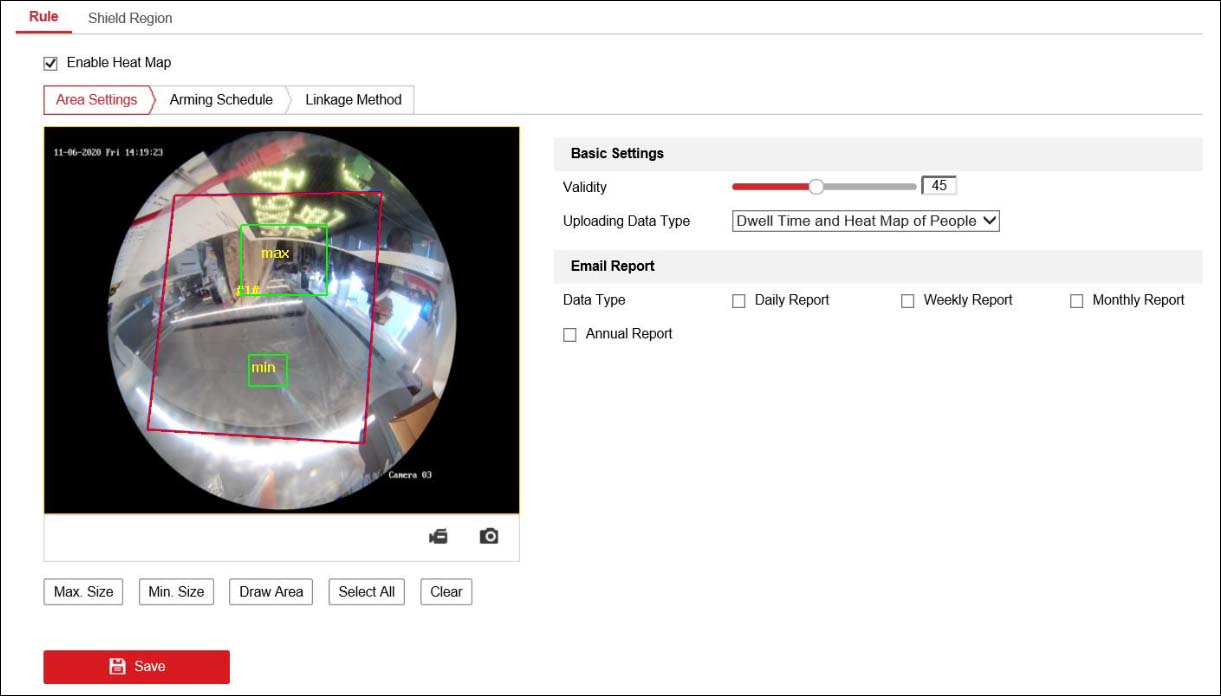
Step 1. Type the IP address of the camera on the web browser, log in with your username and password. Then enter the Heat Map configuration interface: Configuration > Heat Map Configuration. Tick the checkbox of Enable Heat Map to enable the function (as shown below).
 Follow these instructions to configure the Heat Map function:
1. Click Draw Area to define the area you want to count the visitors. Draw the area by left click four end-points in the live view window and right-click to finish the area drawing. You can click Select All to select the whole live view window as the configured area. Or click Clear to delete the current drawn area. We recommend putting some effort here and select the right area for the heat map.
2. Set the Max. Size and Min. Size for valid targets by clicking the corresponding button and drawing on the live image. Targets smaller or larger than the valid target size are not able to trigger detection.
- Max. Size: The maximum size of a valid target. Targets with larger sizes would not trigger detection.
- Min. Size: The minimum size of a valid target. Targets with smaller sizes would not trigger detection.
3. Configure the parameters of the Heat Map.
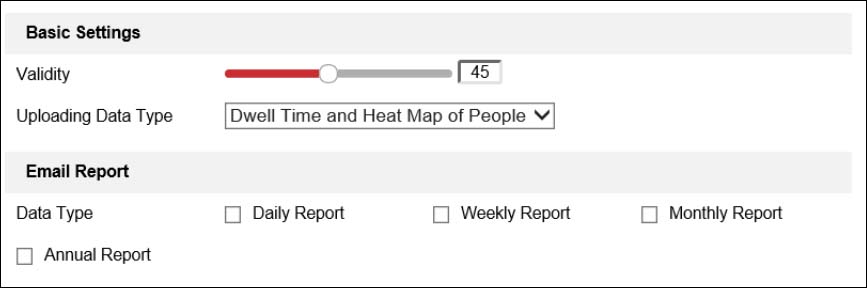
- Validity: The camera uses this value to judge if a target it detects is a valid one or not. Invalid targets will not be included in the statistics. The higher you set the value, the harder a target would be treated as a valid one.
- Uploading Data Type: There are two options selectable for uploading data type. Dwell Time and Heat Map of People. The uploading data will only upload Dwell time information if selecting Dwell Time type; if selecting Dwell Time and Heat Map of People, the data will contain Dwell time and Heat Map of people.
- Email Report: The heat map data report can be delivered by email. The report type includes Daily Report, Weekly Report, Monthly Report, and Annual Report.
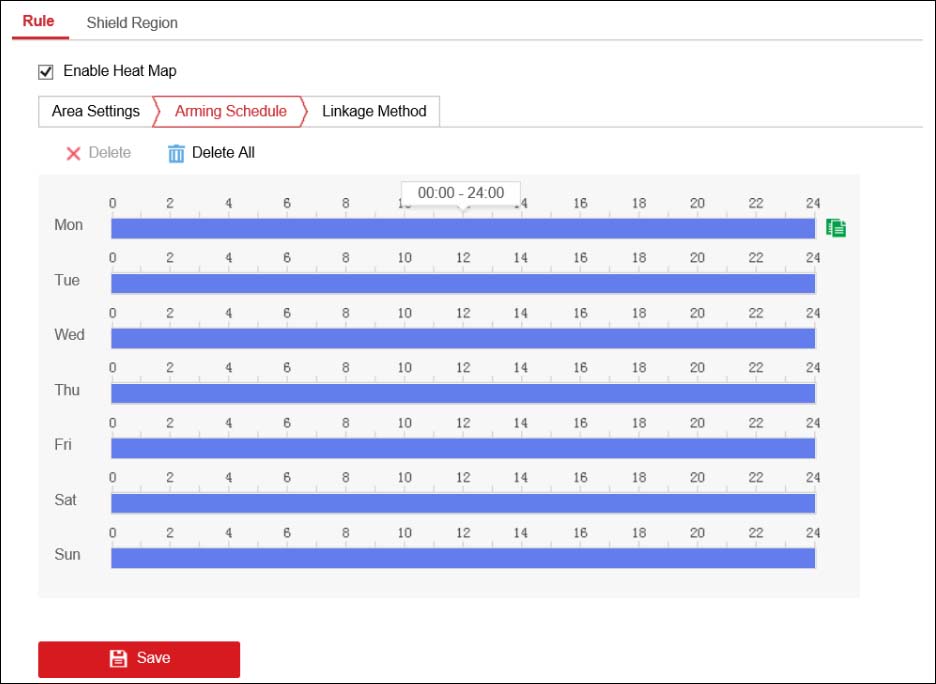
 Step 2. Go to the Arming Schedule tab, and click-and-drag the mouse on the time bar to set the arming schedule. Basically, here you’re telling the system in what time frame to be armed.
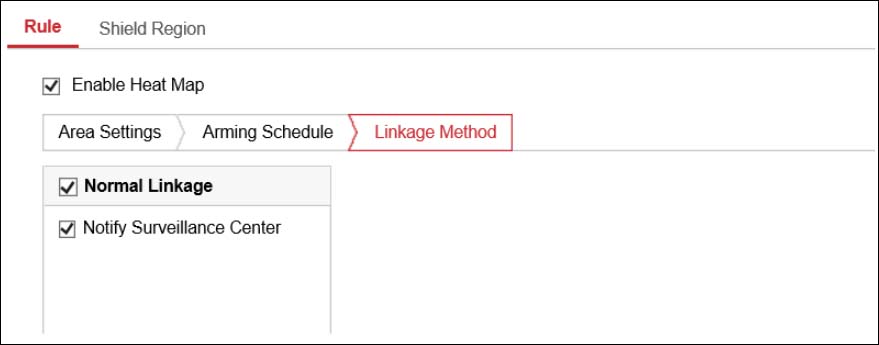
 Step 3. Go to the Linkage Method tab, and select the linkage method by ticking the checkbox “Notify the Surveillance Center”.
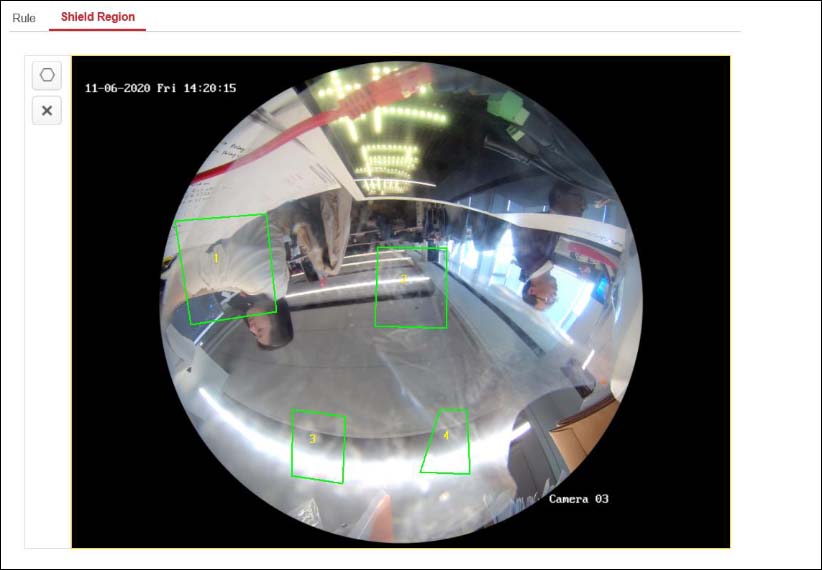
 Step 4. Configure Shield Region if necessary. Shield Region is used to shield the area in which you don’t want to count the heat map statistics. Up to 4 shield regions are configurable. Click Save to save the above settings.
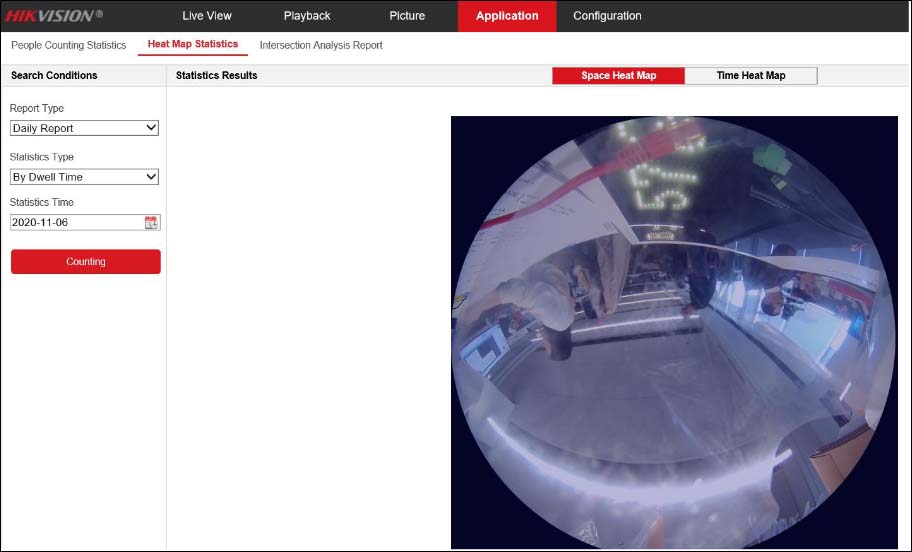
 Step 5. The heat map statistics will be calculated in the Application tab. Go to Application to check the counting statistics.
Steps:
- Select the report type. Daily reports, monthly reports, weekly reports, and annual reports are selectable.
- Select the Statistics Type. By Dwell Time and By Heat Map of People are selectable.
- Set the Statistics Time. If you select the report type as anyone other than daily report, the camera generates reports for the week, calendar month, and calendar year that the set date belongs to.
- Select the chart mode for statistics showing. For heat map, Time Heat Map and Space Heat Map are selectable.
- Click Counting to start calculating.
Notes: When you choose Time Heat Map, you can export the data in an excel file by clicking the Export on the top right corner of the interface and setting the saving path.
 Once done, the CCTV security camera will generate a heat map report with the traffic data from the area. You can use this data to better understand the layout impact of your business. We recommend trying various setting combinations on the Heat Map settings section until you’re happy with the generated report.
If for some reason the confusion doesn’t work, make sure the camera’s firmware is updated to the latest version. Additionally, you can ask the Hikvision USA office for technical support.
