PTZ cameras are smart security cameras that can perform controlled movements such as pan-tilt-zoom. These cameras can be controlled via the NVR or by using the phone.
Additionally, they come with various intelligent functions that help you better monitor your area and, most importantly, automate certain tasks.
For example, you can have the PTZ camera on Patrol mode, scanning the area and then returning to its previous position, and so on. Or follow certain Patterns and Presets, etc.
In this guide, we will show how to configure a Hikvision PTZ camera, how to set the Preset, Pattern, Patrol, and explain all the PTZ smart functions. The guide is valid for Hikvision branded and OEM PTZ security cameras. Even for other brands, the logic and steps are the same.
How to configure Hikvision PTZ camera
Below we will explain various smart functions on a Hikvision PTZ security camera and show how to do the respective configuration.
First of all, log in to the PTZ camera by typing the IP address on the web browser and then entering your username and password. Use Internet Explorer and install the required plugin when prompted.
Min. Focus Distance
The minimum focus distance is the shortest distance at which a PTZ lens can focus. Navigate to Configuration > Image > Display Setting > Focus interface.
The Min. Focus Distance is recommended to be set to 6.0m for the outdoor scene and 1.5m for the indoor scene.
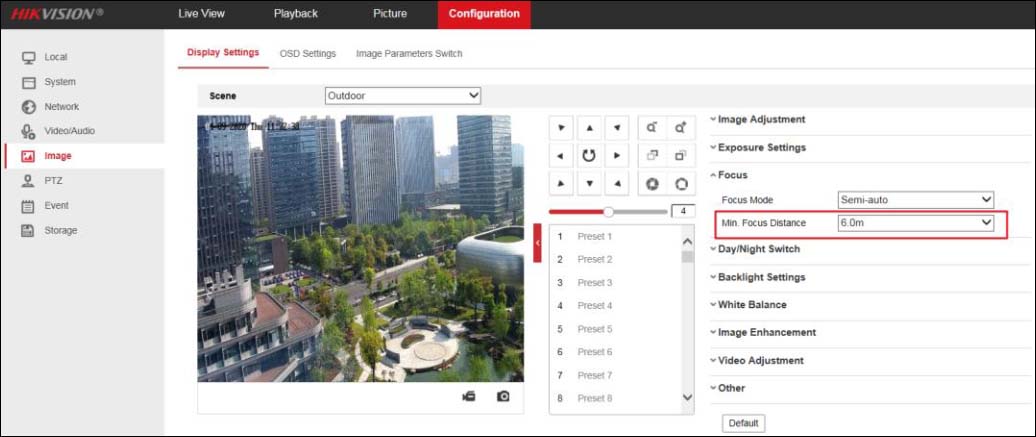 Setting an inappropriate Min. Focus Distance may cause slow or unfocused problems. To choose the right Min. Focus Distance according to the actual monitoring distance.
Lens Initialization
The Lens initialization can solve the focus issue caused by a poor focus curve. Go to Configuration > Image > Display Setting > Other menu, the lens gets initialized when you enable the Lens Initialization.
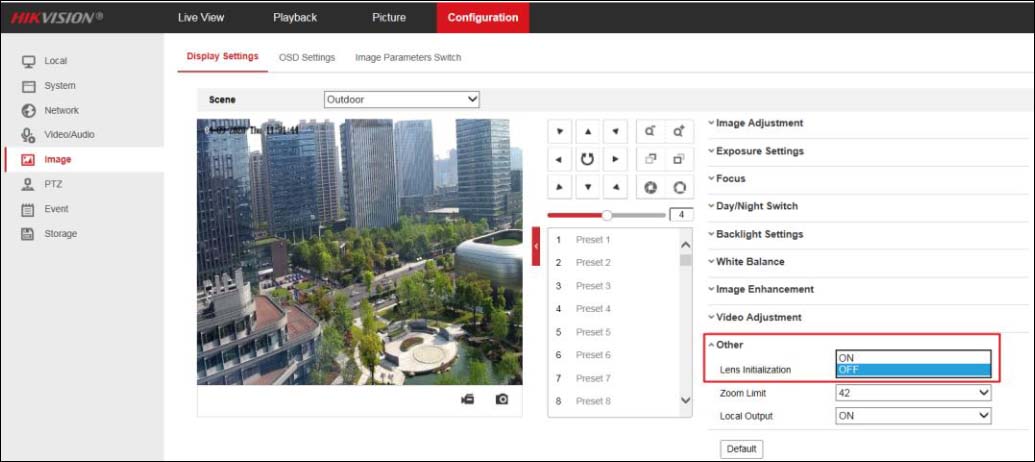
Note: Once the lens initialization is enabled, it will be initialized at one o’clock every day.
Preset
A preset is a predefined image position. Basically, you can ask the camera to track position 1, position 2, and so on, whatever you have “preset”. For the defined preset, you can click the calling button to quickly view the desired image position.
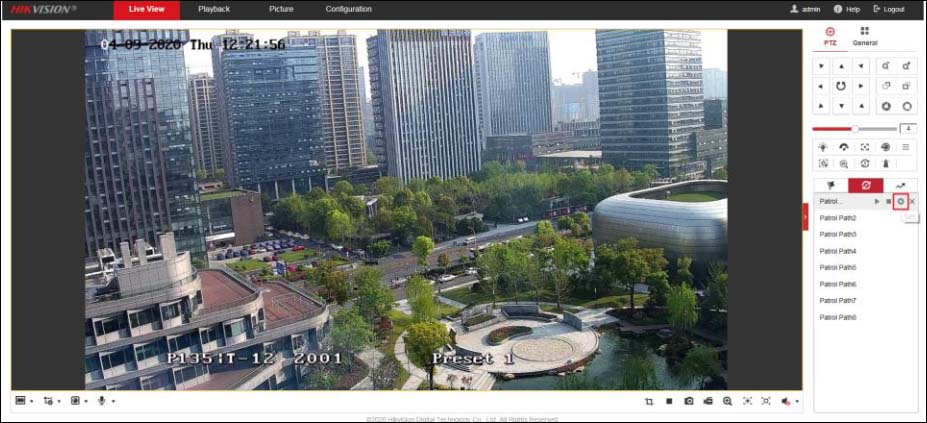
To configure the PTZ Preset function, go to Live View > PTZ interface, select the preset that you want to set, left-click on Set.
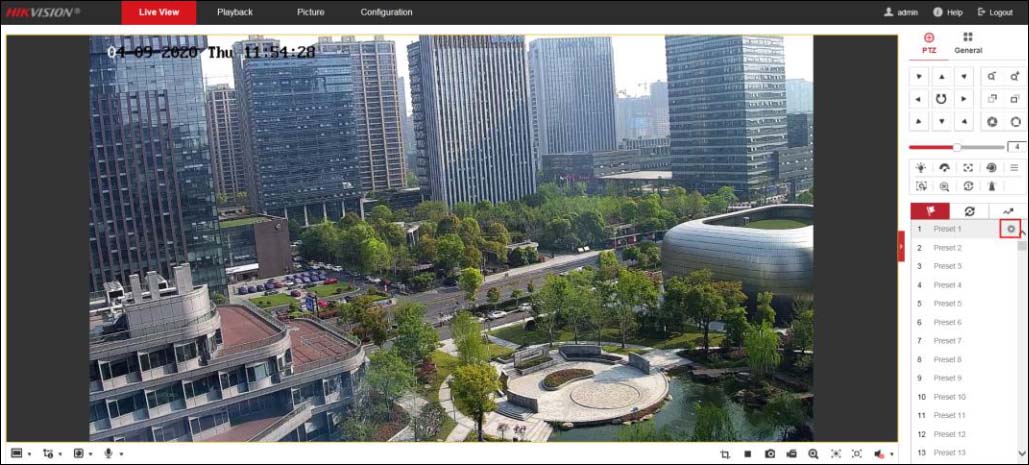 Click Call to let the PTZ camera go to the position corresponding to the preset you selected.
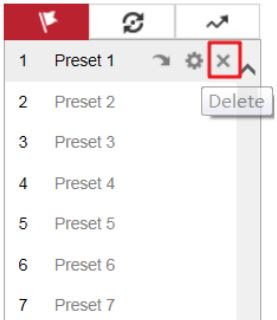
 Click Delete to delete the preset.
Patrol
A patrol is a memorized series of preset functions. In other words, the camera will follow the “preset 1” path, stay there a few seconds, and then move to the “preset 2”, etc. The whole thing is called “patrol”.
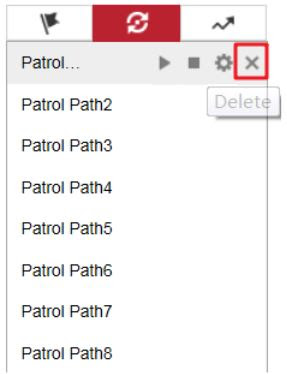
These settings can be configured and called on the patrol settings interface. There are up to 8 patrols for customizing. A patrol can be configured with 32 presets.
To configure the Patrol function, go to Live View > PTZ interface, and add several presets first. Choose the Patrol Path which you want to set, and left-click on Set.
Click the green + sign in the pop-up interface to add the preset, configure the Speed and Time and click OK to save the setting.
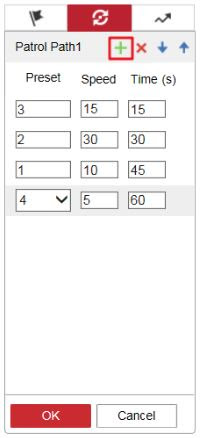 Note: The dwell time of the preset cannot be set to less than 15 seconds, this is to ensure that the slip ring has a longer service life.
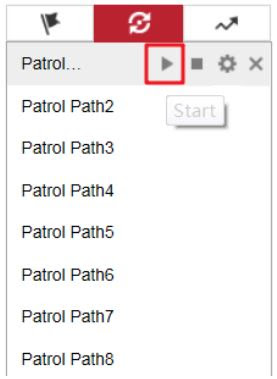
Click Start to call the patrol, the PTZ camera will patrol between various preset points according to the configuration.
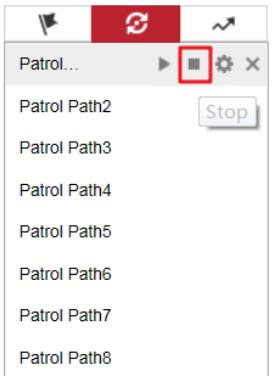
 Click Stop to interrupt the ongoing patrol.
 Click Delete to delete the patrol.
Pattern
A pattern is a memorized series of pan, tilt, zoom, and preset functions. It can be called on the pattern settings interface. There are up to 4 patterns for customizing.
Go to Live View > PTZ interface, choose the Pattern which you want to set, and left-click on Start Recording.
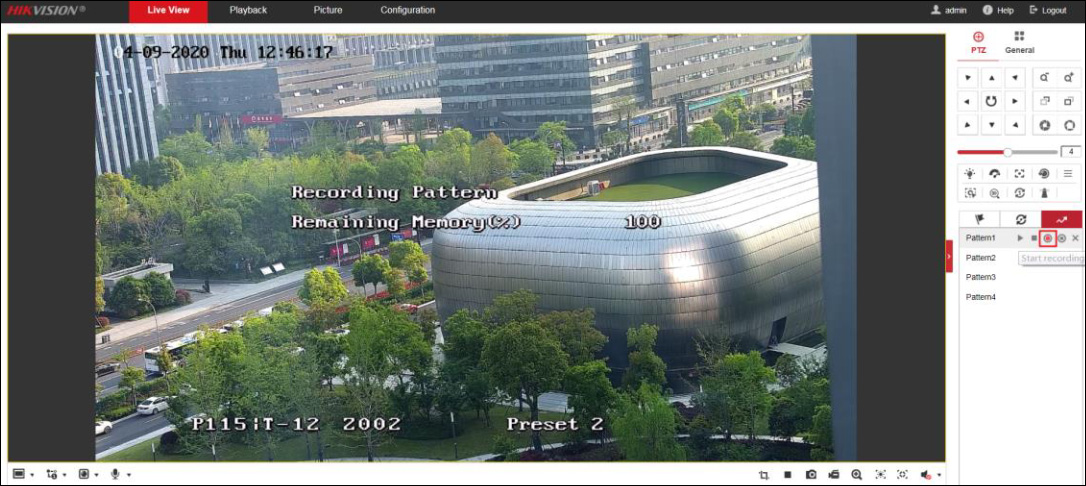 Use the PTZ control panel to let the camera perform pan-tilt movements, such as turning up and down, left and right, zoom in and out, and calling preset point, etc. The camera will record these actions and reproduce the next time it is called.
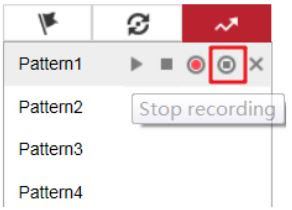
Left-click on Stop Recording to interrupt the recording.
 Click Start to call the pattern, the PTZ camera will perform the actions just recorded.
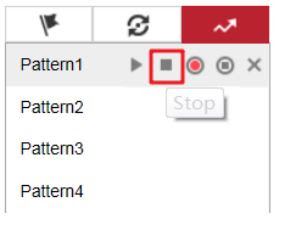
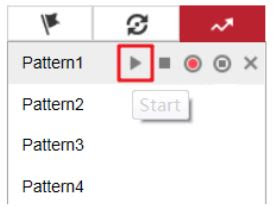 Click Stop to interrupt the ongoing pattern.
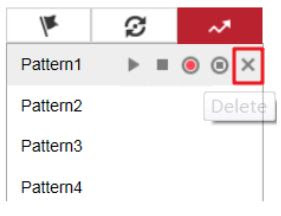
 Click Delete to delete the pattern.
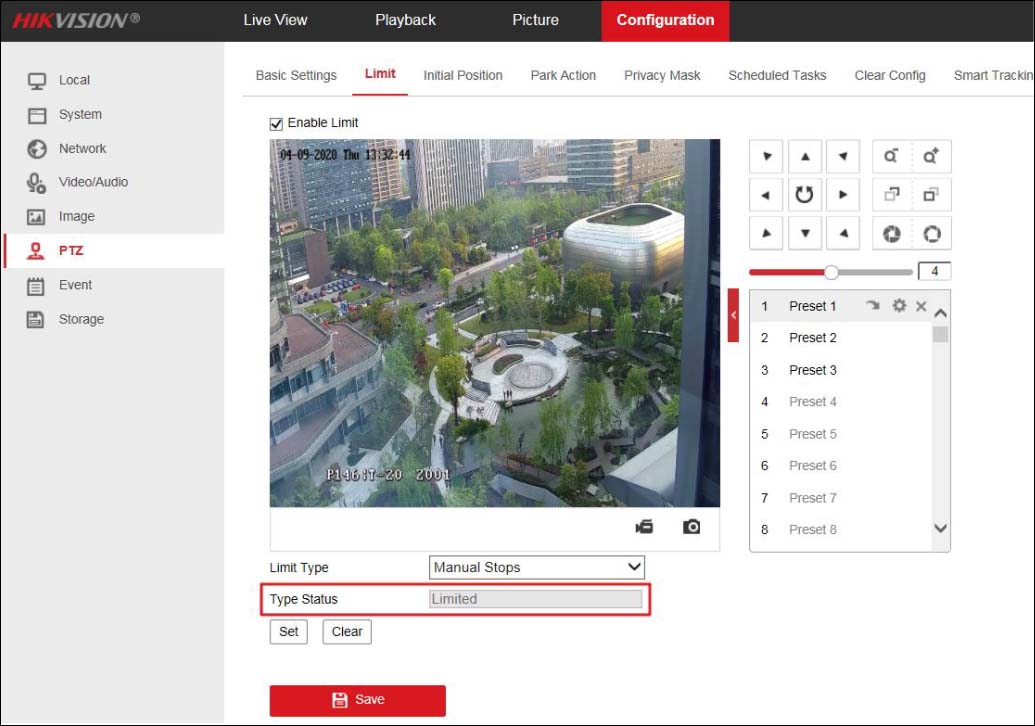
Limit
The dome can be programmed to move within the configurable limit stops (left/right, up/down).
Go to Configuration > PTZ > Limit interface, check the checkbox of Enable Limit, and choose the limit type as Manual Stops or Scan Stops.
- Manual Stops: When manual limit stops are set, you can operate the PTZ control panel manually only in the limited surveillance area.
- Scan Stops: When scan limit stops are set, the random scan, frame scan, auto scan, tilt scan, panorama scan is performed only in the limited surveillance area.
Note: Manual Stops of Limit Type is prior to Scan Stops. When you set these two limit types at the same time, Manual the Scan Stops is invalid.
Set Limits for the selected limit type. Click Set, and the setting guide text displays on the live image. Control the arrow buttons (or call the desired preset) to the desired left limit position, and click Iris + button to confirm the position. Then the live image displays the guide text for the right limit settings.
Follow the guide text to finish settings for left limit, right limit, up limit and down limit. If you want to clear limits, click Clear. Click Save to apply the settings.
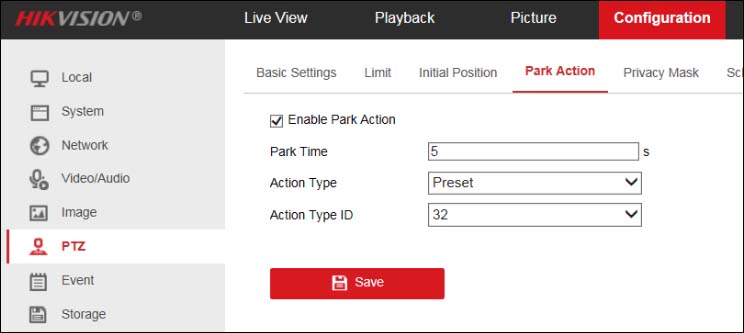
Park Action
This feature allows the dome to start a predefined park action (scan, preset, pattern and etc.) automatically after a period of inactivity (park time).
To configure the Park Action function, go to Configuration > PTZ > Park Action interface, check Enable Park Action, and set Park Time and Action Type according to the actual needs.
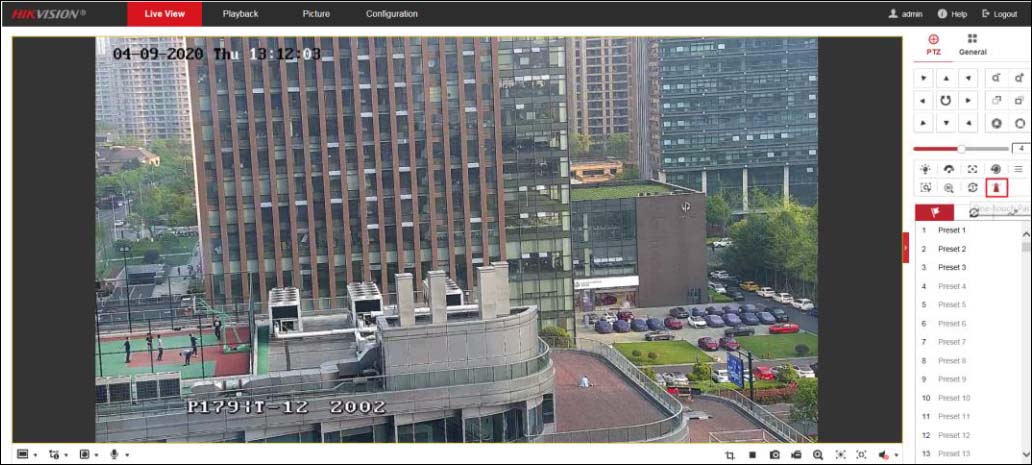
 Go to Live View > PTZ interface, click the lamp icon to save the current view as preset No. 32, and start park at the current position.
Here you can adjust the Park Time.
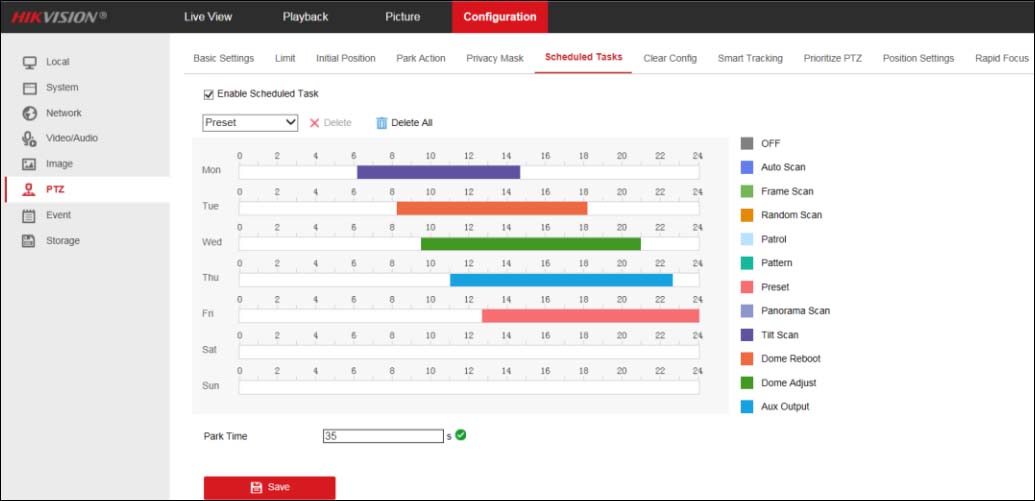
Scheduled Tasks
You can configure the network dome to perform a certain action automatically in a user-defined time period.
Go to Configuration > PTZ > Scheduled Tasks interface, Click Enable Scheduled Task to edit the task schedule.
- Choose the day you want to set the task schedule.
- Choose the Task Type from the dropdown list. You can choose scan, preset,
pattern and etc. - Select the timeline of a certain day, click and drag the left button of the mouse to
set the recording schedule (the start time and end time of the recording task). - Set Park Time. Park time means the waiting time before the camera resumes the scheduled task when it is interrupted by manual controls.
- (Optional) After you set the scheduled task, you can copy the task to other days.
- Click Save to save the settings.
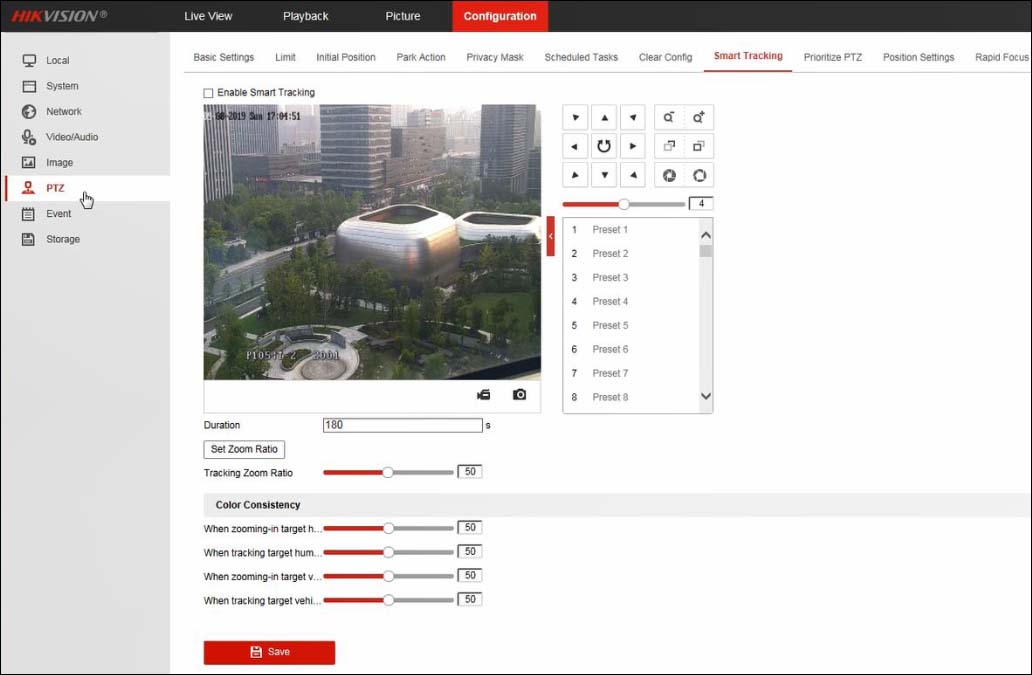
Smart Tracking
The speed dome tracks the moving objects automatically after you configure this function. Basically, it will track them intelligently.
Go to Configuration->PTZ->Smart Tracking interface, check the Enable Smart Tracking checkbox to enable the function.
Set zoom ratio for tracking. You can set a fixed zoom ratio, or you can let the camera calculates the actual zoom ratio automatically.
- Set a Fixed Zoom Ratio: Move the Tracking Zoom Ratio cursor to 0, Select a target in the live image and
adjust the PTZ buttons to see the target at the desired size. Click Set Zoom Ratio to set the current zoom ratio as the zoom ratio. - Camera Calculates Zoom Ratio Automatically: Adjust the Tracking Zoom Ratio to the desired value. Then the camera determines the actual zoom ratio dynamically according to the detected target size and the set value Larger value means a larger zoom ratio.
Note: As long as you set the Tracking Zoom Ratio value as not 0, the zoom ratio you set manually is invalid.
On the same tab, set the tracking duration. The speed dome stops tracking when the duration time is up. The duration ranges from 0 to 300 seconds. Click Save.
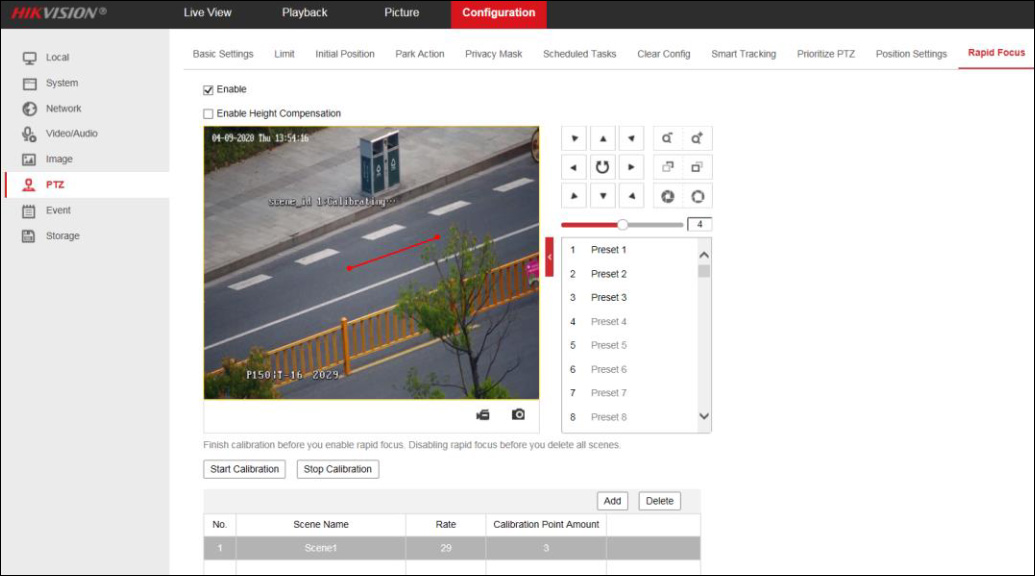
Rapid Focus
Go to Configuration > PTZ > Rapid Focus interface, tick Enable to enable the function. Adjust the camera to the desired scene via PTZ control buttons, Click Add to add the scene, and input Scene Name, Rate, and Calibration Point Amount according to the actual need.
Select one of the scenes just added, a red line will be displayed on the live image. Adjust the length and position of the line by dragging its two endpoints.
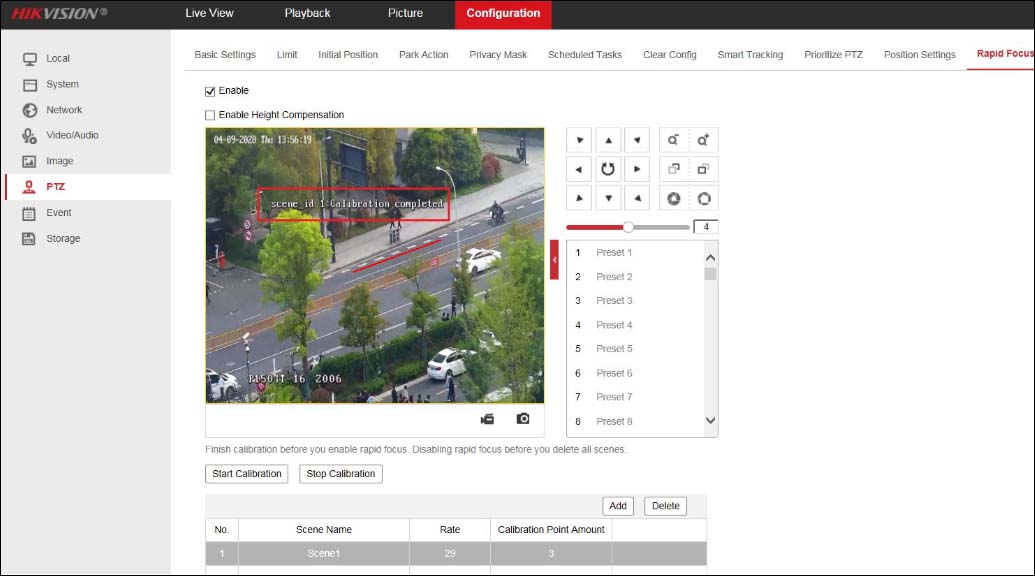
Note: The red line is recommended to stay in the center of the scene which covering the ground at the same time. If the line is not in the center, use PTZ control to adjust the scene.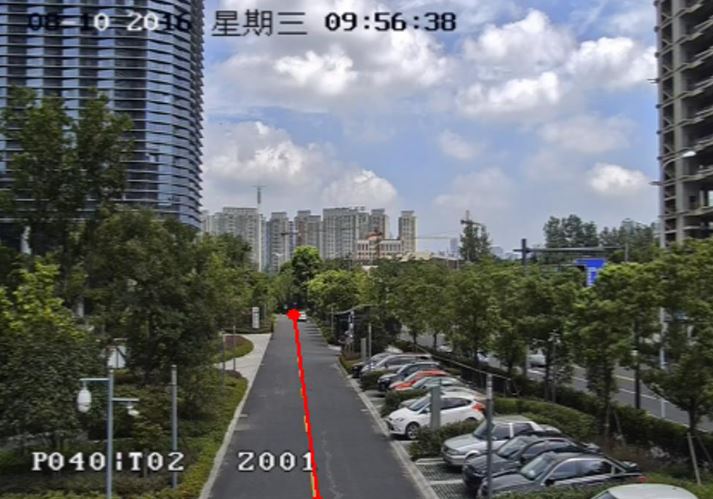 Click Start Calibration. The camera will start self-adjustment for calibration which may take some time.
 Save the settings after calibration succeeds.
Conclusion
Using the smart function on a Hikvision PTZ security camera you can improve the performance of your security system. Moreover, you can automate certain tasks, and instruct the PTZ camera to follow preset, perform a patrol or a pattern mode. This way you can maximize the operation of your camera.
