Do you need to sort the cameras in a different order in your Hikvision NVR or DVR? Maybe you need a different camera on the first channel, or just need them ordered on a natural sequence from the main doors, side, garage, etc.
In this article, we will explain how to change the camera sequence and order them in any way you want. Keep in mind, the layout may be different from the screenshot published here, but the logic and the steps are almost the same across all the Hikvision products.
It’s applicable for the Hikvision USA logo and OEM versions of NVRs; the instructions work for regular NVRs with an external switch.
If you have an NVR with built-in PoE (the cameras are plugged in at the back of the NVR) then you can order them by physically plugging the camera on the desired sequence. The same thing for the DVRs that use BNC cameras, unplug the camera and plug them back in the correct sequence.
Change camera sequence on a Hikvision NVR
Let’s start by identifying the camera that needs to move to a different channel. If you have more than one camera, write the correct sequence (note the IP addresses) on a piece of paper so you don’t get confused when re-ordering them.
An example is shown below, let’s say that the camera named “Camera X” needs to move into channel D4.
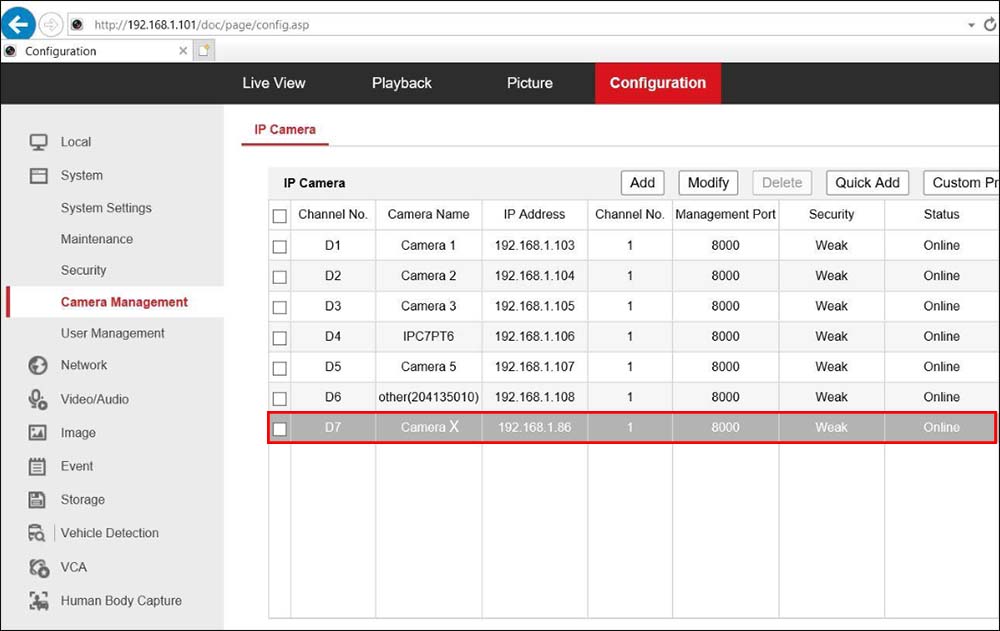 Select the camera that is occupying channel D4 and delete the camera (click the “Delete” button on top).
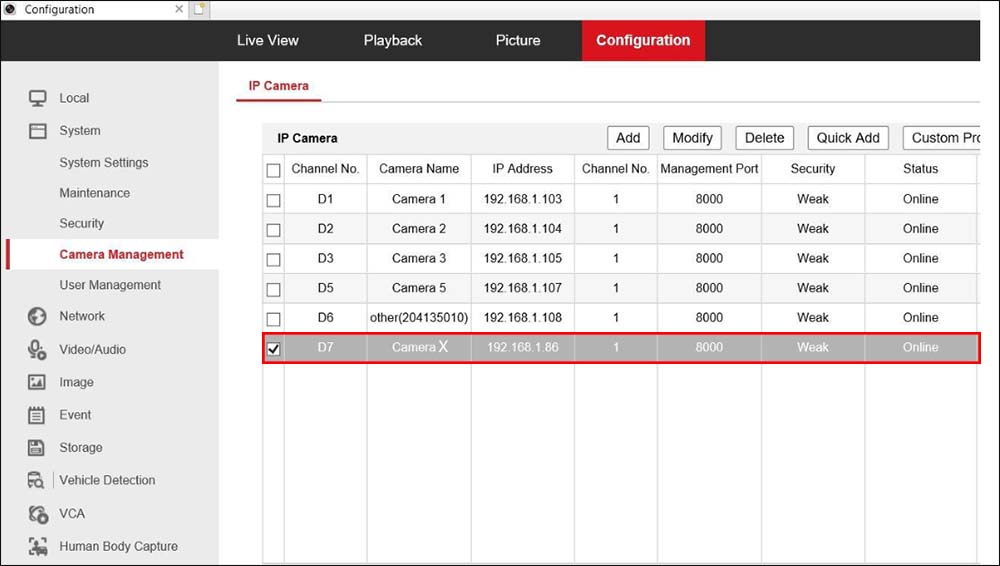
 Select Camera X and delete it from the list as well. Before you delete it, note the IP address of the camera which in our case is 192.168.1.86.
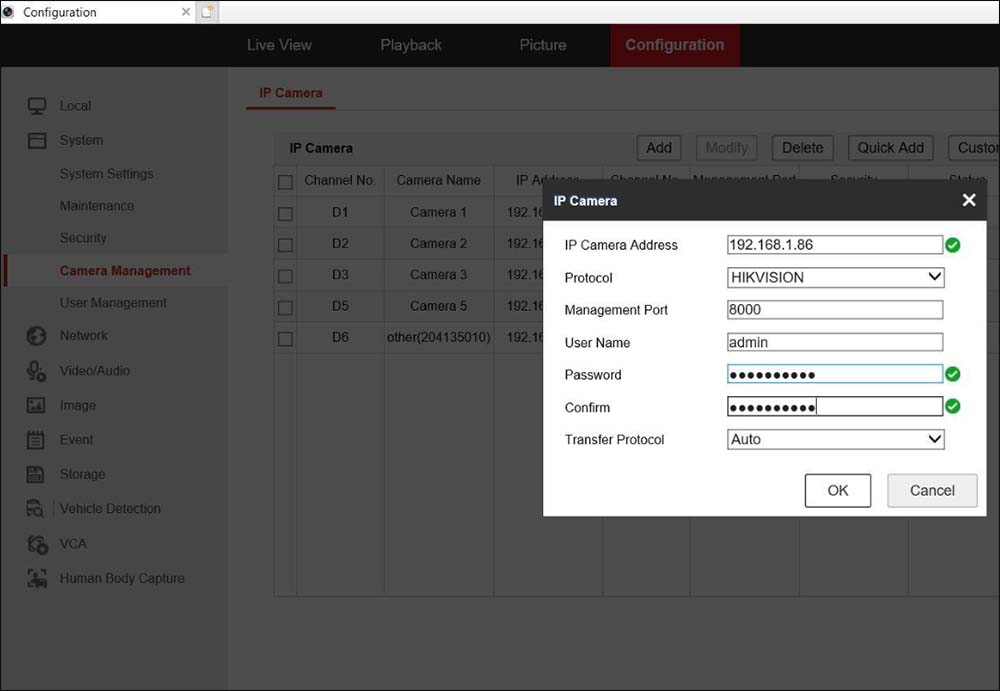
 Then click “Add” and enter the IP address for Camera X, type in the password, leave the rest of the settings on the default mode and click “OK” to apply the settings.
(Usually, the password of the camera is the same as the password of the NVR). This will add Camera X into channel D4.
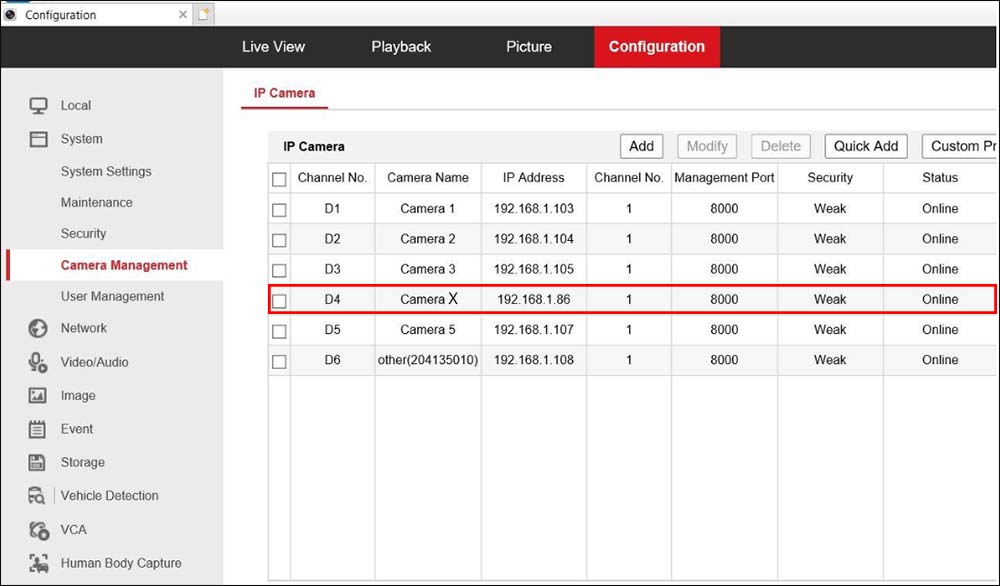
 The screenshot below shows the Camera X added into Channel D4.
 You can repeat this procedure for all the cameras that need to move up and down in a new sequence. Just make sure to write down the IP addresses and that you know the password for the camera.
The logic is that all the cameras are plugged into some external switch and then you can erase all of them and then re-add again on the recorder on the desired sequence.
This method won’t work if you have an NVR with a built-in PoE switch, meaning the cameras go directly to the back of the recorder (and not some external switch or router).
Each of these cameras is linked to the channel, sometimes even if you disconnect them and plug in another port, the camera will still show on the original channel. It may be necessary to factory reset the NVR via the GUI and then plug the cameras one by one in the correct sequence. (If that still doesn’t work, then you need to reset the camera as well).
There are some reports that even if the cameras are ordered correctly, after a while they lose their positions, or when you reboot the recorder they go back to the original order. In this case, if there’s a problem with the firmware on the NVR, you need to update it to the latest version.
Either download the firmware online by yourself or contact the reseller or Hikvision reps and ask for technical support.
