This article will guide you through the steps of setting up an IP camera to the Hikvision IP Intercom Room stations. The method shown here will only work when using the Hikvision Villa IP Intercom firmware version 1.4.71 Build 20170724 or newer (the older version won’t work).
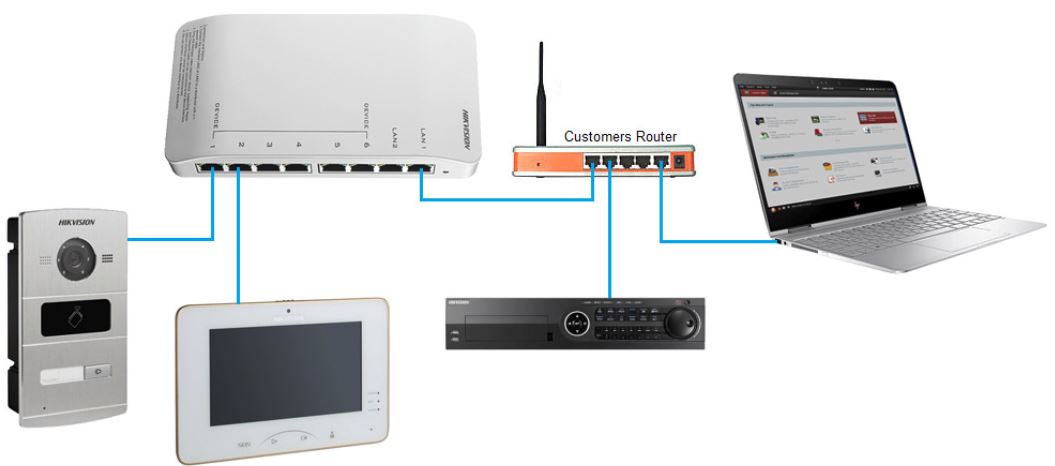
Before you begin: make sure you have your IP Intercom system working already. Make sure you have your NVR connected to the customer’s local network. Ensure you know the NVR’s IP address, as well as the username and password to login to that NVR.
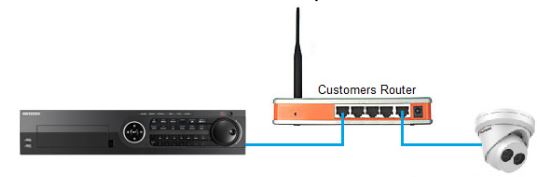
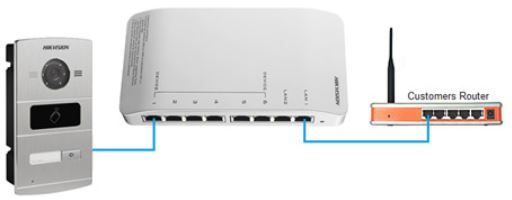
Wiring Diagram
Adding IP cameras to System
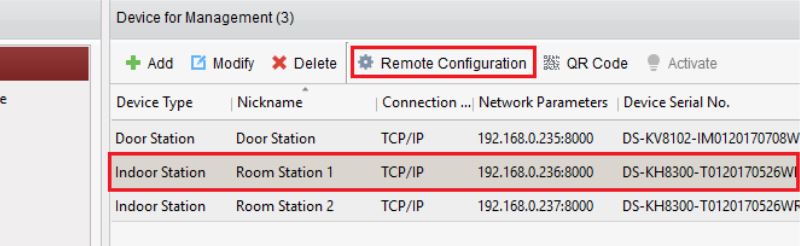
Step 1. Open your Hikvision iVMS-4200 software and select the room station you want to add the IP camera to and click ‘Remote Configuration’.
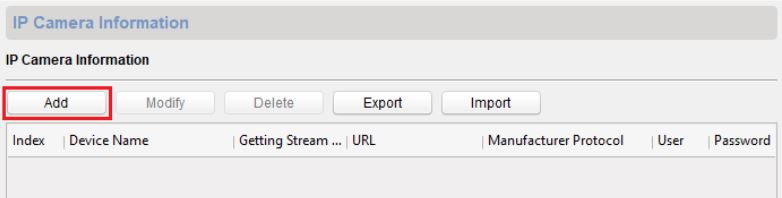
 Step 2. Select ‘Intercom’ > ‘IP Camera Information’ from the side menu.

Step 3. Click on ‘Add’ from along the top.
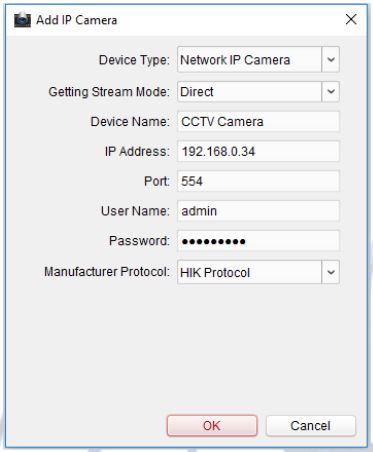
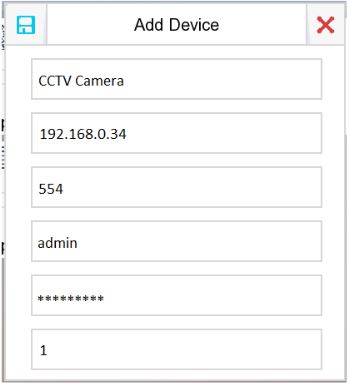
 Step 4. You now need to add your IP camera or NVR/DVR settings.
Let’s explain what the Device Type is.
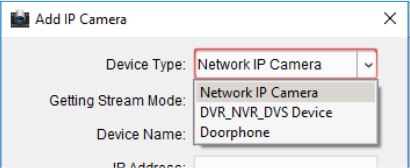 • Network IP Camera – If your IP Camera network cable is directly connected to the customer’s network then you need to select this option.
 • DVR_NVR_DVS Device – If your IP camera’s network cable is connected to the NVR/DVR or your camera is going to be streamed from your NVR/DVR to the room station then you need to select this option.
 • Doorphone – If you want to add the door station again to the LiveView screen then select this option.
Device Name – This can be anything you want.
IP Address – This is the IP address of the camera or NVR/DVR
Port – Unless this has been changed in the camera or NVR/DVR then enter 554.
Username – This is the username you login to the camera NVR/DVR with.
Password – This is the password you login to the camera NVR/DVR with.
Once the above has been set click on OK to add the camera.
Step 5. Step 3 and 4 need to be done for each of the cameras you plan to. Each of the room stations will automatically get the cameras added so you don’t need to do this for each of the room stations.
Setting up the Door Station and IP camera toggle
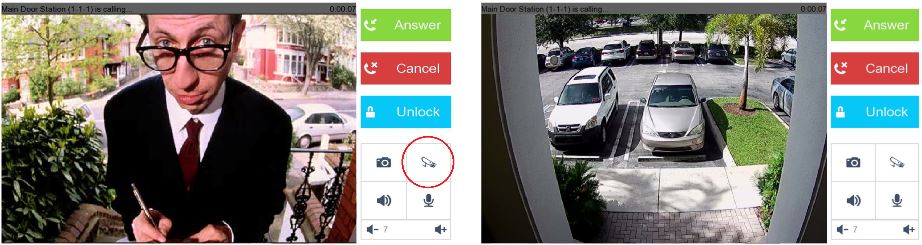
With the new updated firmware, you can now toggle between the door station and one CCTV camera while talking to the person at the door station.
Note: Only CCTV cameras that have been setup as the device type ‘Network IP Camera’ during the setup can be used to toggle between the door station and the CCTV camera. Basically it needs to be an IP camera.
Step 1. On the room station, tap on settings.
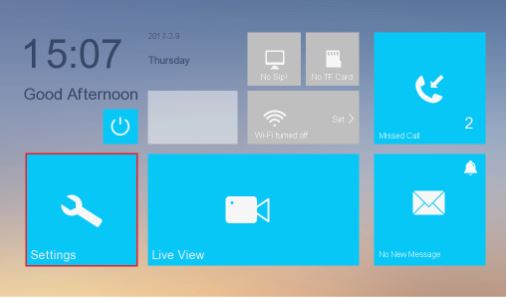
Step 2. Select ‘Configuration’ from the side menu.
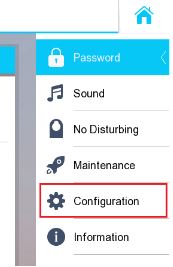 Step 3. Enter in the admin password to enter the menu. By default the password is 123456 unless it has been changed.
Step 4. Select ‘Device’ from the side menu.
 Step 5. Select the CCTV camera you want to use as the toggle camera. This camera must be set up as a Network IP Camera (the cameras that aren’t set up as Network IP Camera won’t work). You can only have one CCTV camera to toggle between.
Step 6. The last field needs to be set as either 0 or 1. If you want the camera to toggle then put it as a 1. 0 = Doesn’t allow the camera to toggle. 1 = Allows camera to toggle.
Switching between Door Station camera and CCTV Camera
While viewing the door station, tap on the Camera icon. This will then toggle between the Door station camera and CCTV camera.