The Hikvision Professional Line of NVRs support POS (Point of Sale) information display which is transmitted by multiple types of connection such as RS-232, USB, and Ethernet.
Once the POS settings are properly set up on the NVR, you will be able to view the POS information on Live View mode and Playback. Let’s say you ring a product, all the POS information will be displayed on the CCTV screen.
This provides the possibility to offer an advanced level of integration for multiple scenarios. If something happens, you will be able to corroborate the POS information and the CCTV footage from your security camera system.
This guide shows how to setup the POS system on a Hikvision NVR and how to display the information on the screen. The basic procedure is the same across various POS manufacturers.
The devices used for this demonstration
The following demonstration will show you how to achieve POS info display on Hikvision DS-7732NI-I4 with RS232 to Ethernet Server. Configuration is needed on both NVR and RS232 to Ethernet Server.
Test Environment
- NVR Model: DS-7732NI-I4. Check the settings and make sure you can see the POS section on the NVR.
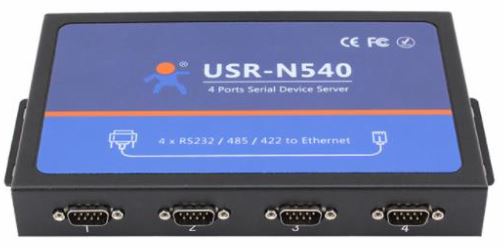
- RS232 to Ethernet Server Brand: USR IOT
- RS232 to Ethernet Server Model: USR-N540
- RS232 to Ethernet Server Firmware: 3009
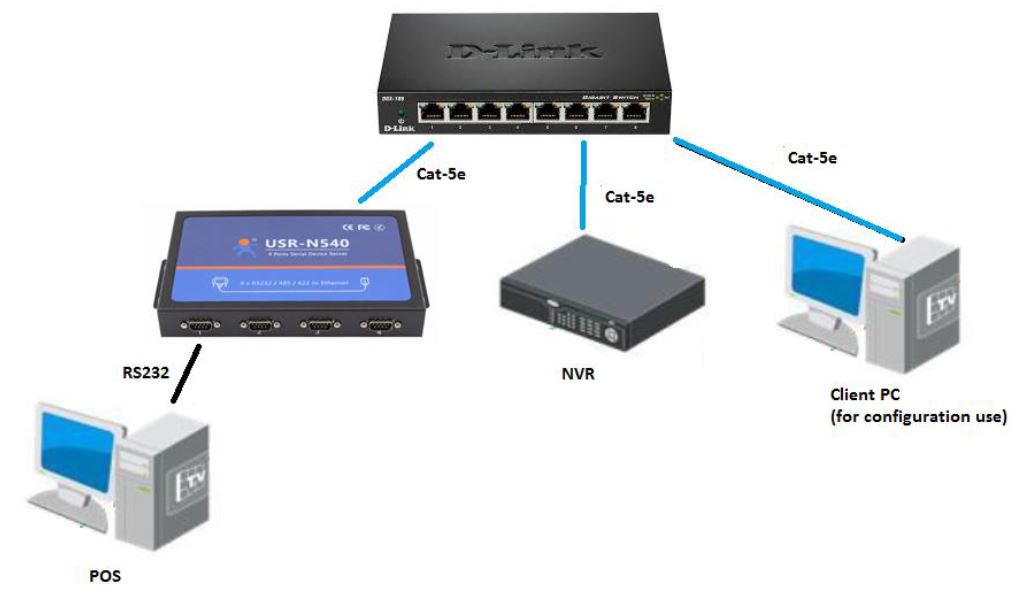
The connection diagram
Connect the POS output to USR-N540 RS-232 Port 1, connect USR-N540 LAN to your router/switch with Ethernet Cable. Connect the NVR to the same network with Ethernet Cable
Display POS information on Hikvision NVR
1. Configure the USR-N540 IP address
Step 1. Connect the USR-N540 to LAN port on your switch or router with Ethernet cable, connect the power cord and make sure the unit is powered on.
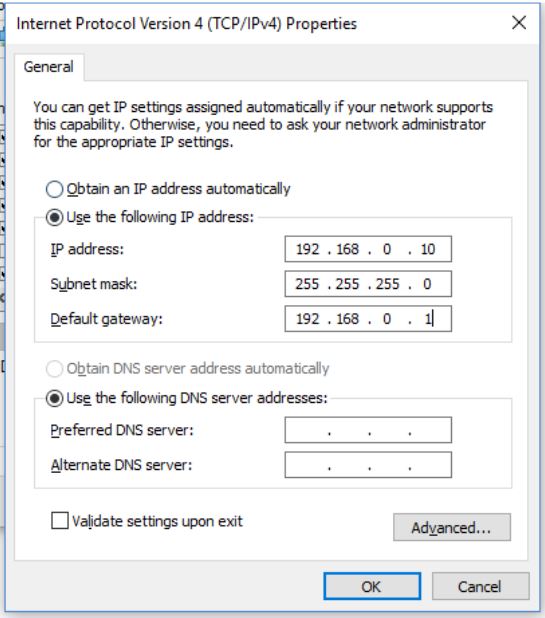
Step 2. Change your PC network IP address to the same segment as the USR-N540 default address (for example 192.168.0.10). The USR-N540 default IP address (192.168.0.7) can be found on the sticker under the unit.
 Step 3. Visit USR-N540 default address (192.168.0.7), enter the username and password Note: the default username and password for USR-N540 are username admin and password admin.
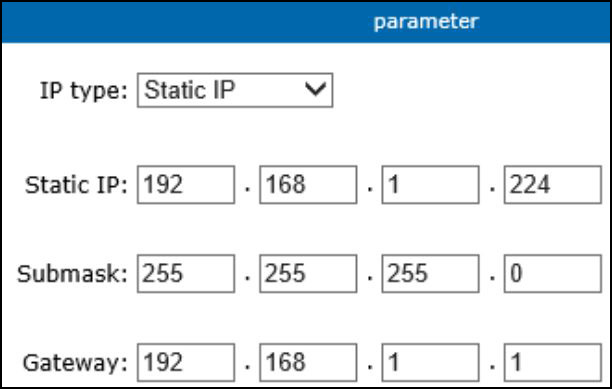
Step 4. Change the IP address to the same segment as the Router IP address (for example 192.168.1.224). Save and reboot the USR-N540.
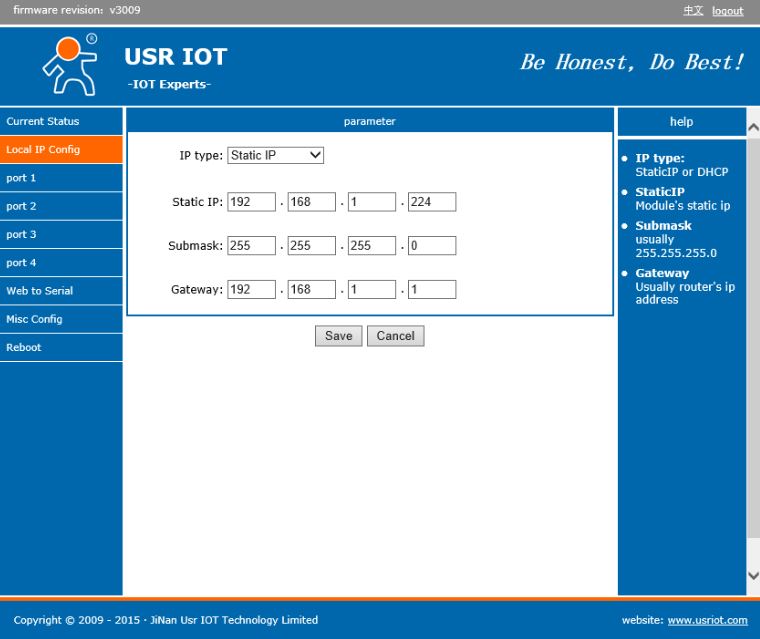 Step 5. Restore the PC IP address (for example 192.168.1.18).
2. Change Port setting on the USR-N540
Step 1. Access the USR-N540 with the new IP address you just assigned (let’s say 192.168.1.224).
Step 2. Login with Username and password.
Step 3. Go to the port your POS is connected with (e.g. Port 1).
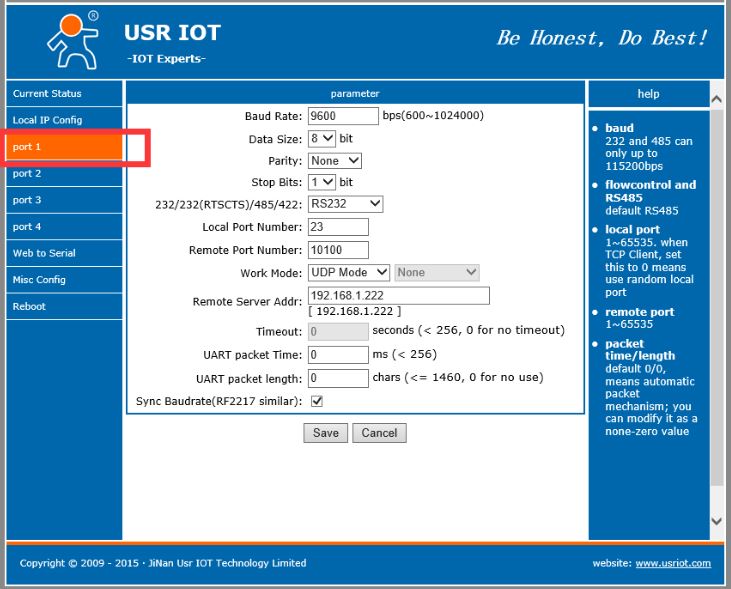 Step 4. Change the Baud Rate, Data Size, Parity, Stop Bits and Type according to the configuration on your POS machine. So, check the setting of your POS system and fill out these fields.
 Step 5. Assign Local port Number, Remote Port Number (e.g. 10110), choose UDP Mode for Work Mode, and Enter the NVR’s IP address (for example 192.168.1.222)
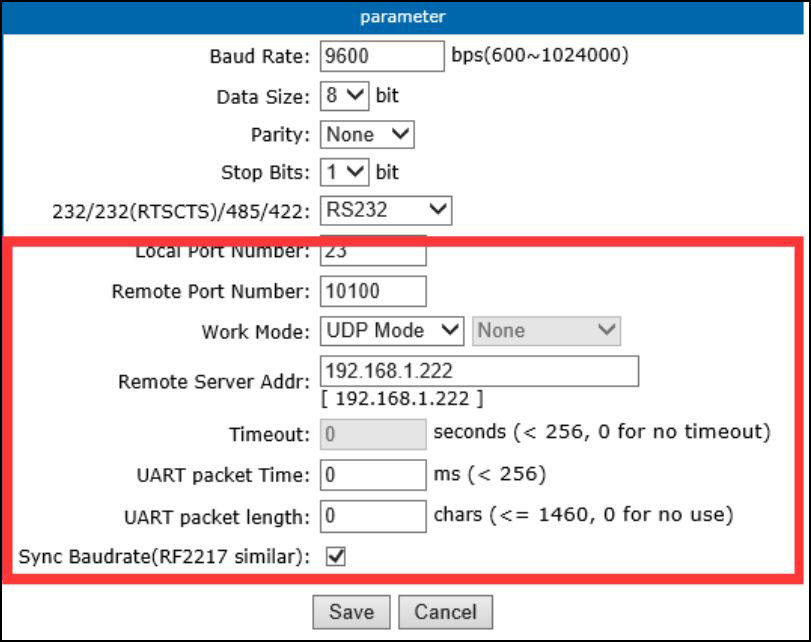 Step 6. Leave the rest of settings in default, Save and Reboot USR-N540.
3. Configure the Hikvision NVR POS settings
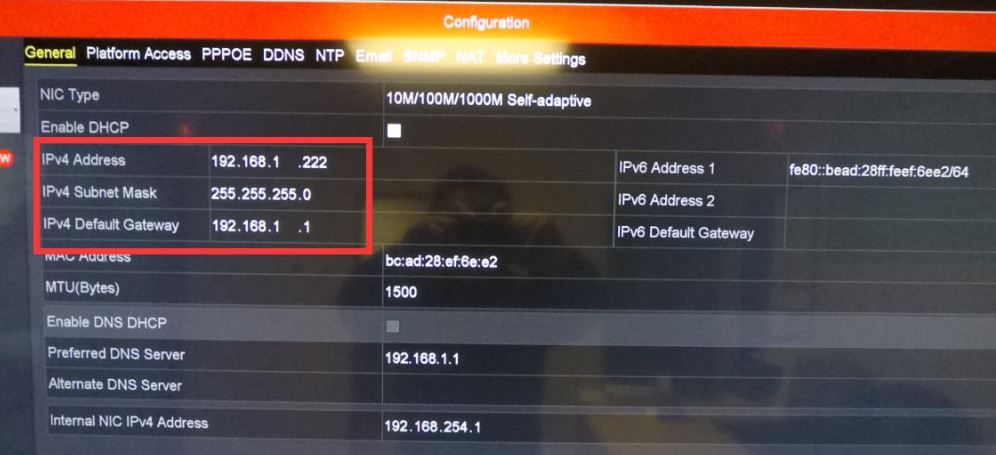
Step 1. Make sure NVR is connected to the same local network as USR-N540 and they are under the same IP segment.
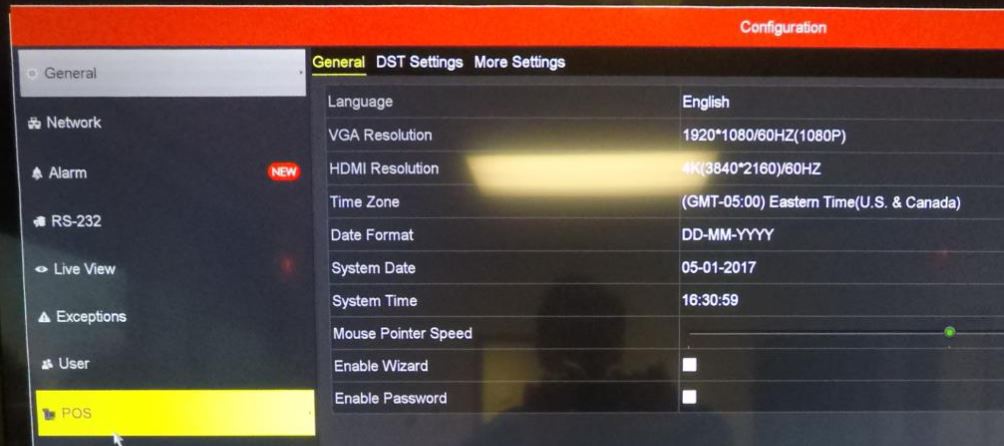
 Step 2. Right click and open the Main Menu, click on Configuration and navigate to POS tab on the left.
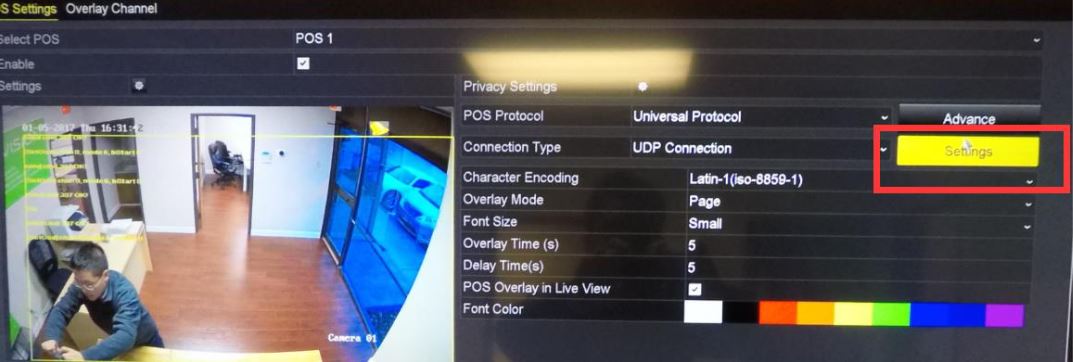
 Step 3. Configure POS Protocol as Universal Protocol, connection Type as UDP connection.
 Step 4. Click on Settings on the right.
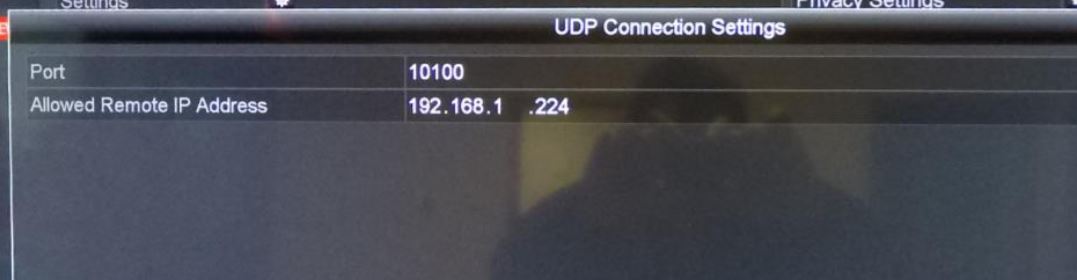
 Step 5. Enter the IP address you assigned for USR-N540 (e.g. 192.168.1.224) and the Remote Port Number you assigned on the USR-N540 port configuration page (e.g. 10110), click OK.
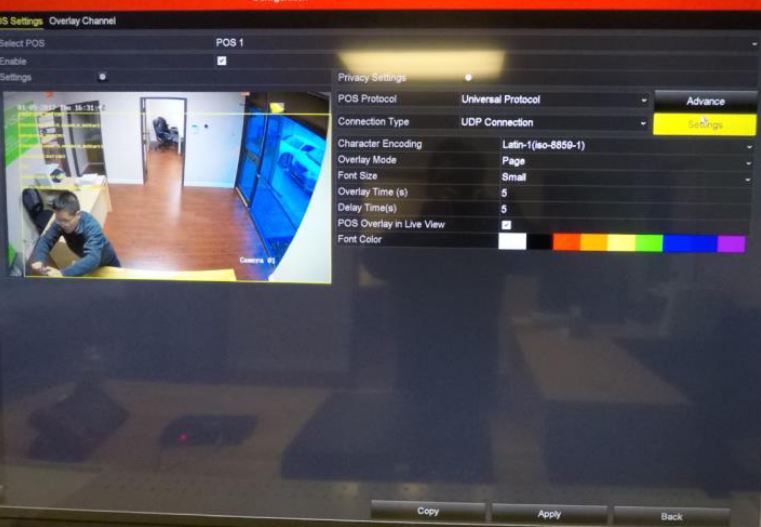
 Step 6. Click on Apply in order to save the settings.
4. Verify the settings
With all the settings complete, once data is sent through RS-232 port, it will be displayed on NVR Live View screen. An example is shown below.
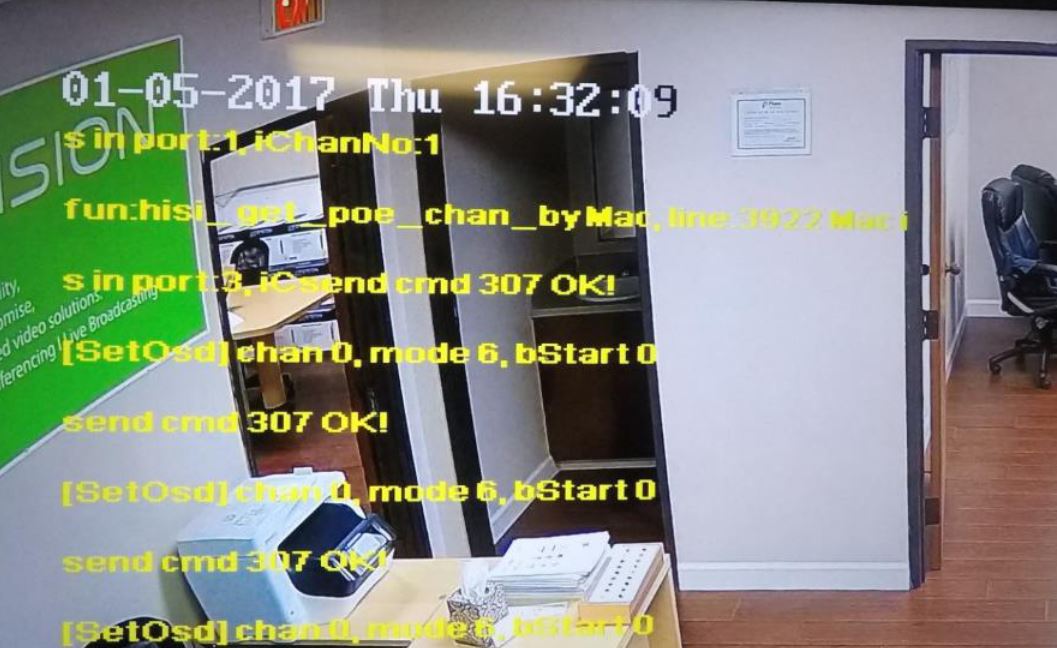 Important note: POS information will only be displayed under main-stream, if NVR is displaying multiple Live View under sub-stream, POS information will not be displayed.
