This guide shows how to log into your Uniview NVR using a monitor/TV (with mouse) and how to configure the network settings to properly connect your NVR to the local network.
Uniview Network Configuration
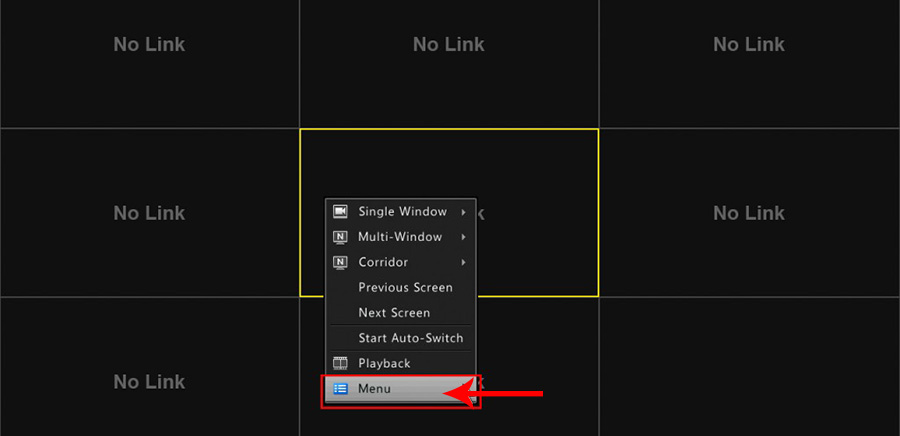
Step 1. Connect the Uniview NVR to a monitor with mouse and right click anywhere on the screen. You’ll see a small menu. Wight the left mouse button, click on the Menu option.
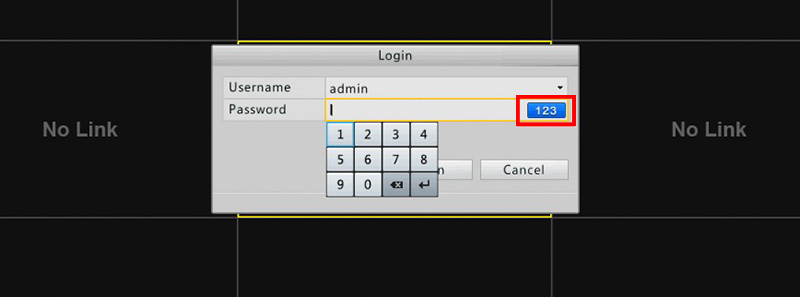
 Step 2. Select the username admin, if it hasn’t automatically been selected for you. Enter in the password for the admin account. The default password for the admin account is 123456.
If you have modified the password for the admin account or are using another admin-level account, you can cycle through the on-screen keyboard by clicking on the button highlighted in the picture to the left, which will show keys for upper and lower case letters.
After you have entered the password, click on the Login button to access the main menu. Usually, if you are still using the default password, you may be asked to change the password.
We recommend changing the default password and creating a stronger one instead. You can either cancel the password change for now or choose to modify the password.
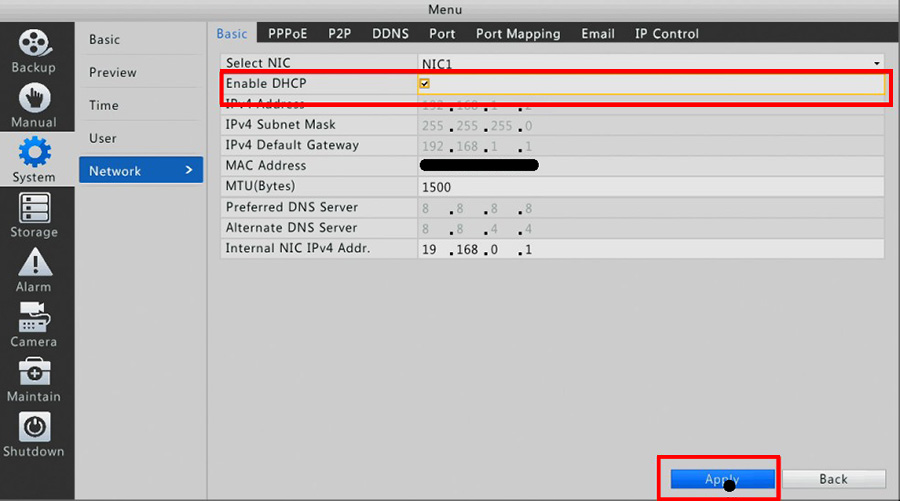
 Step 3. Click the System icon from the far left. Then select the Network section and then make sure you are in the Basic tab section. Please refer to the image to make sure you are in the correct section of the menu.
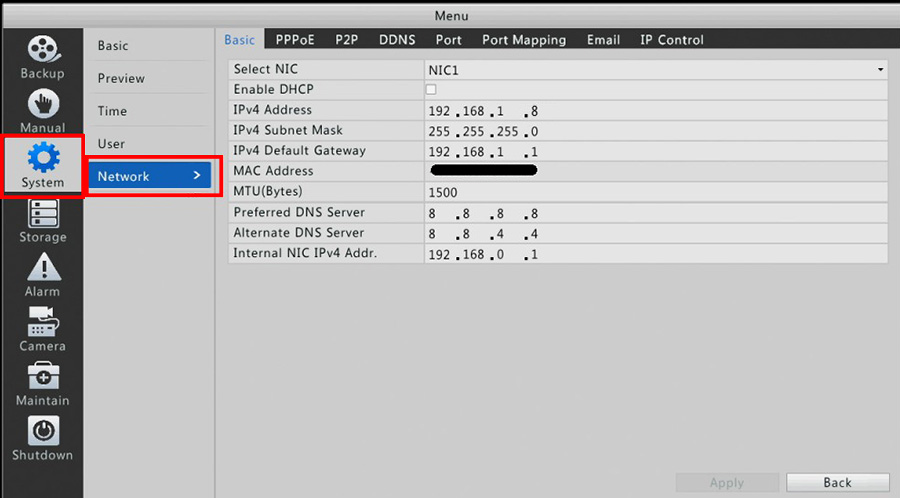 Step 4. From within the Basic tab, make sure you check the box next to Enable DHCP. When this option is enabled, the router will automatically assign an IP address for your Uniview NVR. Click on the Apply button to save these settings.
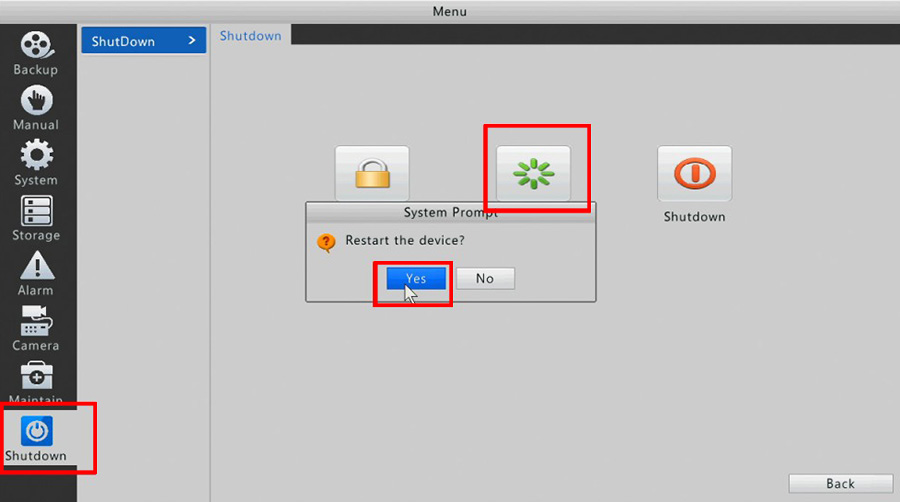
 Step 5. After clicking on the Apply button to save the changes you made to the network settings, you will have to restart (reboot) the Uniview NVR to allow it to properly update the settings and get connected to your local network.
To restart the recorder, click on the Shutdown icon on the left column, then click on the Restart icon. You will be shown a confirmation prompt, and just click on Yes to restart the NVR.
 Step 6. After your NVR has restarted, you can now confirm your new IP address by navigating back to the Network submenu. Your new IP address will appear in the section highlighted in the picture.
 Keep this address handy since it will be used to configure port forwarding and also used to connect to the NVR when you are on the same local network as the NVR.