There are two default accounts used by most 3xLogic cameras and devices. One is default username: admin and default password: 12345, the other one default username: admin and default password: admin.
If you have lost the password of the 3xLogic camera, try the default password listed above and see if they work. Keep in mind, the new generations of 3xLogic devices will ask you to create a new password the first time you run the device.
3xLogic Default Password
- Username: admin and Password: admin
- Username: admin and Password: 12345
Installing and Configuring a 3xLogic camera
Step 1. Run the 3xLOGIC Camera Setup Utility.
Download and install the latest version of the utility (at www.3xlogic.com) on the VIGIL Server system. The VIGIL Server should be on the same LAN network as the camera(s) you are adding. Then Navigate to Start > Programs > VIGIL > Utilities and launch the VIGIL Firewall Utility. Create a firewall rule for VISIXIPSetup Utility if one has not already been created.
Launch VIGIL Server, navigate to Settings > Cameras. Select the desired camera channel from the treeview. Then Open Network Camera Settings and set the Type to VISIX-IP-B. Click the Detect Camera button. The software’s Detect Online Devices window will now launch automatically with a list of detected cameras on the network. Select the
Step 2. Select the desired camera from the list of devices.
Step 3. Change IP Info (Optional for non-DHCP environments).
The camera will use DHCP by default and should be assigned an IP by your network automatically. If the network lacks DHCP and requires a static IP for the camera, click Change IP Address and edit the camera’s IP info. The default username and password of admin/admin will be required to change IP info. Enter the credentials and click Save IP Address after making changes to save the new IP information.
Default TCP/IP information (set after 90 seconds if no DHCP is detected).
- IP: 192.168.1.80
- Subnet Mask: 255.255.255.0
- Gateway: 192.168.1.1
- DNS: 168.126.63.1
After making and saving any IP changes, confirm the camera is still selected in the devices list then click Next. The main utility window will now launch.
Step 4. Change Password
After the main utility window launches with the camera selected, enter in the default username and password of admin/admin then click Connect. Once the utility states Login Success, click Change Password. A pop-up will deploy. Enter and confirm a unique password, then click OK to complete the change. A pop-up will confirm success.
The default user ID and password must be changed for security reasons. The video will not stream from the camera until the default admin password is changed. The ID and PW will be set to defaults when a ‘factory reset’ is performed on the camera.
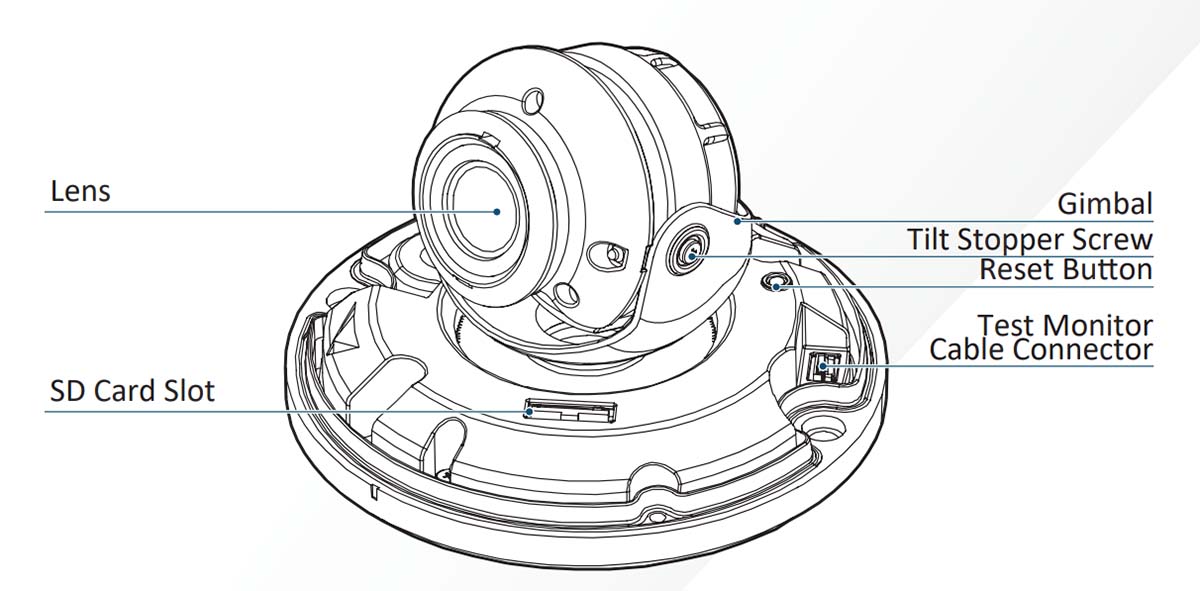
Step 5. Rebooting or Resetting the Camera to Factory Settings.
If a factory reset is required, login to the camera’s browser interface (enter IP into a browser URL bar and login to the camera) then navigate to Setup > System > Factory Reset. To perform a basic camera restart, Navigate to Setup > System > Restart. Additionally, you can reset the 3xLogic camera by pressing the reset button for 15 seconds.