• About
  • Contact
  • Privacy Policy
SecurityCamCenter.com
  • Home
  • Buying Guide
  • Learning & Tips
  • Technical Guides
  • Security Tips
  • Downloads
  • CCTV Glossary
No Result
View All Result
SecurityCamCenter.com
No Result
View All Result
Home Technical Hikvision

How to add a door station to Hikvision NVR for preview and record

Marco Albertini by Marco Albertini
in Hikvision

Here we will discuss how to add a Hikvision door station to a Hikvision NVR and you can record the camera or just live view it. The idea is to add the door station and to make it transmit the video feed to your NVR. In this demonstration we are using the following equipment:

1. One Hikvision door station. We are using Hikvision door station mode DS-KD8102-V, updated to the latest firmware.
2. Hikvision NVR DS-7716BIE4/16P, using firmware 3.4.95. The setup will work as long as your NVR has this firmware version or newer.
3. Client software such as iVMS-4200 (Hikvision-made camera managment system).

Note: NVR needs a hard disk for storage. Door station can’t be connected directly to the NVR’s PoE port, it can only be connected to the NVR’s LAN (Ethernet) port.

Step 1. Add Devices to iVMS-4200. Click Add to Client tab to add all devices (one door station and one NVR) to iVMS-4200, make sure all devices are in the same local network, if not, click Modify Net info to modify it.

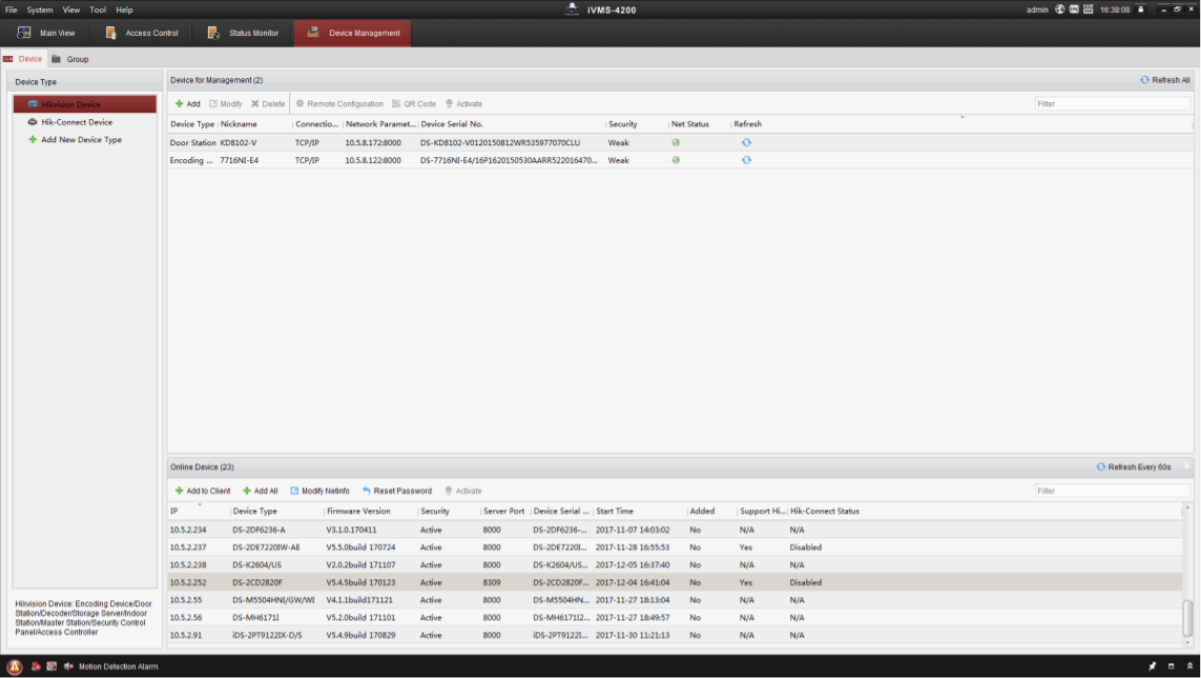
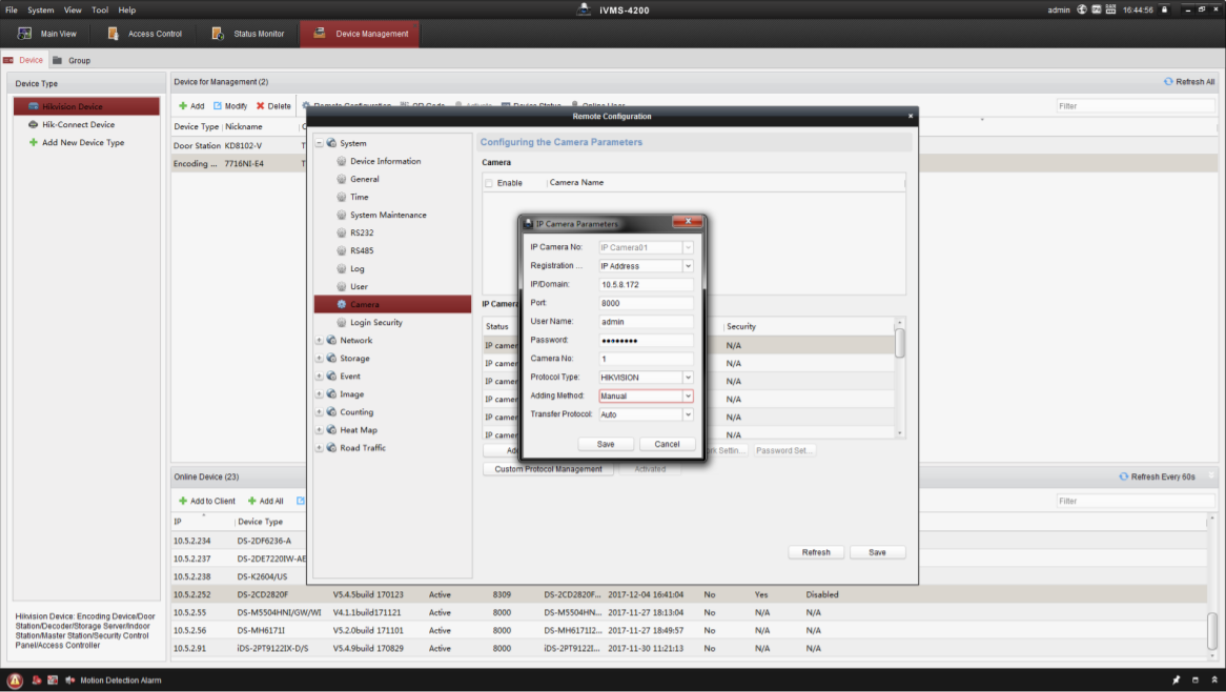
Step 2. Set the NVR. Choose your NVR from the list, click Remote Configuration, and then go to System > Camera. Choose one Camera in IP Camera table, then click Modify.

Set Adding method as Manual, enter IP/Domain, type your password, then click Save.
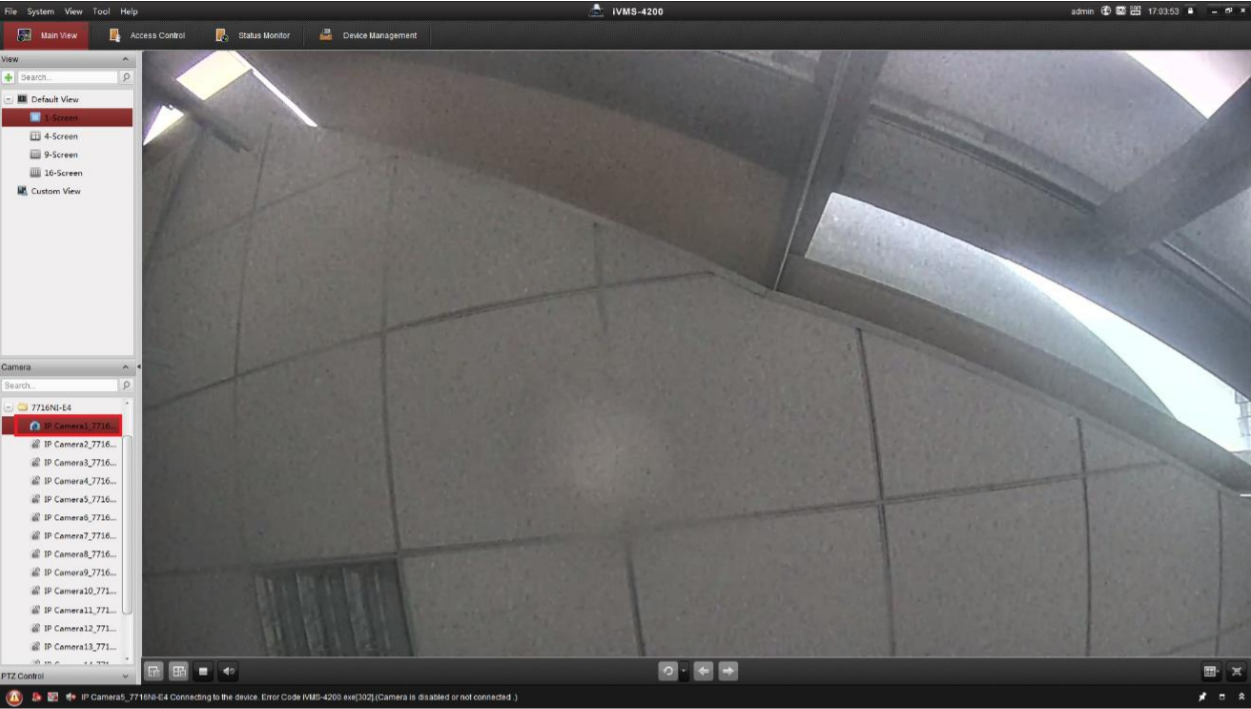
Step 3. Make sure the picture shows up on Live Preview. Click the Main View, go to the Camera choose the NVR and the channel you set. Make sure the door station could be viewed normally.

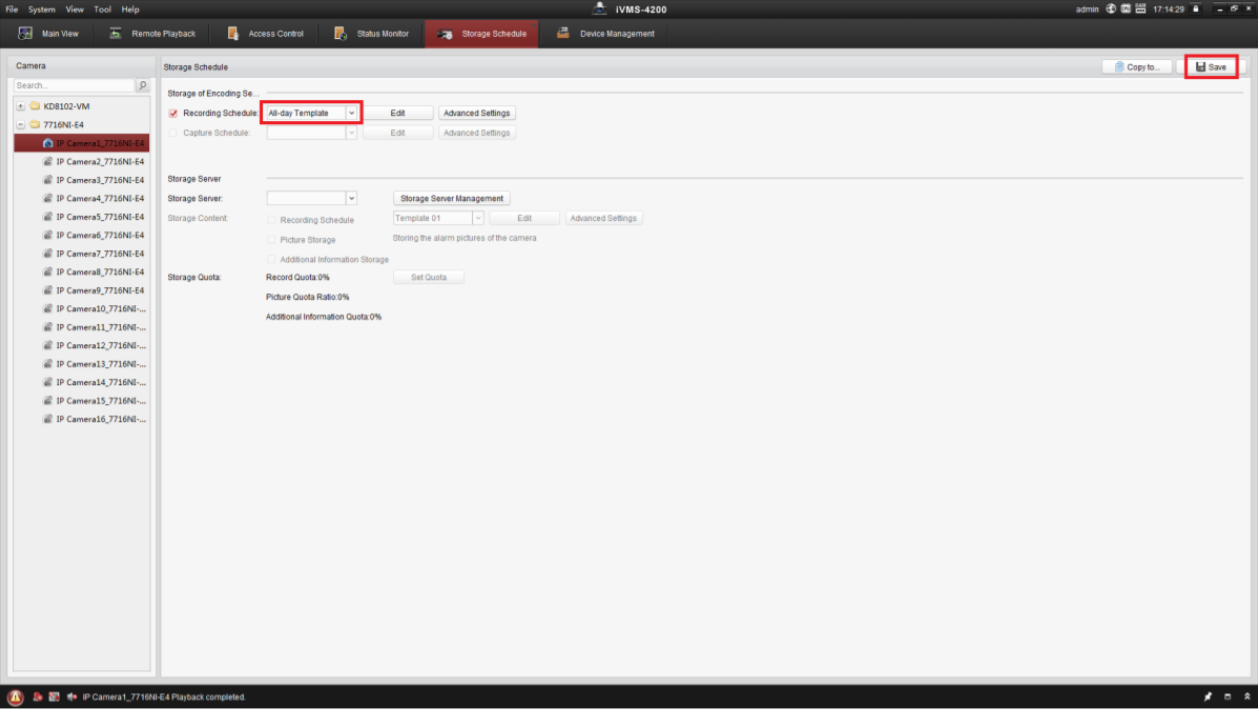
Step 4. Set the Storage. Click the Storage Schedule, choose the NVR and channel you set, then click the Recording Schedule, choose a Template (such as All-day template), then click Save.

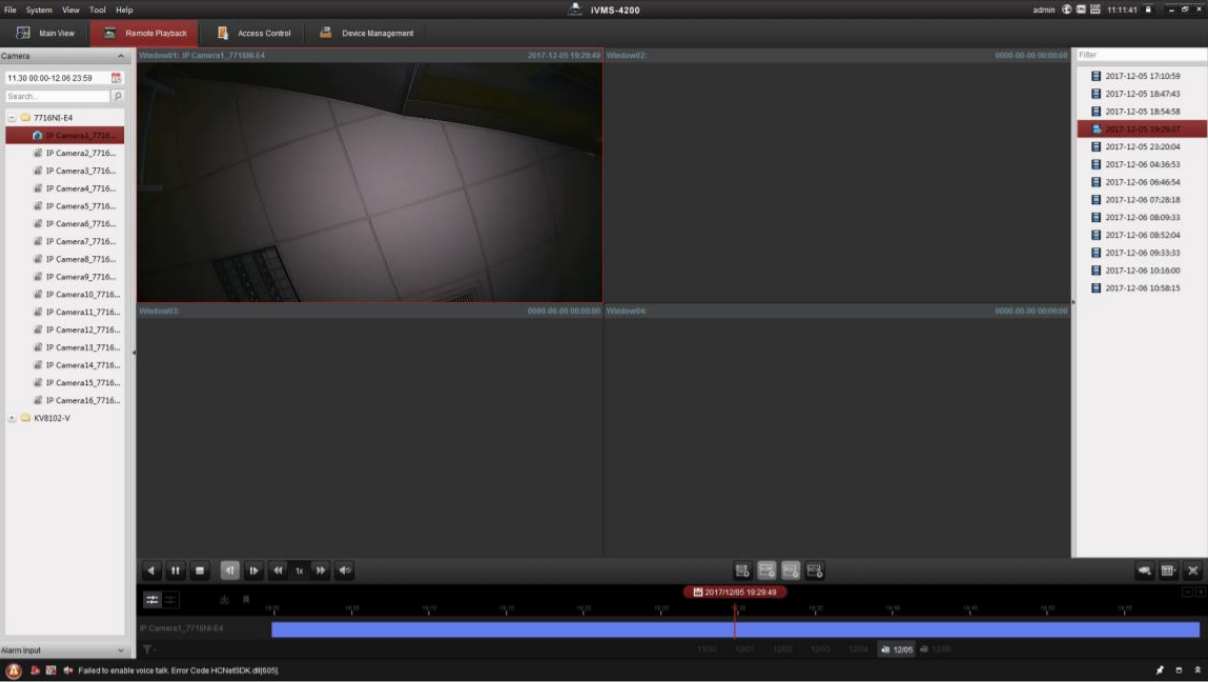
Click the Remote Playback, go to the Camera, choose the NVR and the channel you set. Make sure the Recording Setting is right.

Marco Albertini

Marco Albertini

Italian-born Marco Albertini, with a background in Computer Science, found his passion in security camera systems, alarms, and cloud services. Based in New York since 2010, he's a sought-after expert, assisting numerous businesses and homeowners in securing their properties with advanced solutions.

Related Posts

Hikvison How-To

How To Connect Hikvision DVR To Phone (Hik Connect Phone Setup)

Hikvison How-To

How to Fix Recording Exception Error on Hikvision

Hikvison How-To

How to Add and Delete profiles on your Hikvision Security System

Hikvison How-To

Playback Error on Hikvision System: Number of streaming channels exceeded limit (Quick Fix).

Hikvison How-To

How to fix Error Code 1602 on iVMS-4200

Complete List of Bracket and Base Fits for Hikvision IP Cameras

Complete List of Bracket and Base Fits for HiLook Security Cameras

Load More

Leave a Reply Cancel reply

Your email address will not be published. Required fields are marked *

Latest articles

Thermostats

How To Fix Nest Thermostat Error E195

Streaming

Kodi Error One Or More Items Failed To Play (Quick Fix)

WiFi Systems

How to Reset Eero System? (Quick Method)

Streaming

How to Install Kodi on Amazon Fire Stick (The Easy Method)

Dahua

How To Solve DMSS Camera Offline Issue

SecurityCamCenter is a participant in the Amazon Services LLC Associates Program. This post may contain affiliate link(s). An affiliate link means we may earn advertising or referral fees if you make a purchase through our links, at no extra cost to you.

Categories

© 2024 SecurityCamCenter.com / Security Tips and Tutorials

No Result
View All Result
  • Home
  • Buying Guide
  • Technical

© 2024 SecurityCamCenter.com / Security Tips and Lessons