If you need to enable the DHCP mode on a Hikvision NVR, DVR, or IP camera, then follow this guide. DHCP mode means that the network (router) will assign a valid and valuable IP address to the Hikvision camera or recorder. So if you’re not sure what IP address to assign to your devices or you don’t want to use a static IP address, enable the DHCP mode and let the local network do the rest.
There are a few ways to enable the DHCP mode on a Hikvision device: directly through the NVR or DVR, using the SADP mode, or via the web browser.
If you have a Hikvision NVR or DVR and you need to enable the DHCP, the easiest way is to access the NVR and tick the DHCP box. Follow the steps below if you need to change the Hikvision cameras (or recorders) to DHCP.
How to enable DHCP on Hikvision
Set the Hikvision NVR or DVR to DHCP via the local interface
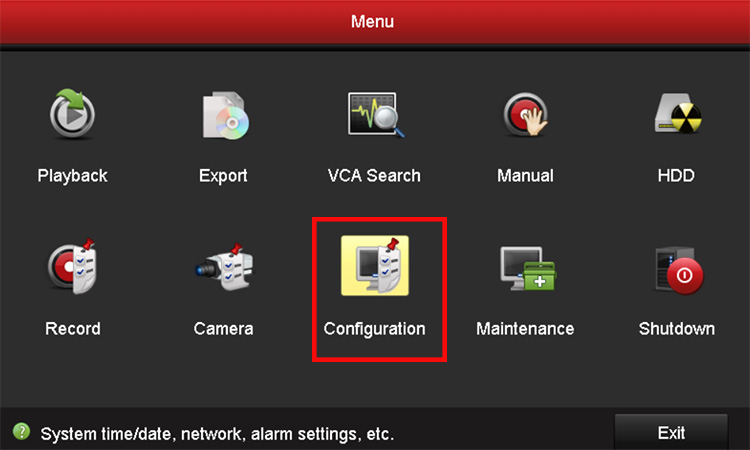
Go to your NVR or DVR, log in using the username and password. On the Main Menu, select the Configuration menu.
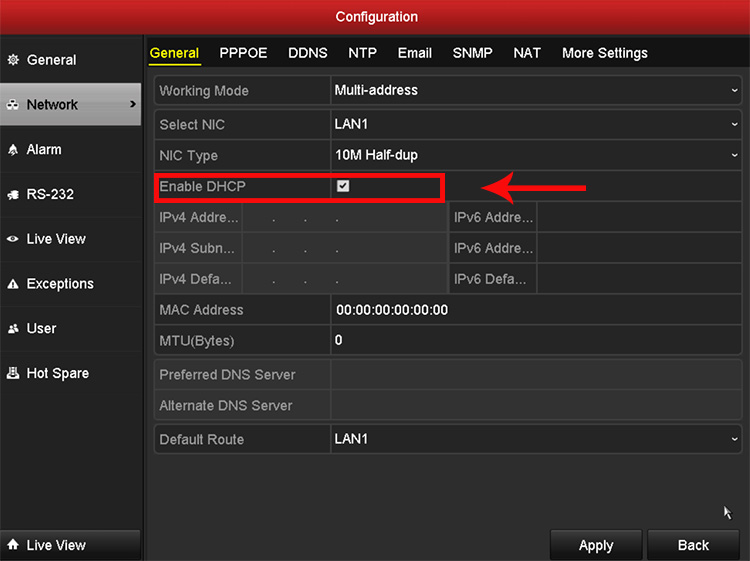
 Then navigate to the Network settings tab on the left side. Tick the DHCP box.
After that IP address bar, Gateway, and Subnet mask will be auto-completed and grayed out. So, that’s it, now your recorder has a self-assigned IP address.
Set Hikvision IP camera or NVR/DVR to DHCP via the SADP tool
Another way to set your Hikvision devices to HDCP mode is to use the SADP tool which is scanning software. Download the SADP tool here, install it and then run it.
The software will scan your network and list all the Hikvision devices found on the networks such as IP cameras, NVR, DVR.
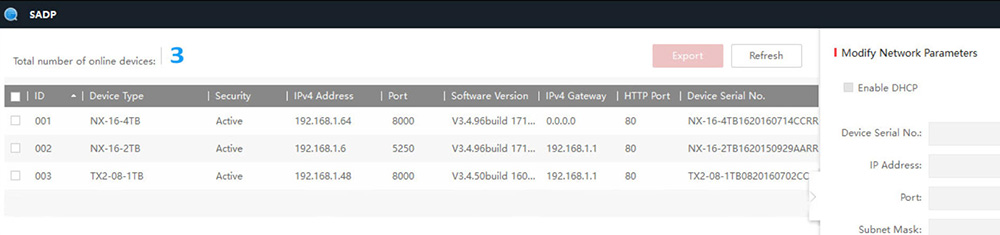 Select a device by clicking the white checkbox to the left of the device’s name. This will enable you to modify the network information of that device on the right panel.
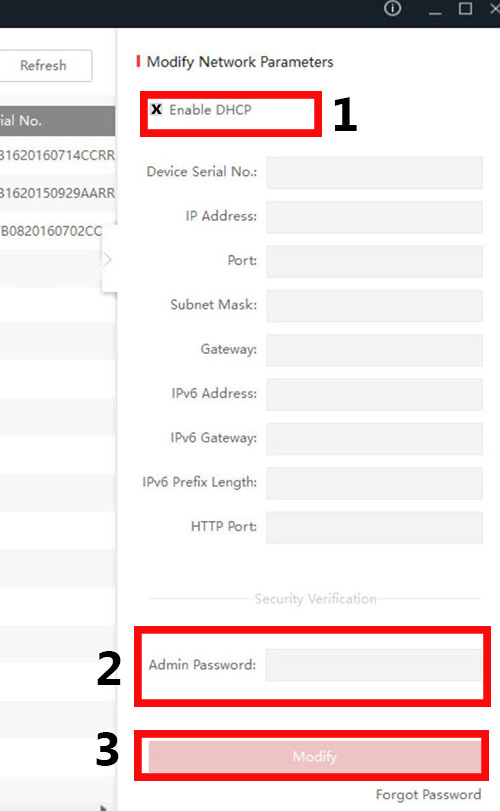
In this example, we have clicked the box next to the first device on my SADP’s list. Now that it has been selected, on the right panel tick the DHCP box.
When you have finished making the network changes, enter your device’s password into the Admin Password field then click modify. You should get the message “Parameters modification completed”.
Set the Hikvision device to DHCP via web browser
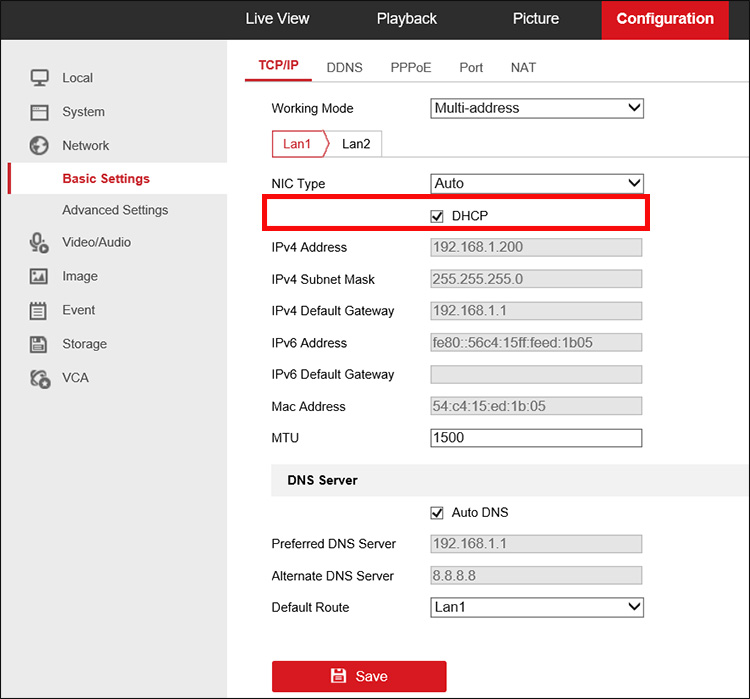
Open up Internet Explorer, type the IP address of your Hikvision camera, NVR, or DVR, log in with your username and password.
On the top click Configuration then Navigate to the Network settings section. Click Basic Settings and select the TCP/IP tab. Tick the DHCP box, Save and you’re done.
 To conclude, there are many ways how you can change the IP address of a Hkivison IP camera (or NVR/DVR) from static to DHCP.
The procedure is simple and the same across all the Hikvision devices. To expand your knowledge, you can read this article: Should I use static or DHCP for my security camera system.
