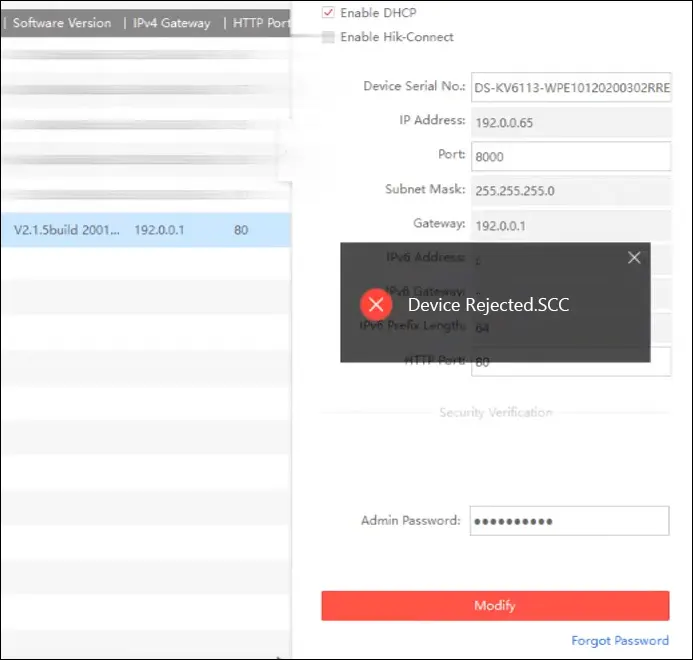
Sometimes when you are trying to modify the parameters of an IP camera through the SADP, you may get an error that says DevicesRejected or TimedOut.
These two errors indicate the same thing, the SAD software can’t access the camera to modify the parameters (or reset the password).
This issue is caused by many factors such as the old version of SADP, privilege permission problems, bad RJ-45, network settings, improper network setup, etc. In this quick guide, we will explain how to fix this problem by just following a few steps.
SADP ‘Device Rejected’ and ‘Timed Out Issue’
As we said, these errors (DevicesRejected or TimedOut) indicate that the SADP can see the camera on the network, but it’s not able to modify its settings as requested by the user.
For example, you may see the camera on the list (via SADP), but when you try to modify the IP address then you’ll go through a delay until getting the message that the device has been rejected. Follow the tips below to have the issue solved.
Run it as an administrator
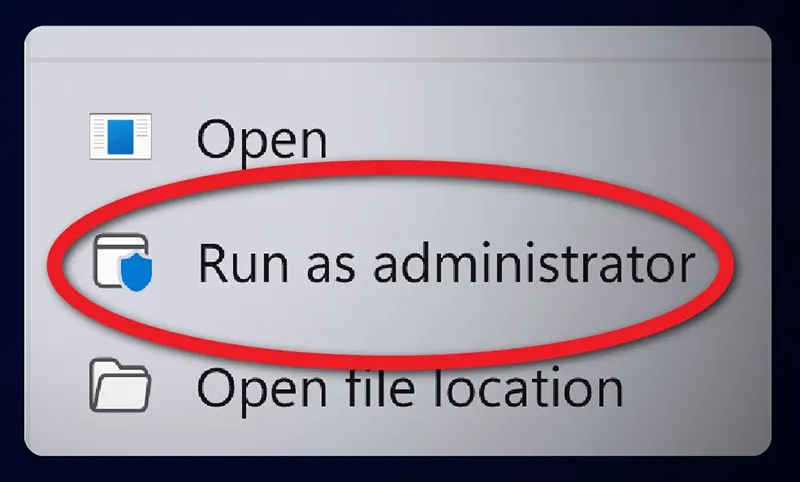
This method fixes the issue most of the time. You need to run the SADP as an administrator to get full control of the app. It’s not always the case, but for some computers and networks, you need administrator privileges to utilize the SADP software.
We assume that you’ve installed SADP software on your computer (click here for more details), and then it’s completely closed off. On the SADP desktop icon, right-click with your mouse and then select Run as Administrator.
The SADP will open up normally and you should see all the devices found on your local network. Modify any parameters as desired and this time the settings will be applied. If not, continue to the next steps.
Check the cable (and connector)
Sometimes the issue is caused by bad cabling, to be exact the RJ45 connector which may have become damaged, or simply not terminated correctly.
Inspect the connector and find out if anything is out of place, check for damaged pins (or completely missing), worn cable, make sure all TXs and RXs work properly., etc. Don’t forget to check the cable on both ends (the camera and network). For more details check this article.
Additionally, you may use a patch cable (or simply another cable) to test out the issue. Replace the old cable, open up SADP and try again to modify the parameters.
If you’re powering up the camera via PoE, make sure that the camera is getting a proper camera and that the switch supports the PoE function. Usually, these types of switches utilize LED lights that turn green when the device is getting properly powered.
Update SADP
Not exactly an update, but you need to make sure to use the latest version of the SADP software, especially if you’re using the latest Hikvision (logo or OEM) cameras. The new cameras run the latest firmware and if you’re using an older version of SADP, then the device can’t communicate with the software.
You can download the latest SADP from Hikvision’s official website (or from here). Before installing the new one, uninstall the old SADP on your computer and reinstall the new one.
Read carefully the prompts and accept the ones that apply. Then run the (new) SADP as administrator and try to modify the parameters as needed. Most likely it will work this time.
Modify the Subnet
Another thing you can try is to match the camera’s factory subnet which will allow you to modify the network parameters. This method works in certain cases, but it’s worth trying if you’re stuck in the middle.
The camera’s default IP address is 192.0.0.64 and the subnet mask 255.255.255.0, you can modify the computer’s network settings to match those IP formats, and then you can use the SADP to perform additional actions.
Go to the Network Connections of your computer (path Control Panel\Network and Internet\Network Connections), right click on your internet connection from the list, and then hit Properties. Go to the TCP/IPv4 and then modify the parameters (an example is shown below).
Basically, the IP of your computer has to match that of the camera. Save the settings, go back to SADP, and see if the DeviceRejested or TimedOut errors have disappeared.

Note: If you don’t know the IP address of the camera, you may simply reset it quickly, and then the camera will revert to factory default settings.
All Hikvision cameras come with a reset button. Inspect your camera and locate such a button. If you don’t see the outside, open up the stop (in dome-style cameras) and find the reset button on the board (it looks like a round black button on a square platform).
Here’s how you can reset the camera easily:
- Power up the camera via PoE (or adapter)
- Right away press and hold the reset button for at least 20 seconds.
- Release the camera and wait 1-2 minutes.
- Go back to SADP and see if it shows up there.
If the camera hasn’t reset yet, try a few times. The secret is to press the reset button right away once the camera is powered up. If you wait longer, the camera won’t enter the reset mode.
Update the camera’s firmware
Additionally, you need to keep the camera’s firmware updated to the latest version. Sometimes the new SADP is not able to properly communicate with cameras that run on old firmware.
That’s why you need to update the cameras, if that’s not possible, you can try to install an old version of SADP and then check if the communication is established.
Conclusion
When modifying the settings of IP cameras via the SADP tool, you may get these two error messages: Device Rejected or Timed Out. Both indicate that the SADP and the camera cannot communicate properly (even if the camera is detected by the tool).
To fix this issue you can either restart the SADP and run it as administrator, or check the cable. Also, you need to ensure that you’re using the latest version of SADP. Alternatively, you may modify the IP address of your laptop to match that of the camera.
