Many UNV recorders support the spot out feature which may be useful in certain situations. A spot monitor outputs allow you to connect a monitor via BNC connectors and coaxial cable to the DVR to display custom camera views.
These outputs are separate from the HDMI video outputs on the DVR. Basically, you can make the NVR/DVR output a different screen on two monitors. One monitor will show the HDMI/VGA output, the second one will show the one selected on the Spot Out settings.
In this guide, we will show how to set up the spot out function. You can either do the settings via the web browser (using a computer) or via the NVR’s GUI. Below we will show both methods as outlined by the Uniview support team.
How to set up Spot Out on Uniview recorders (NVR/DVR)
UNV Spot Out settings via the web interface
To access the web client, you need to use Internet Explorer as the web browser.
Step 1. Access the recorder’s web interface by typing in the IP address on the address bar of Internet Explorer. The path should look like the following: “http://xxx.xxx.xxx.xxx”
(Note: If the HTTP port has been changed from the default, you will need to add the port number after the ip address by inserting a colon “:” in between the address and port number).

Install all requested web plugins that are prompted by Internet Explorer. Once installed, you may need to refresh or restart the web browser. You may install the plugin by selecting “Run”.
In some instances, you may need to close the web browser to complete the installation. After installation completes, re-open Internet Explorer.

Step 2. After logging in, select the “Setup” option.

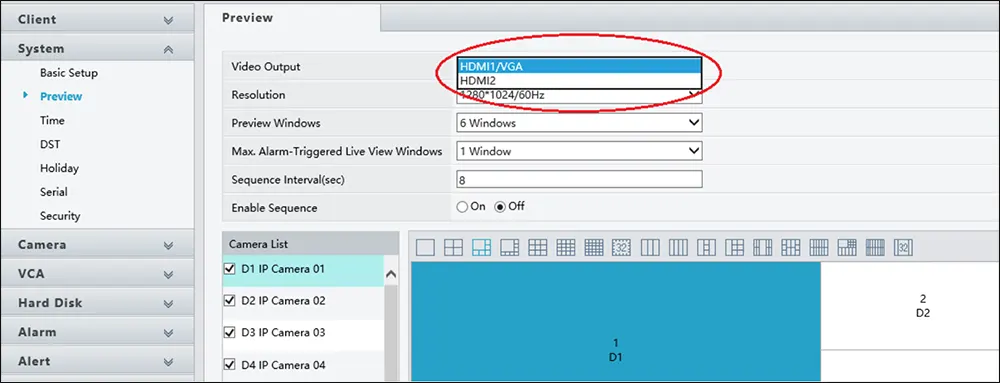
Step 4. After selecting Setup, click on the Preview sub-menu.

Step 5. Under the Preview menu, select the Video Output option. Select the monitor (HDMI2/VGA) that will be the secondary monitor.
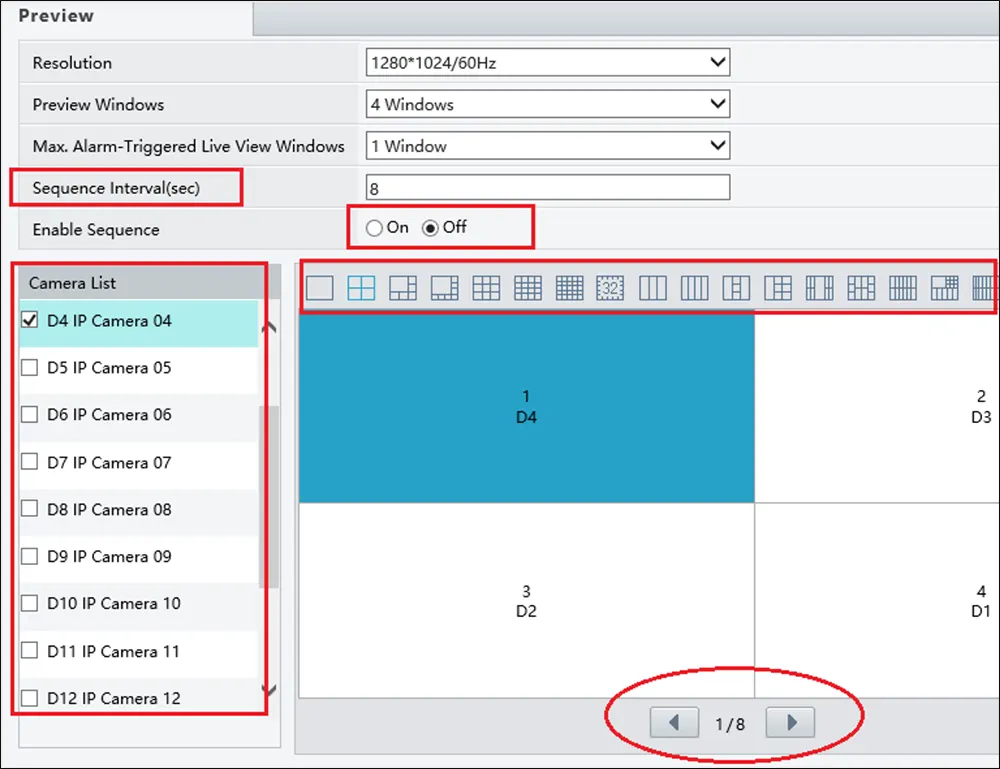
Step 6. After selecting the secondary (spot out) output, configure the channel display as desired. You are able to set multiple channel display types throughout the sequence if desired as well.
UNV Spot Out settings via the NVR GUI
Step 1. Log into the system by entering the username and password. Default credentials are admin for the username and 123456 for the password. If you changed them, you need to use the new credentials.

Step 2. After logging in, move the mouse to the lower left-hand corner of the screen and select the home icon.
You may receive the login screen after selecting the menu option, but will be taken to the main menu page once logged in. On the main menu, select System.

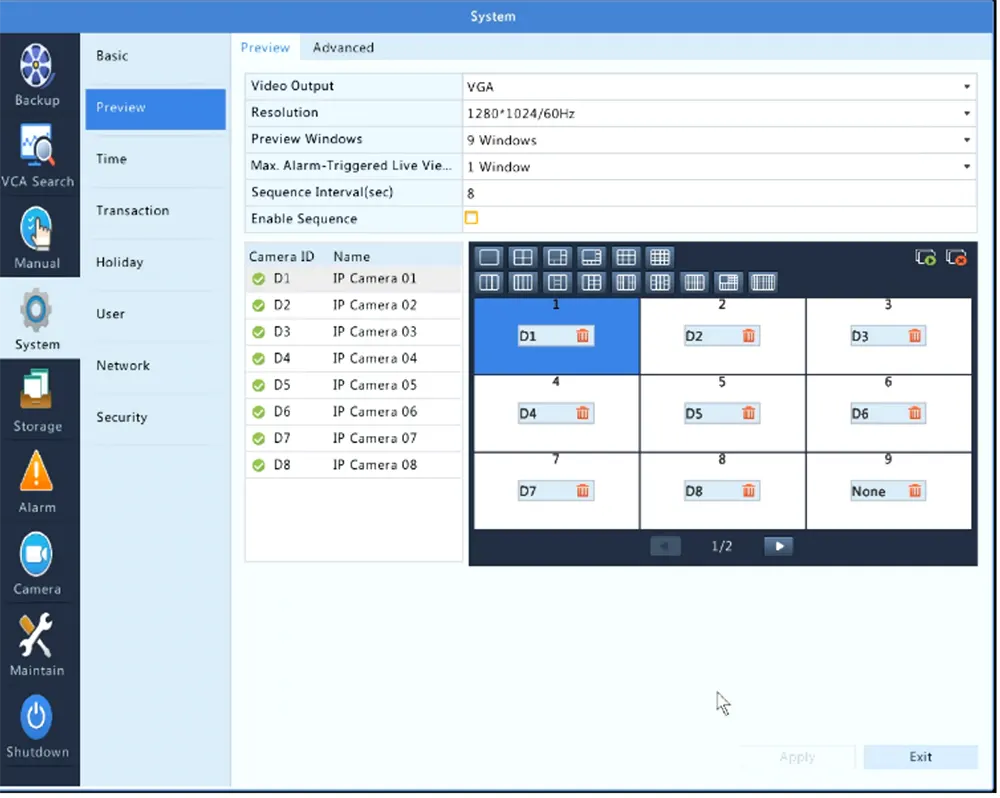
Step 3. After selecting System, select the Preview tab.

Step 4. On the Preview page, there will be an HDMI/VGA option. Either one can be set up for spot monitoring and can have separate views. Mark the selections wanted on the particular output.
Final words
If you need to use the Spot Out feature on the Uniview NVR/DVR, you need to enable the feature and customize it on the settings.
By doing so, you may be able to output the NVR’s screen on two separate monitors using customized views. Keep in mind, that the mouse will work on the monitor connected via the HDMI (the main one).