To adjust the settings of an IP camera connected to Hikvision PoE NVR consists of accessing the said camera directly via the NVR. If it’s a regular NVR and the camera is plugged in an external switch, it’s easy to do it: simply access the camera directly via the web browser and adjust the settings. However, it gets a little bit complicated if the IP cameras are plugged in directly to the back of Hikvision PoE NVR.
The IR LED lights on the IP camera are used for the night vision. The Hikvision NVR system will auto switch the IR on/ off based on the environment lighting: if the environment is too dark to get the clear image by the sensor the system will auto switch it to the night version (black and white image) and if the light is enough for the sensor, It will auto switch back to the color model.
Sometimes though the environment is not too dark the system already switches to IR mode (meaning black and white). If you want to adjust the sensitivity of the camera, you can to the settings on the camera). This guide shows how to access the camera directly (via the Hikvision PoE NVR) and how to adjust the IR LED lights settings.
How to access on IP camera connected to Hikvision PoE NVR
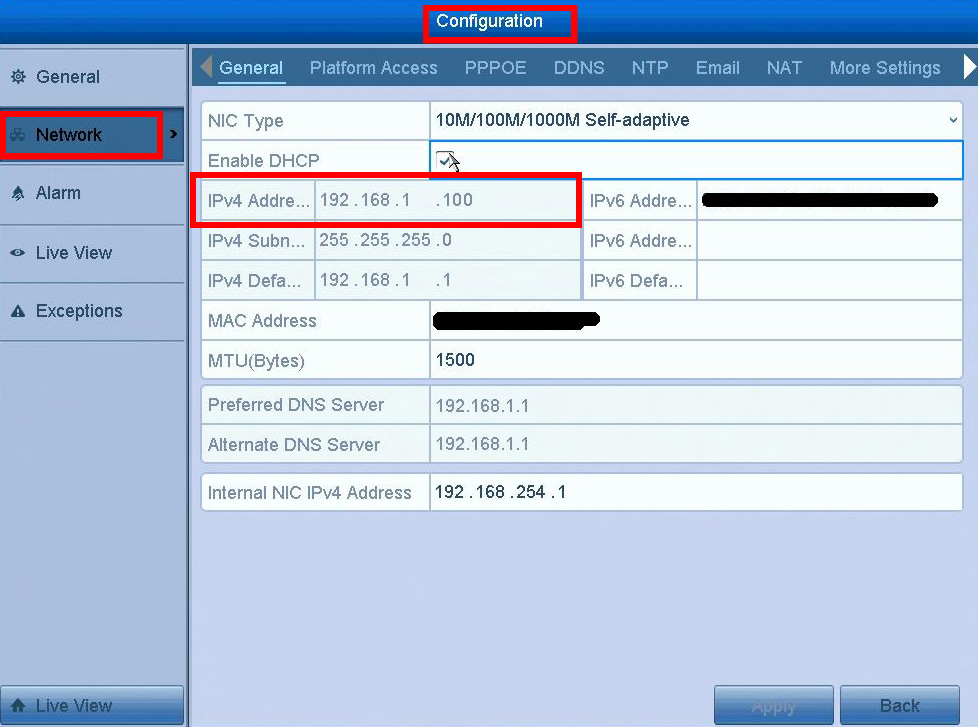
Step 1. Find out the IP address of your NVR. You can either find the IP address directly on the NVR under the Network Settings or you can install the SADP tool and locate it there. In this case, this IP address is 192.168.1.100.
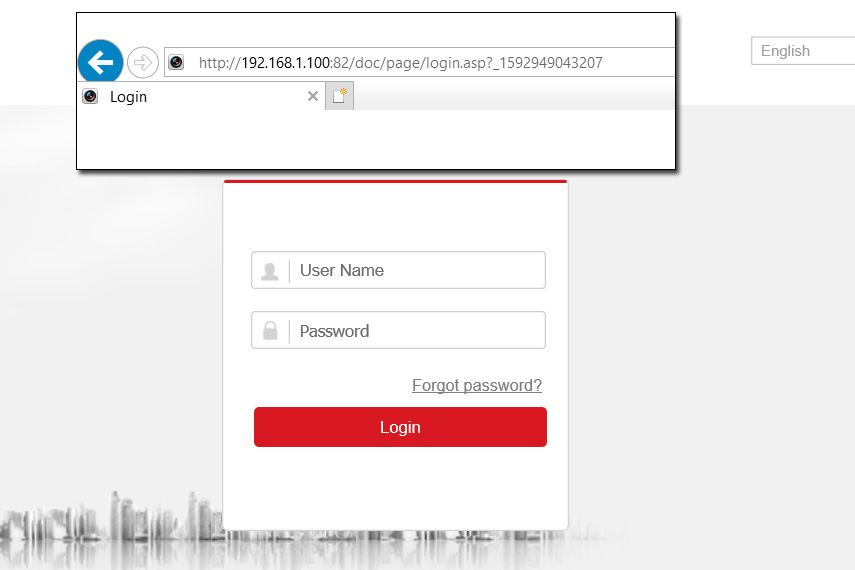
 Step 2. Type the IP address on the web browser (Internet Explorer), login using your username and password.
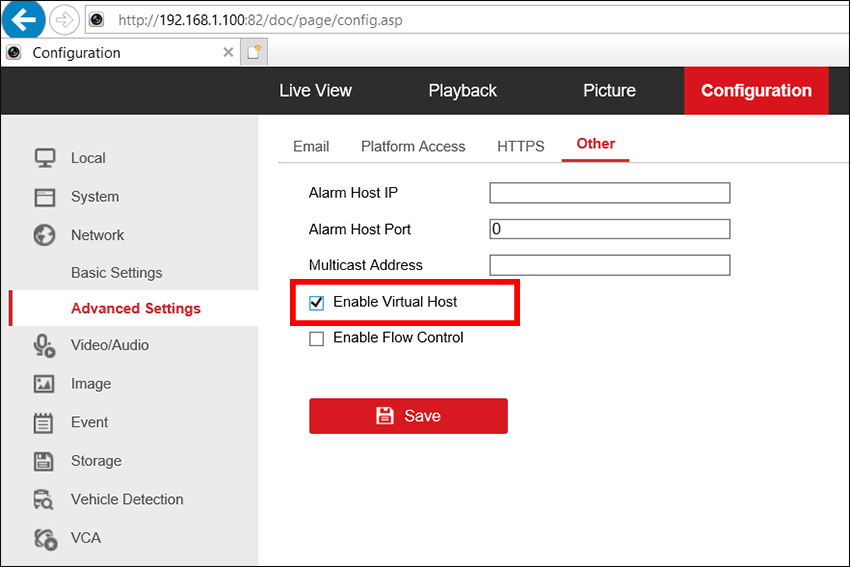
 Then navigate to Configuration > Network > Advanced Settings > and here tick on the “Enable Virtual Host”.
 Step 3. Go to Configuration > System > Camera Management and you can find there is a URL for all the IP cameras connected to the PoE NVR. Click it and you can directly go to the camera setting page.
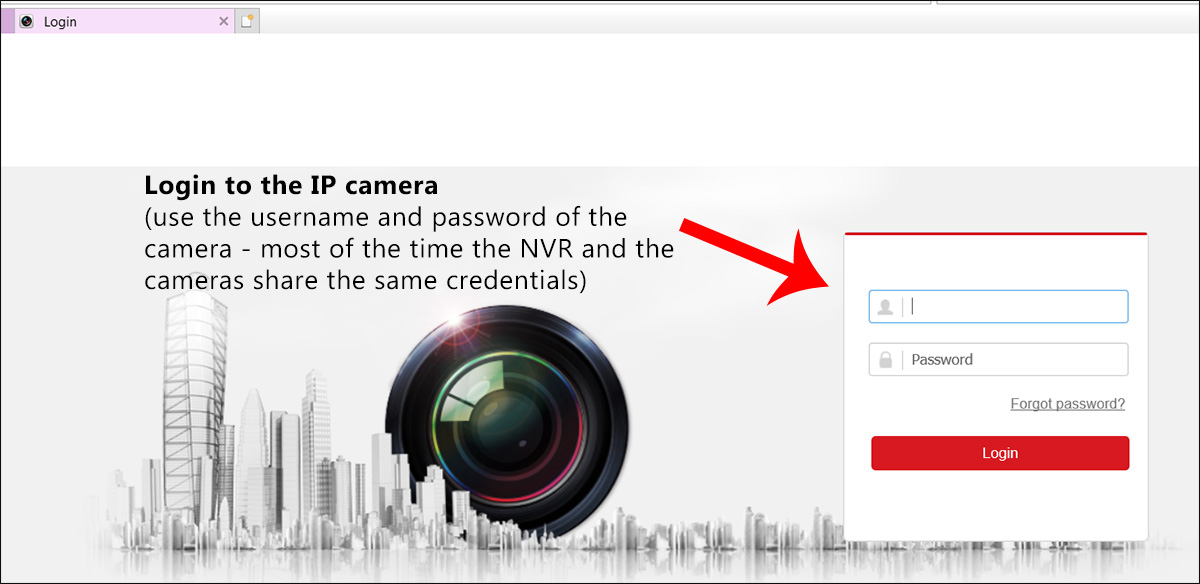
 So, now we are accessing the IP directly through the Hikvision PoE NVR. Note: you have to use the username and the password of the camera, most of the time the PoE NVR and the IP cameras share the same credentials.
 Step 4. Go to the camera’s setting page. Click Configuration > Image > Day/Night Switch.
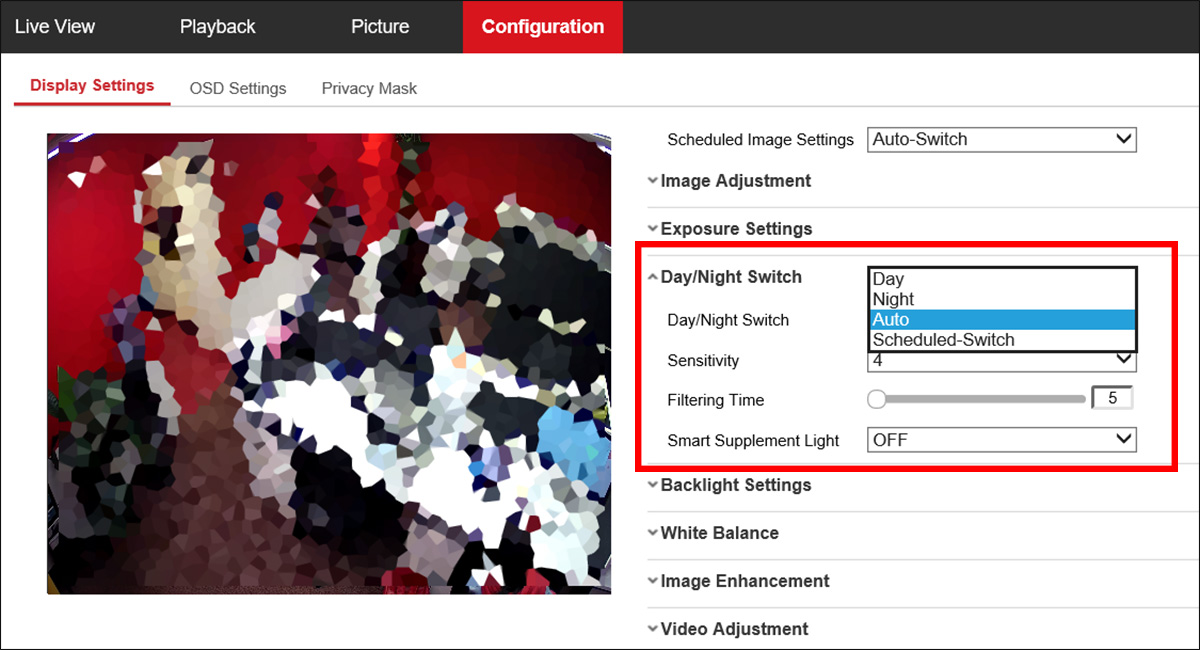 Here you can select various modes of the Day/Night switch.
- Auto: auto-switches the IR LED lights based on the environment light.
- Day: Keeps in the color mode no matter of the lighting.
- Night: Keeps the camera black and white (this IR LED lights are always on)
- Scheduled-switch: You can set up the time for the mode switch. For example, setting up the exact time frames when the IR LED lights turn on (or off)
Also you can play with the sensitivity, the higher it’s set, the more sensitive the sensor against the lighting of the area under surveillance.
Smart Supplement Light gives users an option to turn ON/OFF the supplement light. Set the supplement light to ON, and Auto and Manual are selectable for light mode. Select AUTO, and the supplement light changes according to the actual luminescence.
For example, if the current scene is bright enough, then the supplement light adjusts itself to lower power; and if the scene is not bright enough, the light adjusts itself to higher power. Select Manual, and you can adjust the supplement by adjusting the distance. Let’s say the object is near the camera, the device adjusts the supplement light to lower power, and the light is in higher power if the object is far away.
