In this guide, we will show how to set up the Recording Schedule on a Hikvision NVR or DVR using both the local interface and via the web browser. You can set the NVR to record continuously (24/7), on motion detection, on Event or Alarm.
Note that you need to have a surveillance hard drive installed in order for the machine to record footage. These settings can be applied across all the Hikvision CCTV systems.
Setting up Recording Schedule from the NVR interface
Step 1. Log into your NVR using your username and password. Go to Main Menu > Record > Schedule.
Step 2. Select the camera (channel) you would like to configure and be sure to enable the recording schedule (tick “Enable Schedule“).

In this section, you can configure your recording schedule to your specific needs. Keep in mind:
- You can configure each particular channel as well as each particular day of the week for your recording schedule.
- You may also adjust your recording schedule to record on Continuous or Event. You can choose to use them at separate times throughout your recording schedule
Continuous is full-time recording.
Event/Motion is Motion Detection recording.
Select a recording option and drag it over the time frame that you would like to record using that option.
 After you have finished configuring your schedule, click “Apply” to save the settings.
Setting up Recording Schedule from the Web interface
By default, your Hikvision NVR will come out of the box set to record continuously seven days a week, 24 hours a day, so all the time. You also have the ability to customize your recording schedule. You can set it to record motion only, or not record on certain days, or hours of the day.
There are a lot of options to adjust the settings according to your specific needs. Follow the steps below if you’d like to customize your recording schedule.
Step 1. To begin, log into the NVR’s IP address via the web browser with your username and password. If you don’t know the IP address to your NVR you can find it using the SADP tool or by checking the IP address directly on your NVR (go to Main Menu > Configuration > Network).
Once you’re logged in, go to the Configuration tab and then click Storage > Schedule Settings.
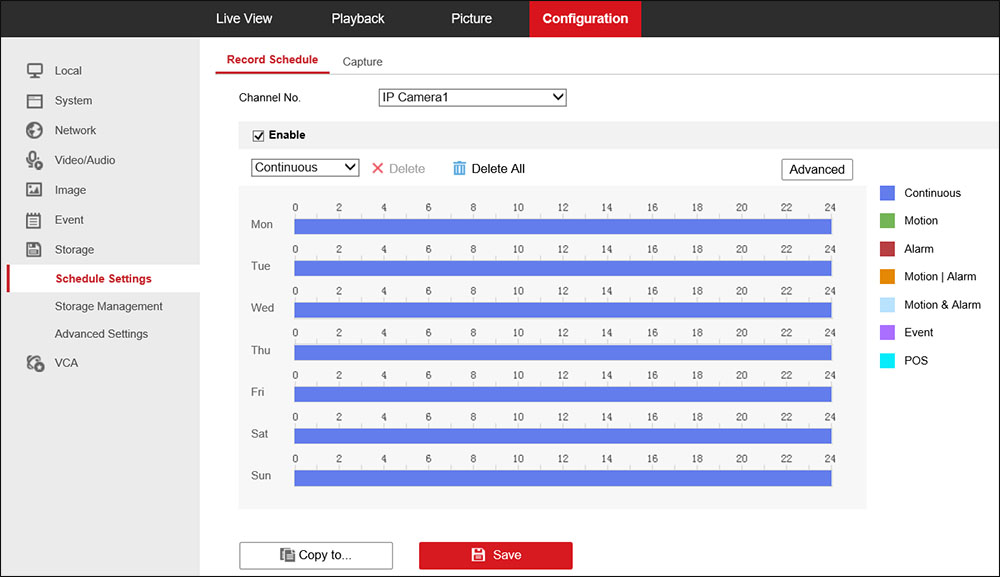
- Blu lines: Continuous recording
- Green: Motion recording only
- No lines: Nothing will be recorded
(Note that the color meaning may vary, check the legend on the right side of your screen).
Step 2. Select the camera that you’d like to configure from the dropdown. Make sure the Schedule is enabled (the Enable checkbox MUST be ticked). Consult this article for more detailed information about Hikvision Motion Settings.

Step 3. By default, the schedule is set to record continuously (all day long, 24/7).
 In the example below, this NVR is at a business where the owner isn’t concerned about having any recordings during normal working business hours between 10am and 8pm. Nothing will be recorded during these hours. This will save some space on his hard drive.

In the next example, the business owner doesn’t want continuous recording during business hours, but only wants to record motion.
Whenever the camera detects any motion during business hours in Green, only motion will activate the recording. It records continuously during all other hours of the day.
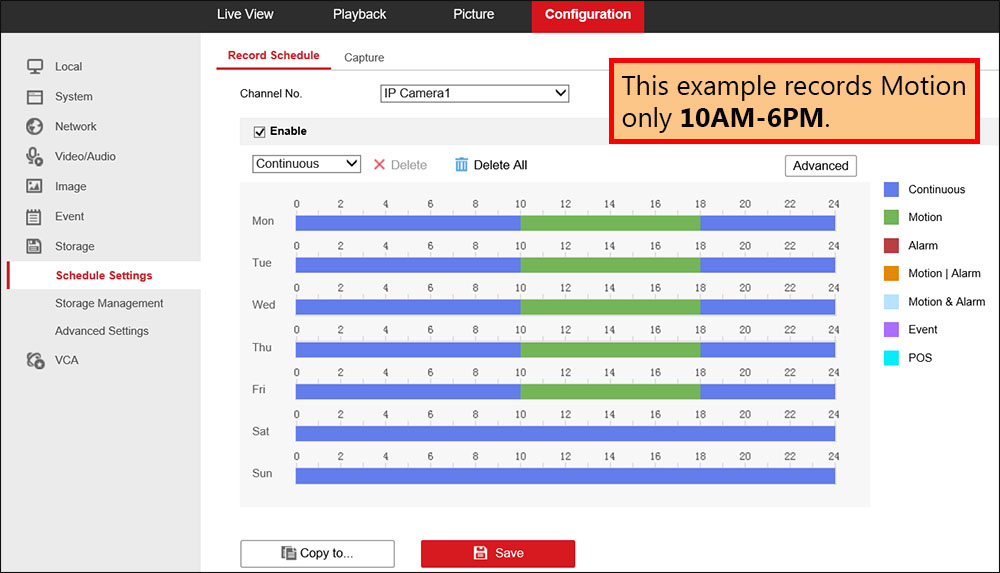 This example shows when the NVR records motion only (set for the 7 days of the week).

Advanced recording features on Hikvision NVR
For Advanced recording features, click the Advanced button.
 Below are the Advanced menu options.
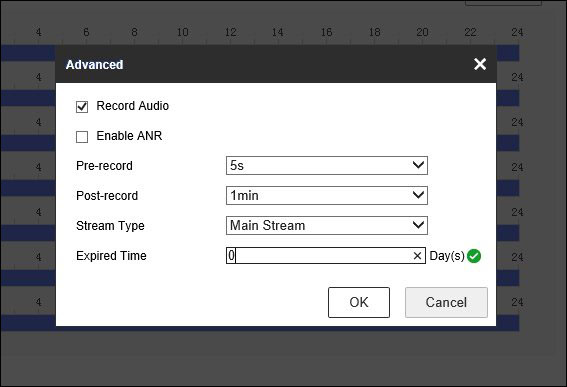
Record Audio: Tick the box if you wish to record both audio and video. Your camera must have an included microphone or a microphone attached.
Enable ANR: Enable the ANR function to save the recording files in the IP camera when the network is disconnected, and synchronize the files to the NVR when the network is resumed. This feature requires a camera with an SD card slot, and an SD card installed separately.
Pre-record: The time you set to record before the scheduled time or event. For example, when an alarm triggered the recording at 11:00, if you set the pre-record time as 5 seconds (5s) the camera begins its recording at 10:59:55.
Post-record: The time you set to record after the event or the scheduled time. For example, when an alarm is triggered the recording ends at 11:15, if you set the post-record time as 1 minute (1min), it will record until 11:16.
- Stream Type: Select the stream type of recording. Main Stream and Sub Stream are selectable. Most users will select Main Stream for the highest quality recording.
- Expired Time: The expired time is the longest time for a record file to be kept on the Hard Drive. If the deadline is reached, the file will be deleted. You can set the expired time to 0, and then the file will be kept indefinitely and not be deleted. We recommend leaving this at the default of 0 as to not lose any recordings.
For simplicity, you can copy your newly created schedule to any other cameras connected to your NVR. This will save time.
 Anytime you do any settings, don’t forget to click Save in order to apply the settings.
