Sometimes the Hikvision NVR (or camera) date and time may be incorrect. Having a correct timestamp on your camera’s recordings is very important for your CCTV security system. If something happens, you’ll need the exact and correct time of the incident. Imagine the cameras having the wrong date or time, it’d be a nightmare. A correct allows you to pinpoint exactly when an event occurred, as well as corroborate this with anything else that might have happened nearby.
It’s crucial to have your time settings configured and synchronized as accurately as possible with the actual time and any other devices, such as other cameras, NVRs, DVRs. In order to avoid an incorrect timestamp, Hikvision devices use NTP (Network Time Protocol) as well as DST (Daylight Saving Time) to adjust the device’s time.
Configure the time settings for a Hikvision NVR (or DVR)
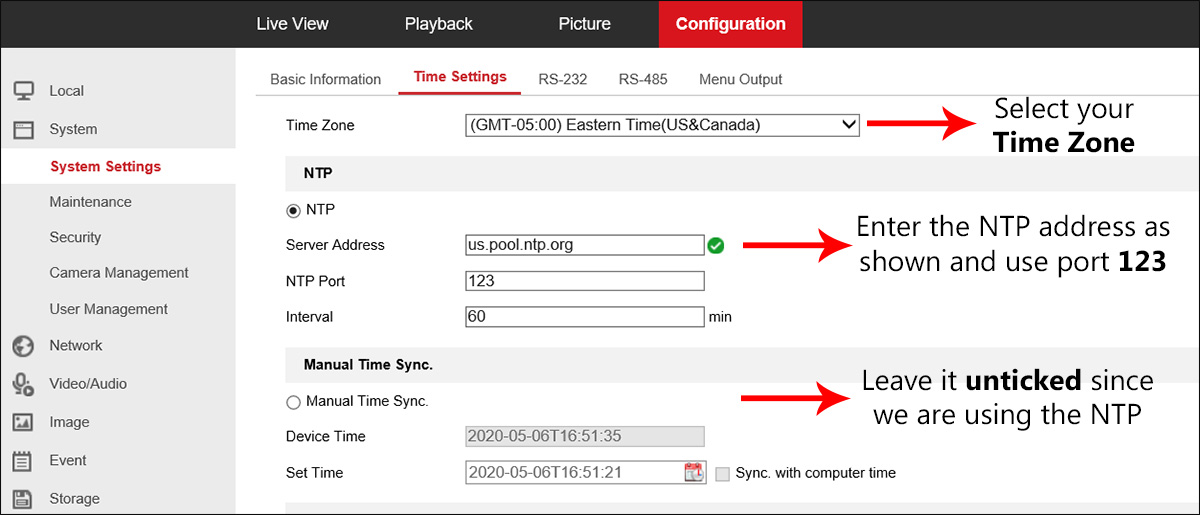
To have the right timestamp, you need to find the address of a reputable NTP server. We recommend using pool.ntp.org as they provide a large number of reliable connected servers from multiple countries to synchronicity with (world wide ). You can find a full list of countries on their website. In this guide we will use us.pool.ntp.org as we are located in North America.
Access your NVR via a web browser and navigate to Configuration > System > System Settings > Time Settings tab. Fill in the required fields with the details you’ll be using and hit save. Don’t forget to test your NTP server. The device should either immediately refresh its time, or will refresh itself at the next interval which you just set.
 Now, the NVR’s time is set properly but you need to make sure it’s actually visible on both the live stream and the recordings the camera takes. Navigate to Configuration > Image and then OSD Settings tab.
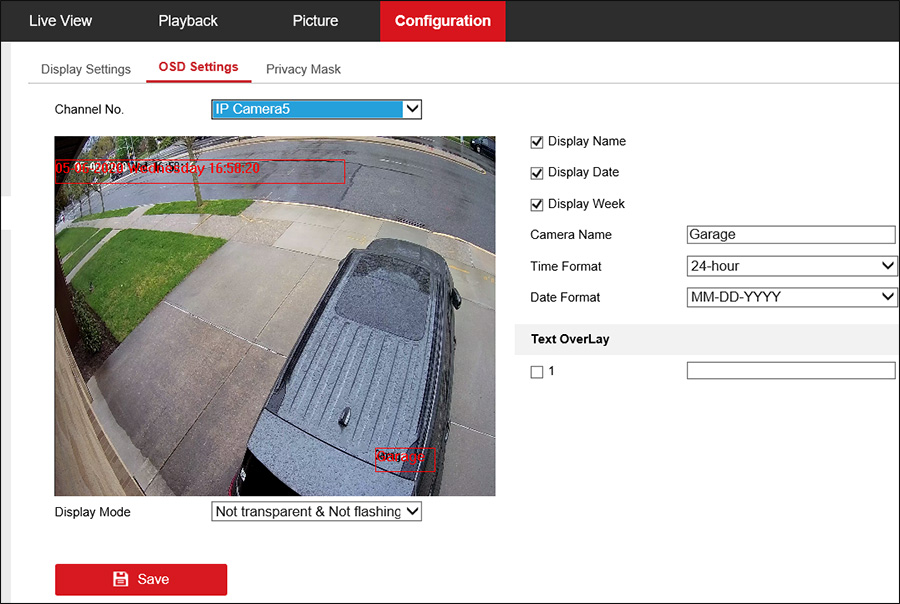 Configure the display to your own requirements and make sure that Display Date is ticked at least. Click save and check out the Live View feed to ensure that the timestamp is correct. That’s all you’re done. The NVR will automatically synchronize the timestamp and you’ll always have the right time and date in your CCTV footage.
Note: The NVRs own time settings will take precedence over those of the camera and any recordings made will use the NVRs timestamp so ensure it is correctly set.
Configure the time settings for a Hikvision camera
The steps for configuring the time settings on an Hikvision IP camera are identical to the above. Again, it is strongly recommended that you use the same NTP server as you did with the NVR. \
Access the IP camera via a web browser and navigate to Configuration > Advanced Configuration > System > Time Settings tab. From here simply fill in the time settings as you did with the NVR (shown on the screenshot in the previous section).
Configure DST (Daylight Saving Time)
The DST function allows you to configure your Hikvision DVR/NVR to automatically adjust its time for Daylight Savings in your time zone. It’s very important to have the correct DST settings otherwise when the time changes you’ll have the wrong timestamp in your recordings. The settings are shown below. For more details about DST settings, consult this article.
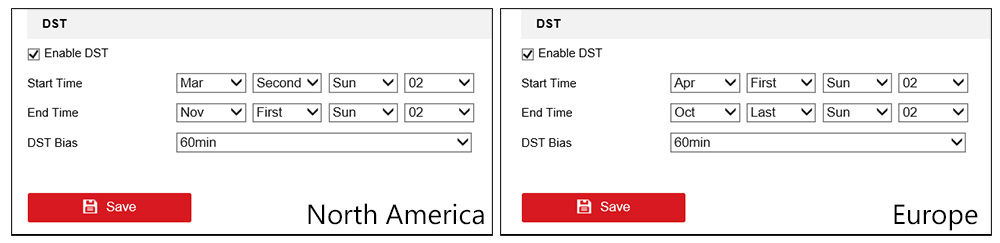 Now, your NVR or camera will automatically adjust their time when DST kicks in (if their NTP server doesn’t do so).
